Dashboards are customizable views where you can pin key metrics from different sections for a unified overview. You can set a dashboard as your default, so it opens automatically when you log in.
Navigate to Data and Insights > Dashboards to access this feature.
To create a new dashboard, follow these steps:
Click the Plus ➕ icon on the top of the Dashboards page.
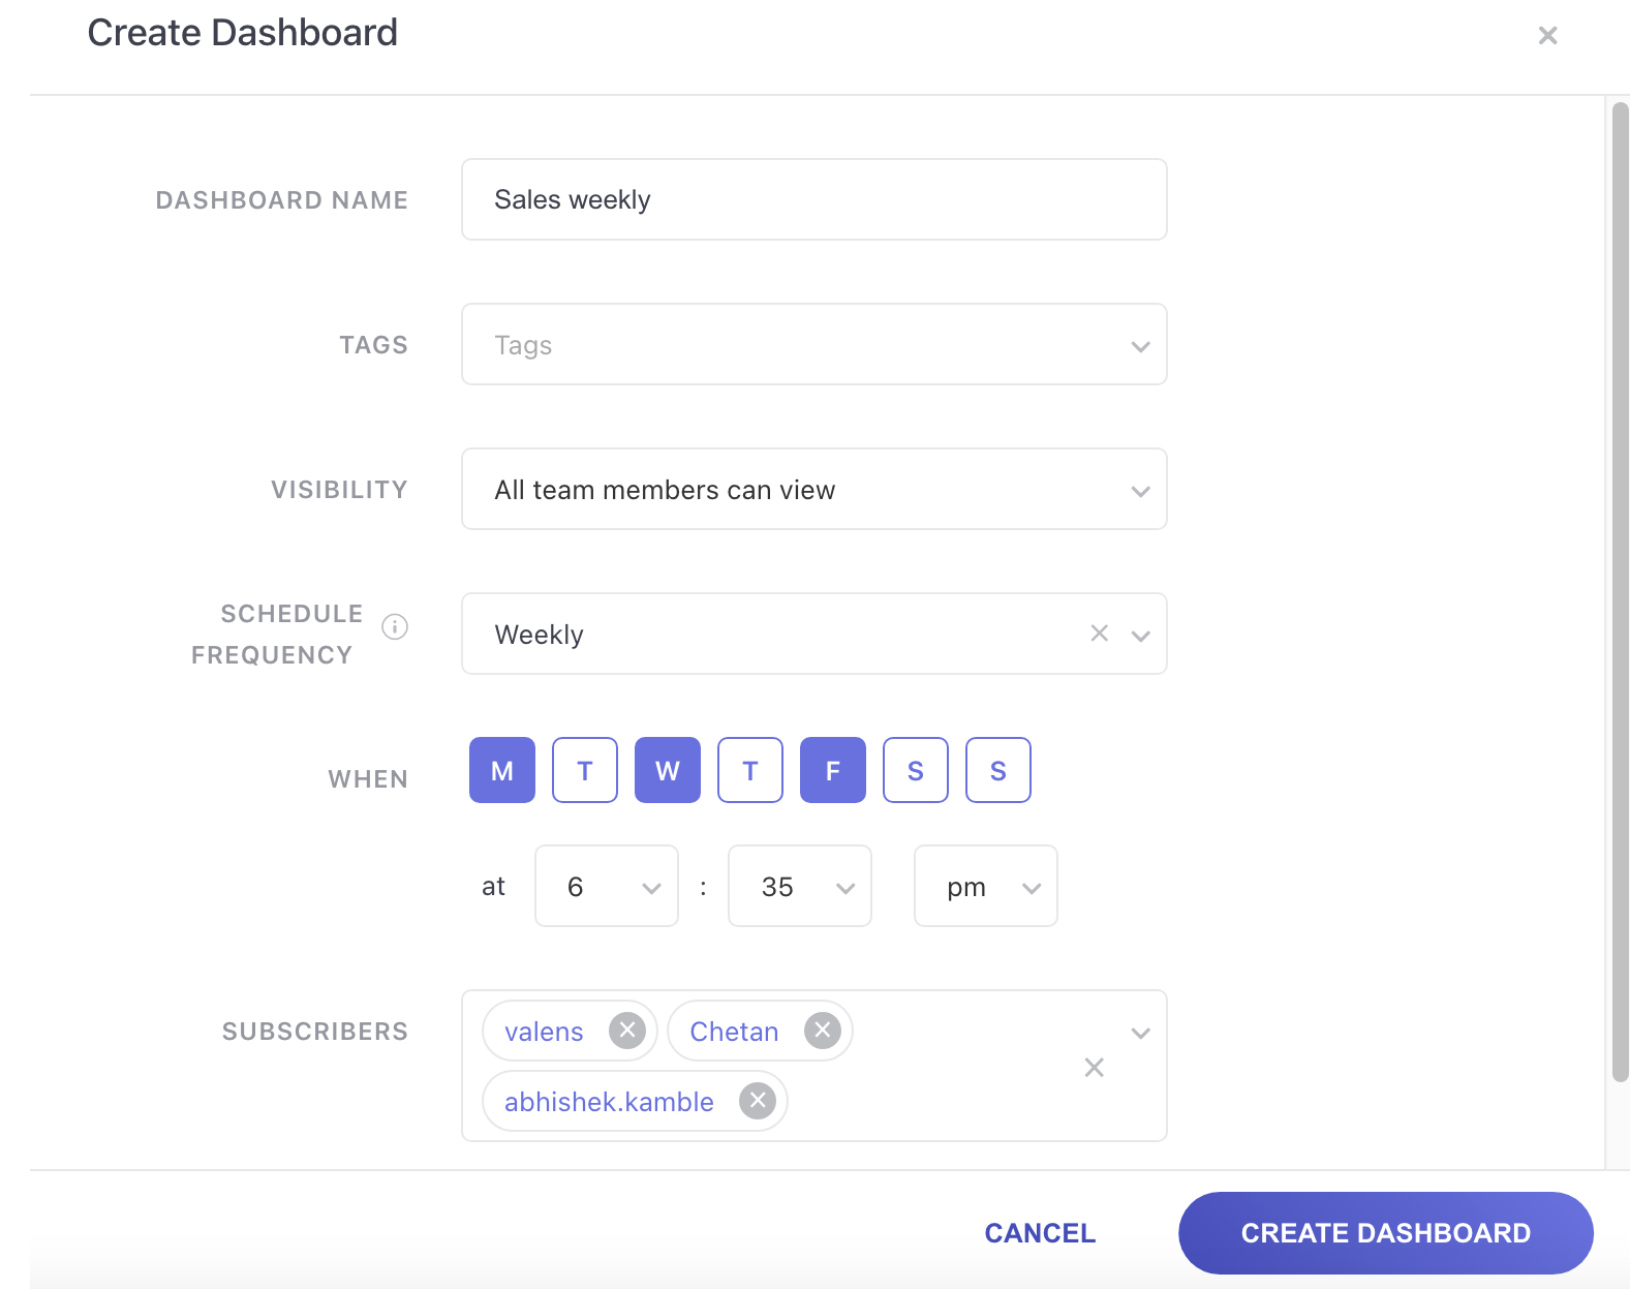
In the pop-up, fill in the required information:
Dashboard Name: A descriptive name to help you remember its purpose.
Tags: Use tags to organize and quickly find your dashboard.
Visibility: Choose who can view or edit the dashboard.
Just Me: Only you can access the dashboard.
Specific Team Member: Select team members with either Edit or View permissions.
All team members can view/edit: Provides access to everyone in the project.
Admin visibility: Admins have full access to view, edit, and delete.
Set Schedule Frequency: Schedule email notifications for subscribers. Choose from Daily, Weekly, or Every X Days and set the time.
Subscribers: Add specific team members to receive email notifications. This option appears after you set a frequency.
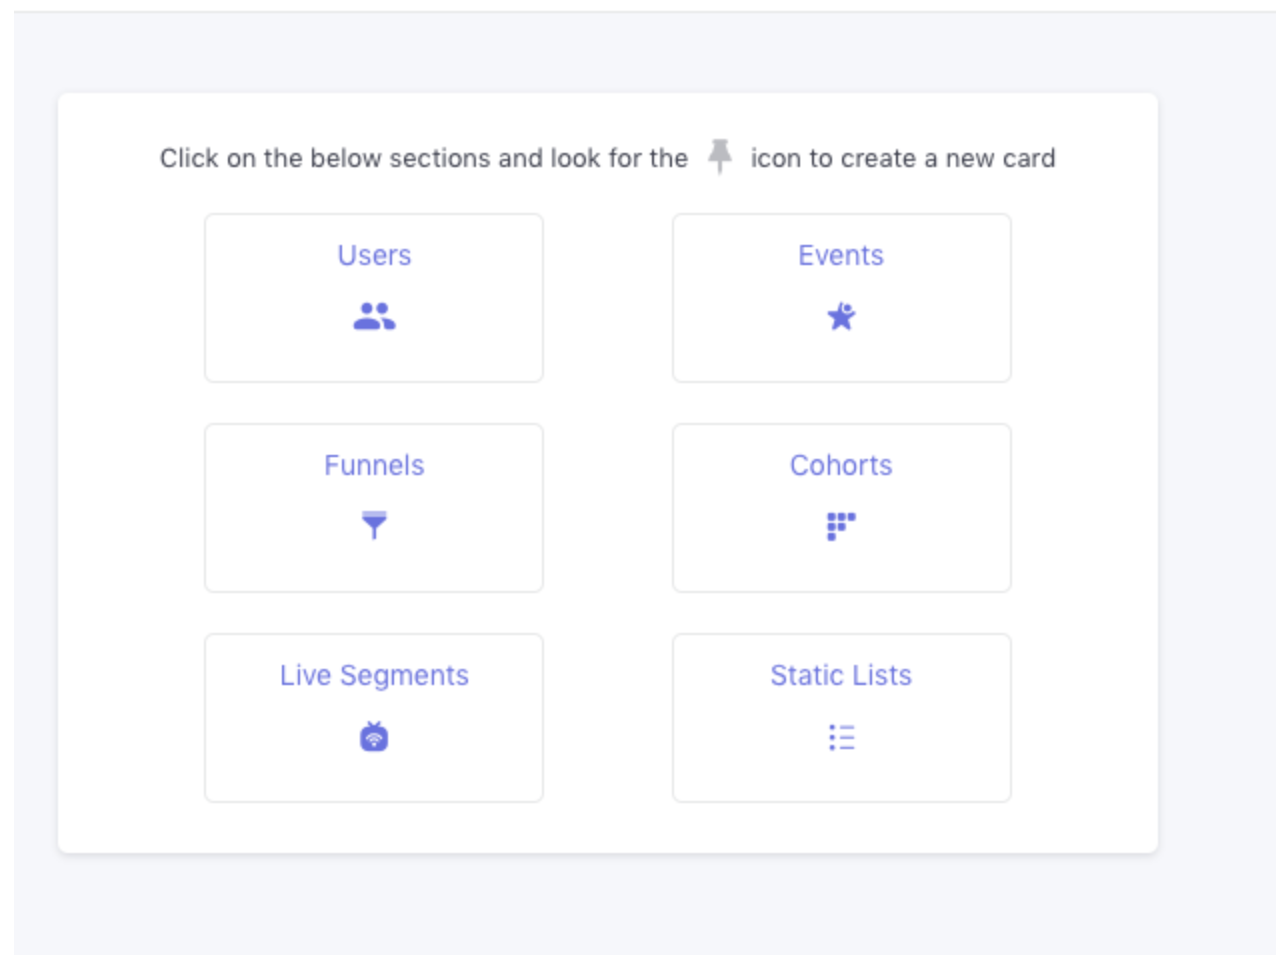
Cards are individual analytics widgets pinned to a dashboard.
Go to the specific section or analytic you want to add.
Click the Pin icon.
Enter a Card Name and select the destination dashboard. You can also create a new one at this step.
Click Pin to Dashboard.
Note: You can have up to 20 cards per dashboard by default. Contact your Customer Success Manager to increase this limit.
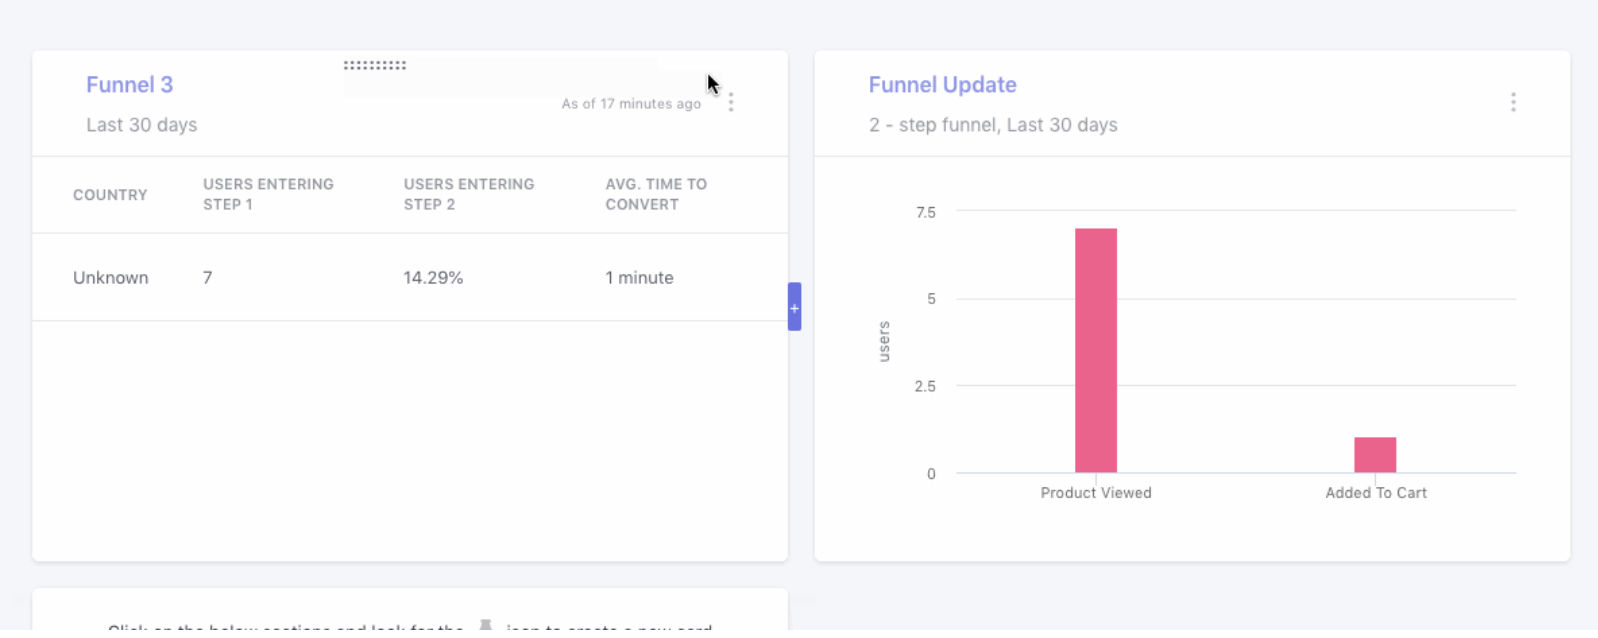
Once a dashboard is created, you have several options to manage its content and settings.
Card Actions To manage a card, you need Edit permission for the dashboard.
Rename: Change the card's name.
Resize: Adjust the size of the card.
Drag and Drop: Rearrange cards on the dashboard.
Delete: Remove a card from the dashboard.
Dashboard Actions These actions are available from the top panel and require Edit permission.
Edit: Modify the dashboard's name, tags, or visibility.
Delete: Permanently remove the dashboard.
Duplicate: Create a copy of the dashboard in the same project.
Tag: Add or modify tags.
Screenshot: Save the dashboard as a .JPEG file.
The dashboard list gives you a quick overview of all dashboards you have access to.
Dashboard Name: Click the name to open the dashboard.
Cards: Shows the number of cards pinned to the dashboard.
Last Updated: The time when the dashboard was last modified.
Tags: Lists associated tags.
Actions: Access the Edit, Delete, Duplicate, or Tag options from the overflow menu.
Note: You can create up to 10 dashboards per account.
The Users section in WebEngage provides a comprehensive view of your audience. It helps you understand user behavior, gain insights into your audience demographics, and access details for individual users.
This section is divided into three key areas:
Overview
Analyze
List of Users
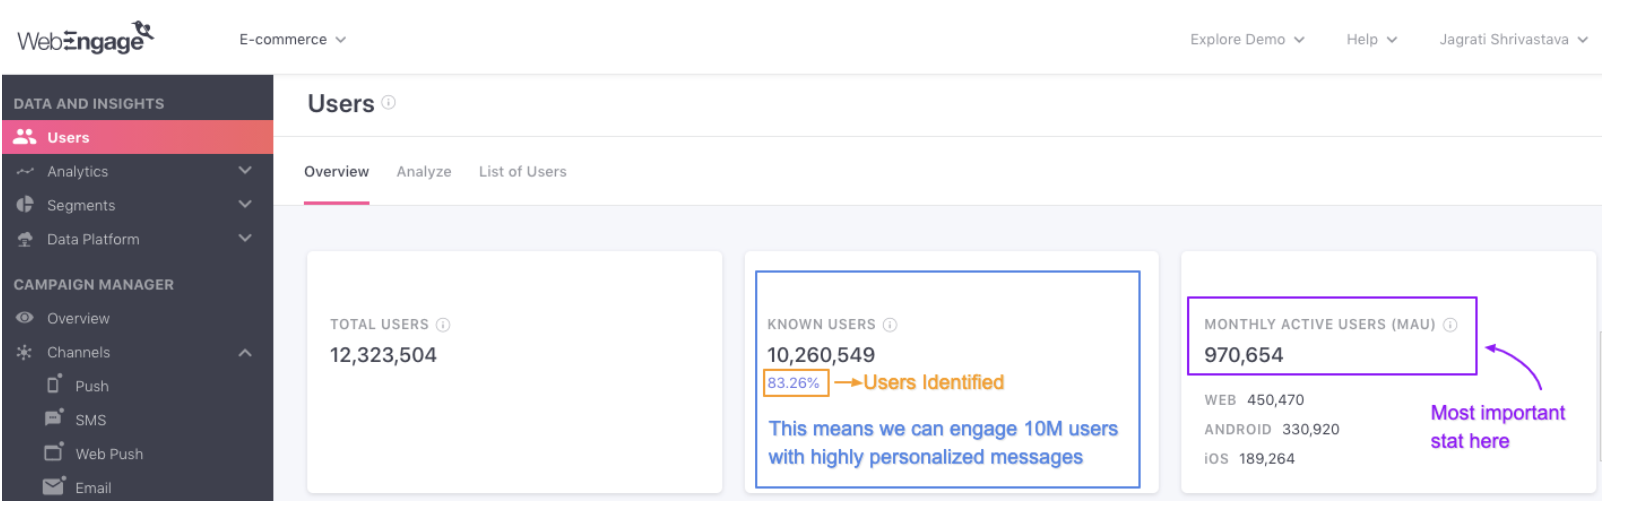
The Overview section gives you a high-level snapshot of your user base with key metrics.
User Totals: View the Total Users (known and anonymous), Known Users (identified), and Monthly Active Users (MAU).
Activity: Track user engagement by viewing Daily Active Users (DAU), Weekly Active Users (WAU), and Monthly Active Users (MAU) over a selected date range.
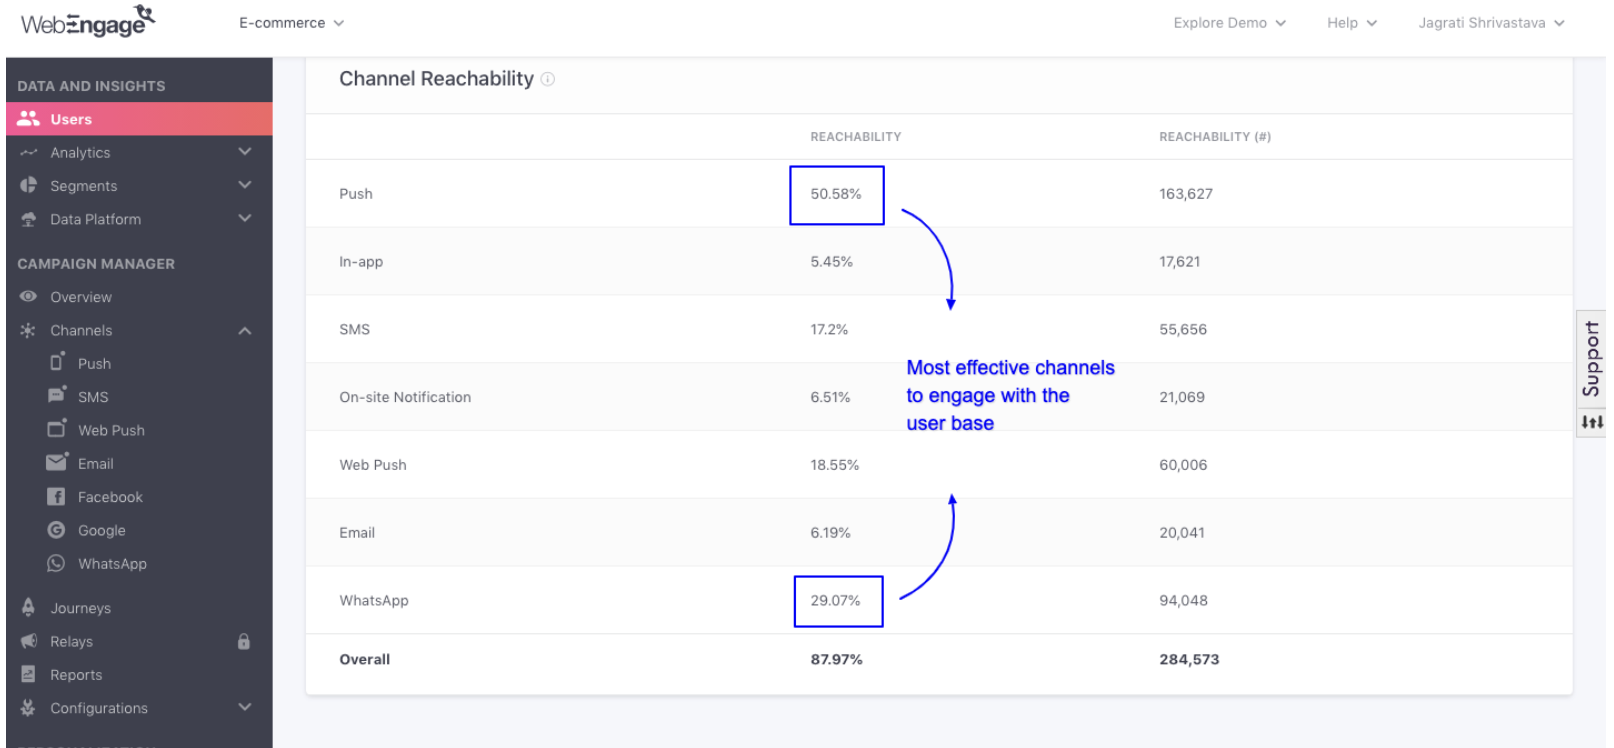
Channels: See the reachability of your users across different channels like Push, In-app, SMS, and Email.
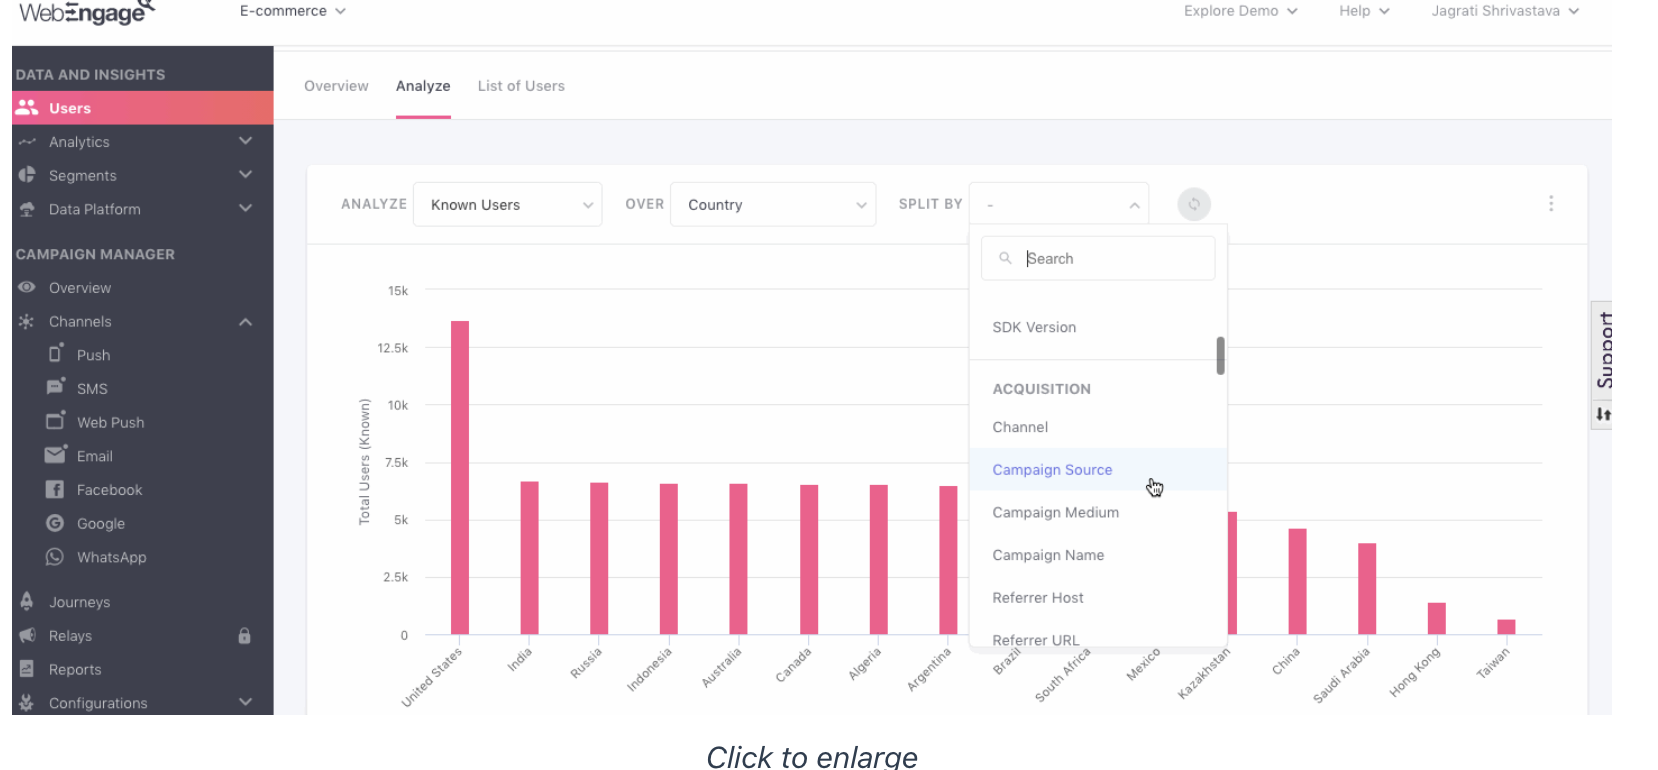
The Analyze section lets you segment your user data to gain actionable insights.
Select User Type: Choose to analyze All Users, Known Users, or Unknown Users.
Select Dimensions: Use the Over and Split By dropdowns to filter users by up to two parameters, such as Location, Technology, or Acquisition source.
Choose Visualization: View your data in a Bar Graph, Line Graph, or Table.
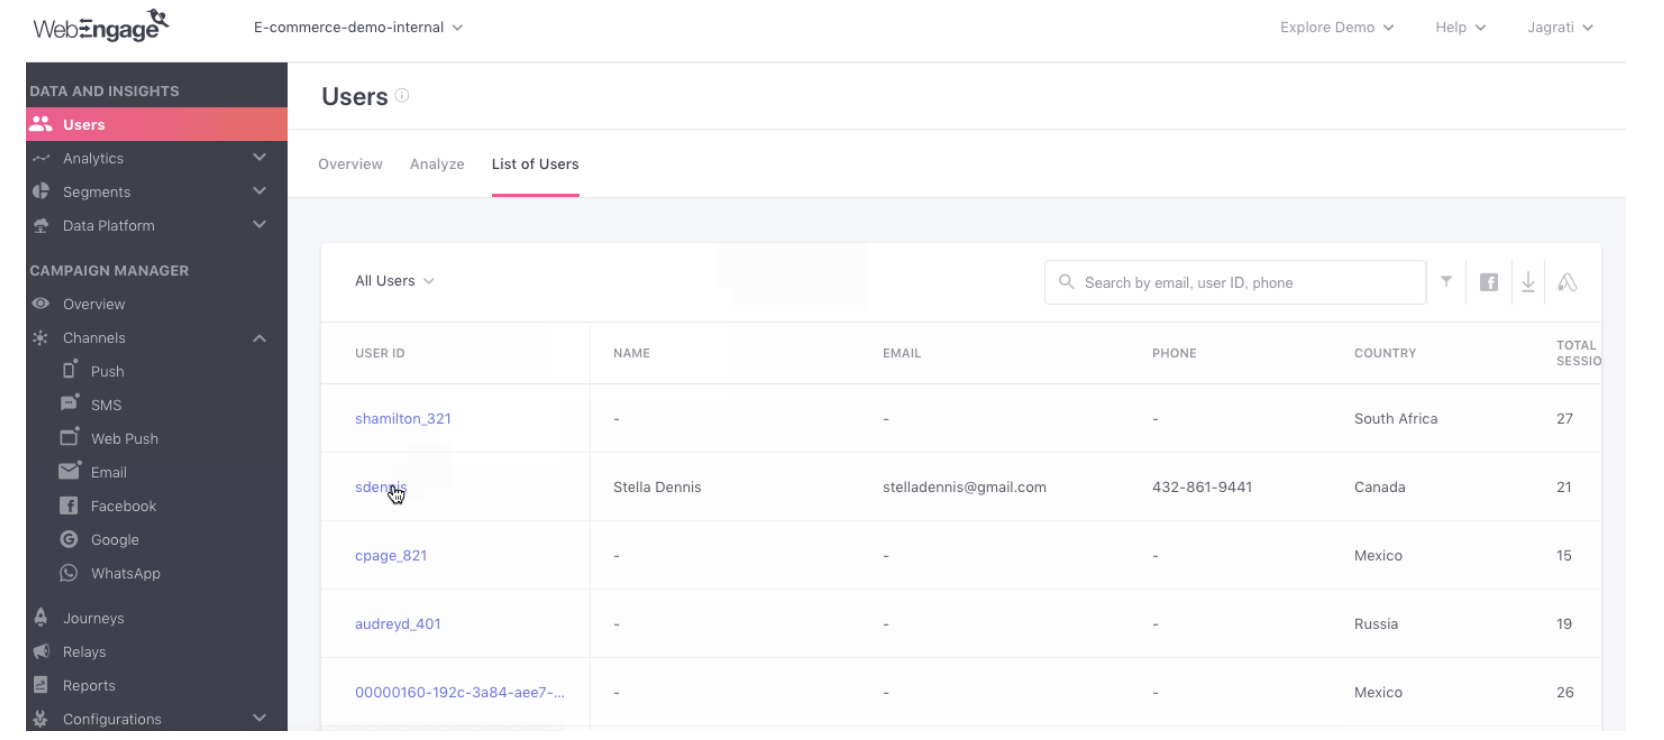
This section provides an in-depth view of all users who have interacted with your platform. It's useful for digging into individual user details or downloading a user list.
Search for a User: Use the search bar to find a specific user by their phone number, email address, or customer ID.
Customize the List:
Filter by User Type: Filter the list by All, Known, or Unknown Users.
Add/Remove Columns: Use the filter icon next to the search bar to add or remove attribute columns from the table view.
Download User List: Click the Download icon to export the user data. A download link will be sent to your registered email address.
Access User Profiles: Click a hyperlinked User ID to view the user's detailed profile.This section is divided into three key areas:
The User Profile in WebEngage provides a detailed view of a single user, including their behavioral history and preferences. You can access a user profile by clicking on their User ID from a variety of lists in your dashboard, such as List of Users or campaign reports.
A user profile is divided into the following sections:
Basic Information
Attributes
Devices
Channels
Events
This section contains a user's core details, including their contact information, activity history, and acquisition source.
Contact: View and edit the user’s name, email, and phone number.
Location: The user's location, automatically derived from their IP address or device's operating system (if permission is granted).
Activity:
Created On: Date the user was first created.
Last Seen: Date the user was last active on your app/website.
Identified: Date the user became a known user.
Total Sessions: The total number of sessions created by the user.
Total Time: The total time a user has spent on your mobile app.
Acquisition: Historical information on how the user was acquired, including details like Channel, Campaign Name, and Referrer URL.
Attributes are data points that provide more information about a user. This section shows all the user attributes tracked for your account, with the specific data for the selected user.
System Attributes: Includes default attributes like Gender, Date of Birth, and Company.
Custom Attributes: Attributes you have custom-defined and passed to your WebEngage account.
This section provides a complete breakdown of all devices a user has used to interact with your platform. A maximum of 10 devices are shown with extensive technical details.
Web: Details about the operating system and browser used.
Android/iOS: Technical details like device model, OS version, app version, and total sessions.
This section gives you a comprehensive overview of a user’s reachability and recent interactions across all six WebEngage channels (Push, In-app, SMS, On-site, Web Push, and Email).
Reachability: A green tick indicates the user is reachable via that channel, while a red cross indicates they are not. These indicators are updated in real-time.
Up next: Learn all about Events and Paths in the next read!