Flows (also called automations or drip campaigns) in Klaviyo let you send personalized, automated messages via email or SMS based on customer actions. This guide covers:
Which flows to set live first
How to build and configure a flow
How to set a flow live
How to review flow performance
A flow is a sequence of automated actions (emails, SMS, updates, splits, or delays) triggered by customer behavior.
Examples:
Welcome series → Triggered when someone subscribes to your newsletter.
Abandoned cart → Triggered when someone leaves items in their cart.
Post-purchase → Triggered after an order.
Flows can include time delays, splits, and filters for deeper personalization.
Complete the Setup Wizard.
Make sure your lists and segments are set up properly.
Klaviyo provides pre-built best-practice flows. The most impactful to launch first are:
Welcome series → Introduce subscribers and encourage first purchase.
Abandoned cart → Recover lost revenue.
Post-purchase → Thank customers, share product info, cross-sell.
Winback → Re-engage inactive customers.
Tip: Keep email and SMS flows separate since subscribers opt in differently.
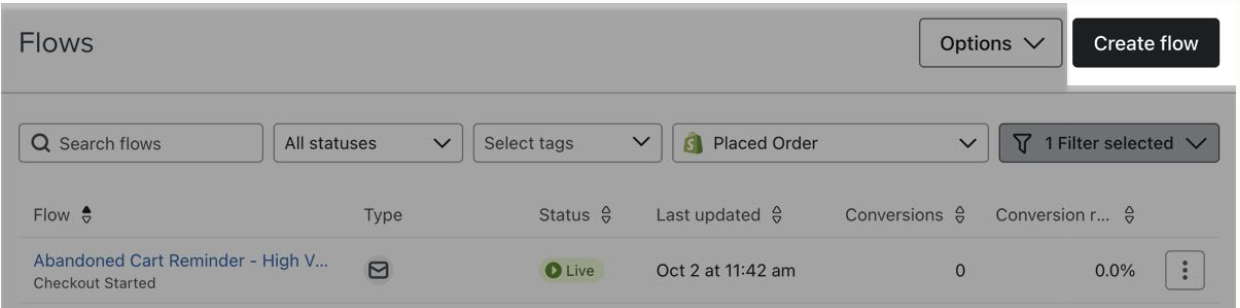
Go to Flows tab → Create Flow.
Browse the Flow Library by goal, channel, or ecommerce integration.
Select a pre-built template or create one from scratch.
Give your flow a clear, descriptive name.
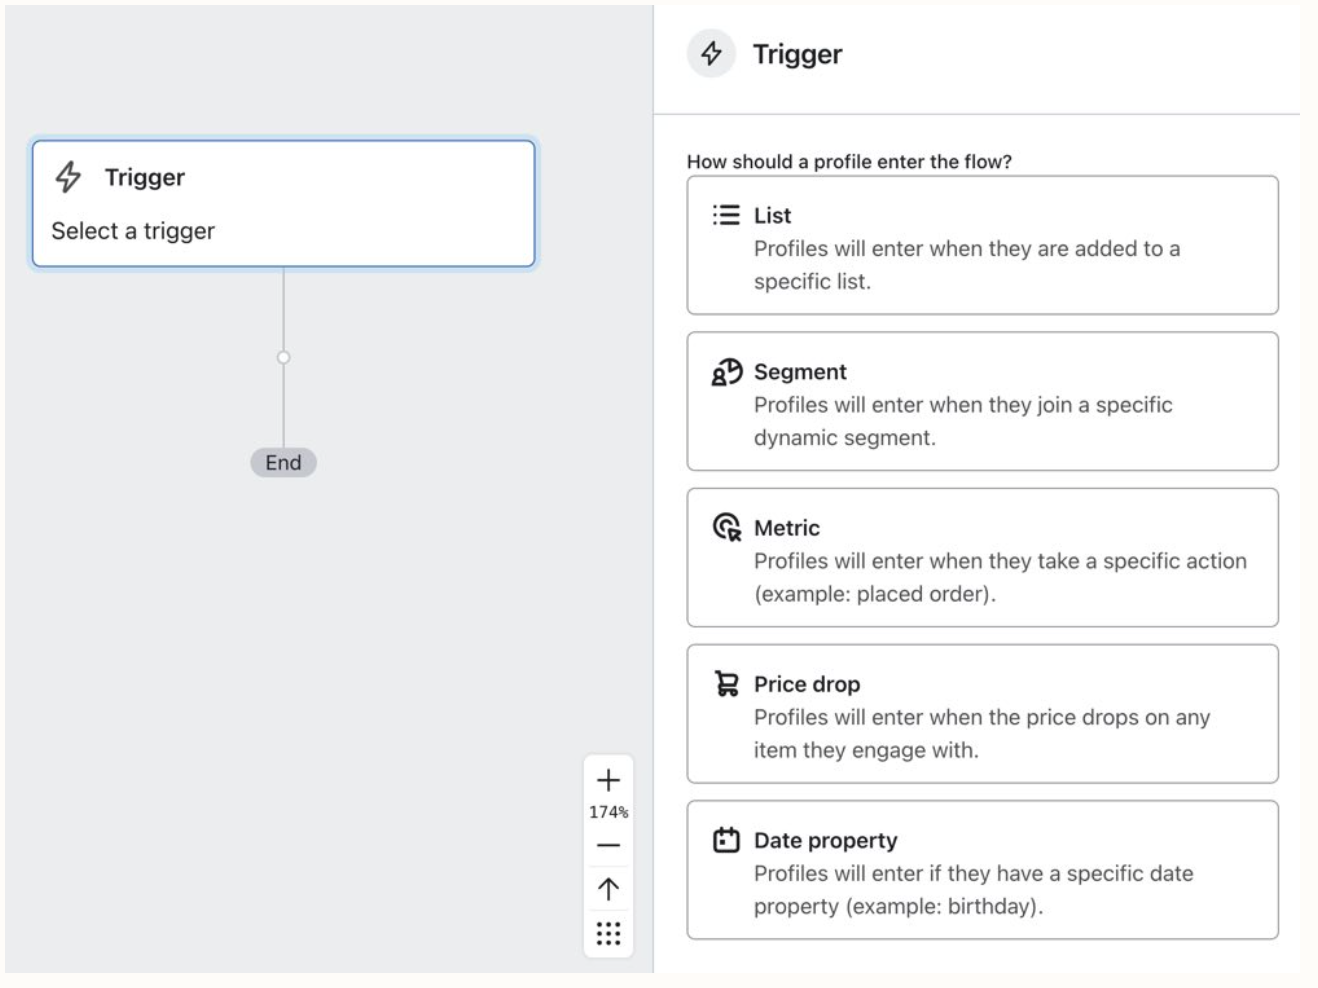
Choose what starts the flow:
List-triggered → Joins a specific list (e.g., welcome series).
Segment-triggered → Added to a segment (e.g., VIPs).
Metric-triggered → Action taken (e.g., placed an order).
Date-triggered → Based on a profile property (e.g., birthday).
Price drop-triggered → An item they viewed decreases in price.
Klaviyo checks trigger and profile filters at entry and again before each message sends.
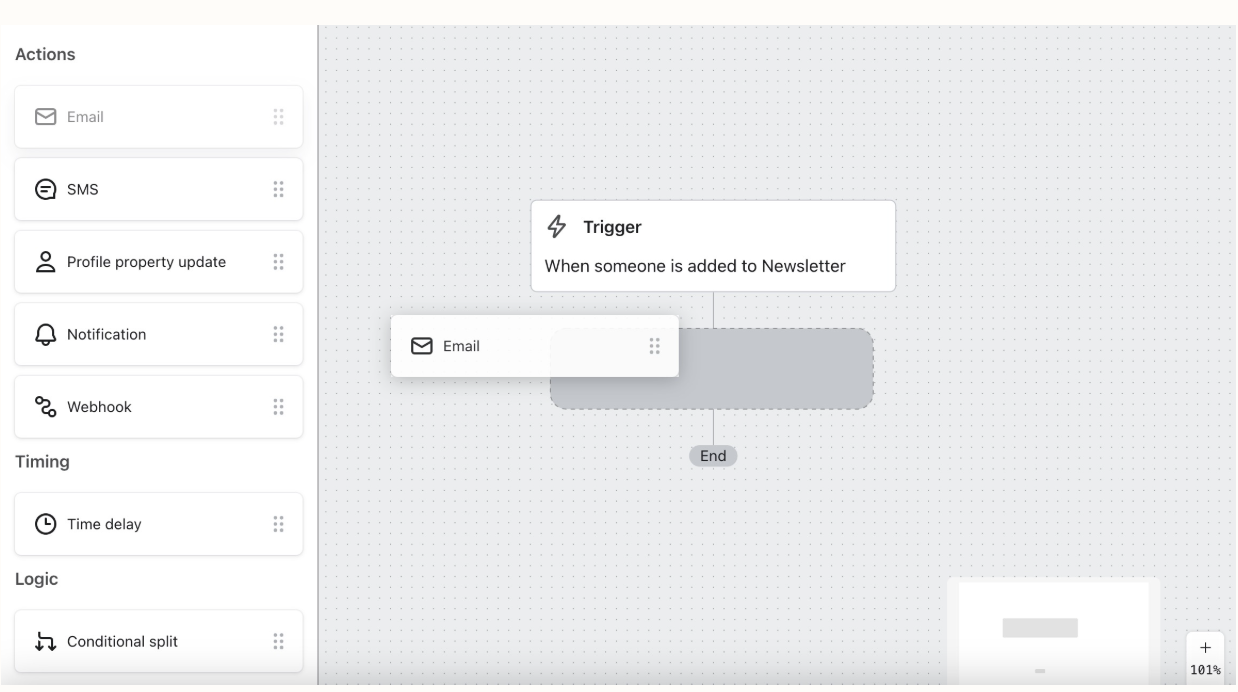
Drag and drop steps into your flow:
Action → Send email/SMS, update profile, etc.
Timing → Add time delays (minutes, hours, or days).
Logic → Add splits (conditional or trigger-based).
Set Up Action Messages:
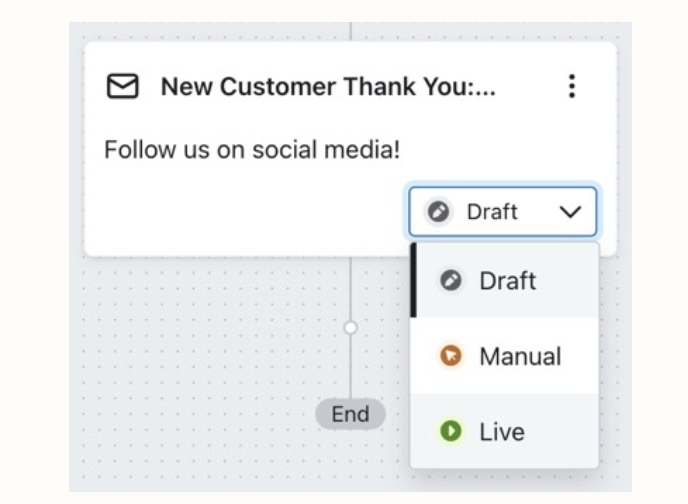
Drag the desired Action block (Push, SMS, Email, etc.) into your flow. Click on the block, then click “Set up [action]” to open the editor. Add your message content, personalize if needed, or update the necessary details and click “Save & continue.” Finally, change the status from Draft to Live.
Add time delays between actions to avoid messages sending all at once.
Time delays can be based on hours/days, a specific time, or certain days of the week.
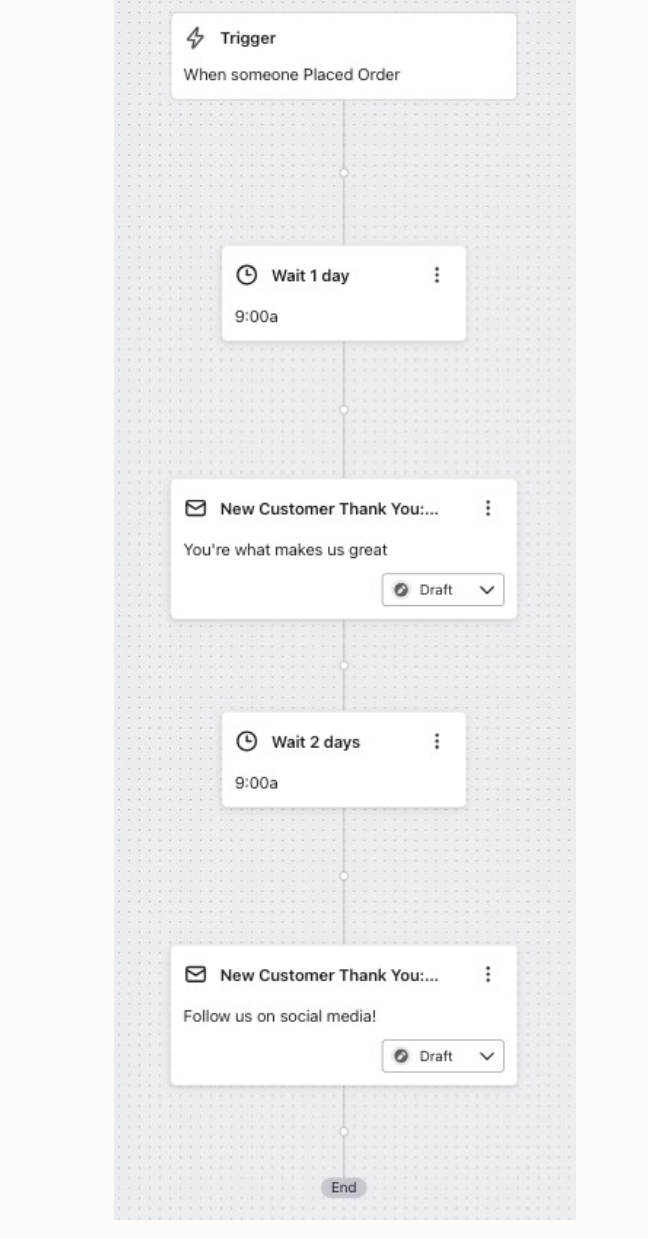
Draft → Default; not active.
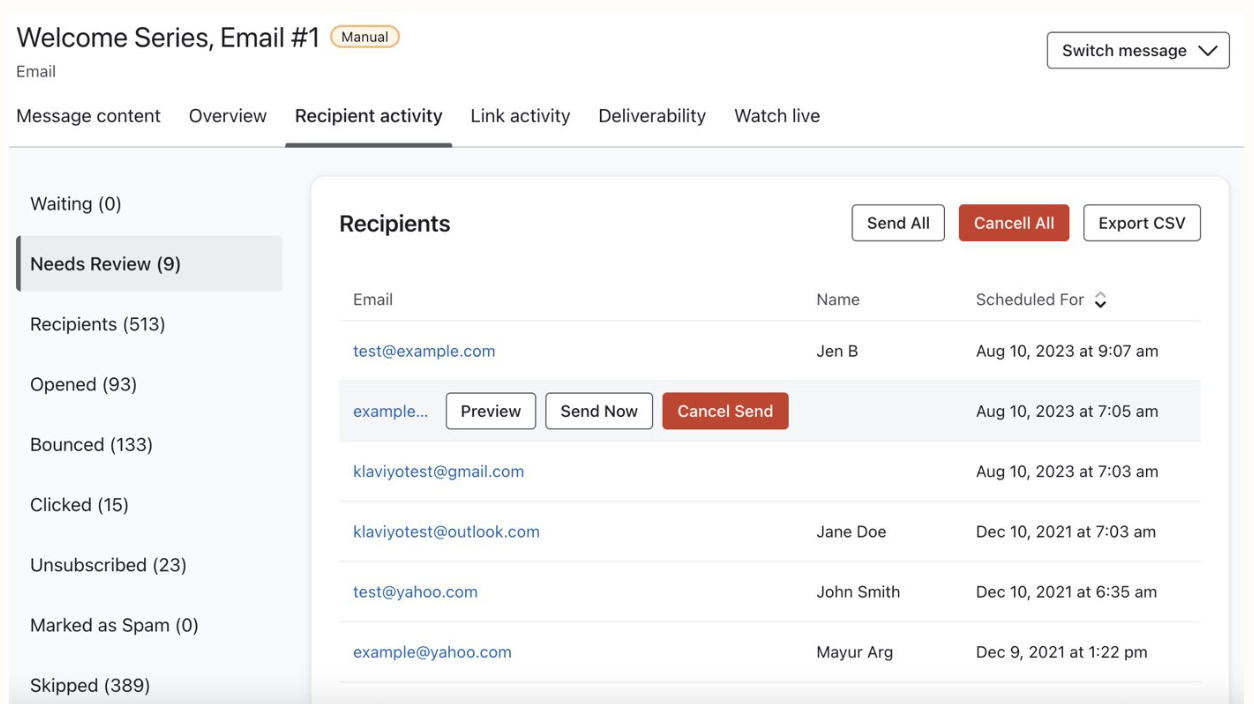
Manual → Messages must be approved and sent manually.
Live → Messages send automatically.
Update status per action or set the entire flow live at once.
In the flow builder, click Show Analytics to see metrics on each step.
Use Recipient Activity to monitor who is:
Waiting (queued for next step)
Skipped (filtered out)
Needs Review (manual approval required)
Deep-dive reports let you analyze performance over time and optimize.
By setting your first flows live, you can immediately start automating communications that welcome, convert, and retain your customers. As you grow, explore more advanced flows and analytics to refine your strategy.