There are two ways to set up a Firebase account:
Default (Superfans-created): A Firebase account is created by us ([email protected]). To get access, contact our support team.
Migration/existing setups: If you already have a Firebase account, add the details in your Superfans dashboard and enable it.
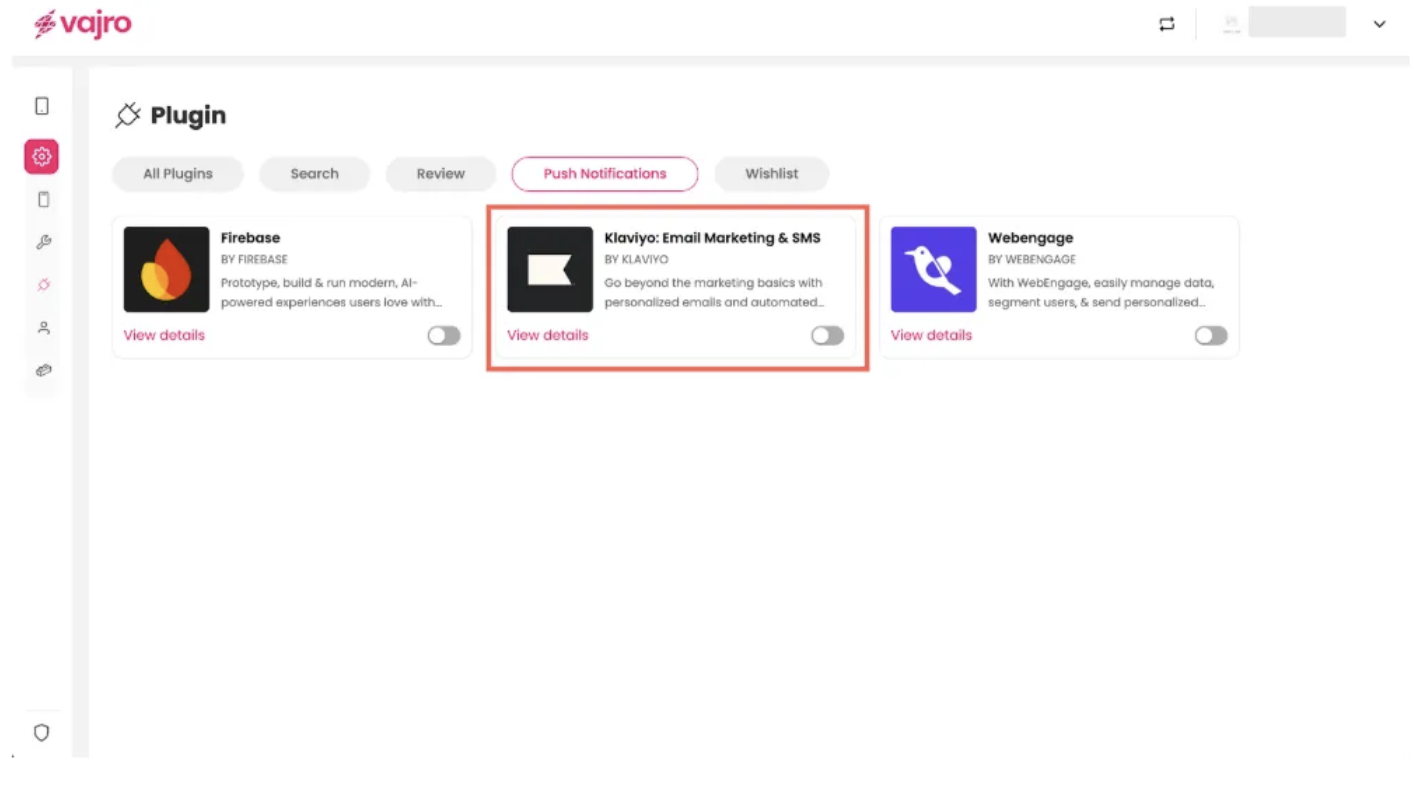
Step 1 : Log in to your Superfans dashboard and go to Settings → Plugins.
Step 2 : Under the Search category, select Klaviyo: Email Marketing & SMS and toggle it on.
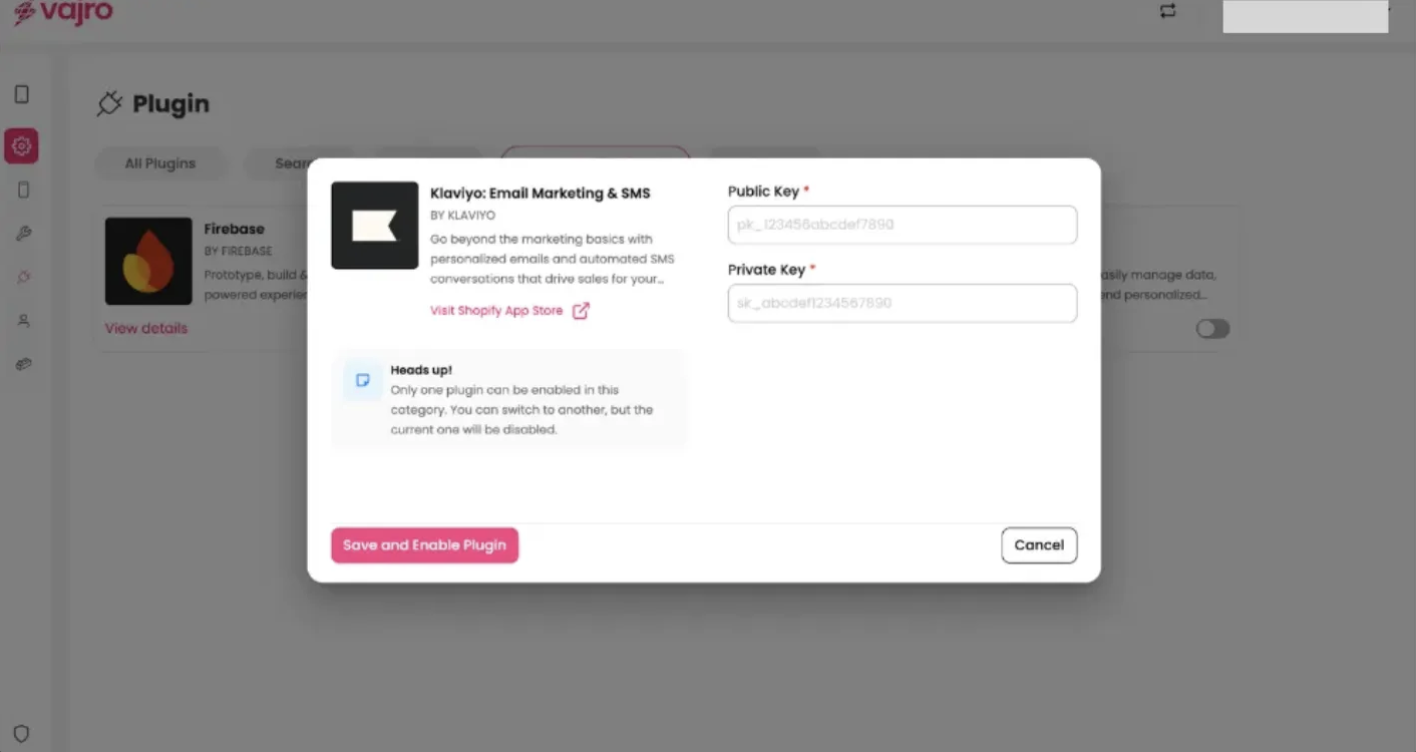
Step 3 : Paste the Public key & private key in the dialogue box, and click on Save & Enable plugin.
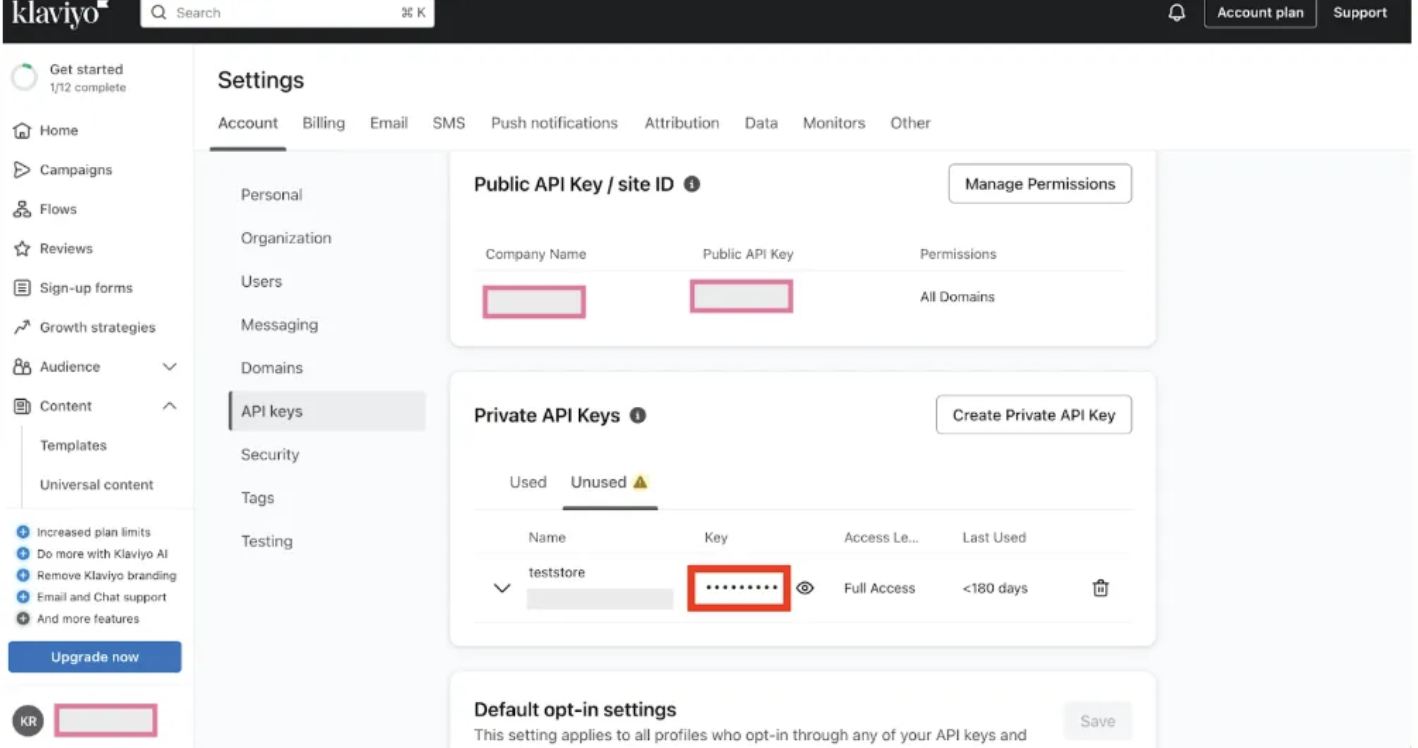
Step 1: Go to your Klaviyo dashboard, navigate to your profile, and click on Account. Then, go to Settings and select API Keys.
Step 2: If a Private API Key is not listed, click on Create Private API Key to generate one.

Ensure the following prerequisites are met for push notifications:
Native iOS app.
APNs authentication key from Apple.
Klaviyo SDK installed with event tracking and push notifications.
Native Android app.
Google service account.
Google service authentication key (JSON).
Klaviyo SDK installed with event tracking and push notifications.
In Klaviyo, click your organization name (bottom left) → Settings → Push Notifications.
Click Enable under the iOS section.
Fill out the required information:
APNs Authentication Key: Upload your .p8 file.
Key ID: Copy from your Apple Developer account.
Team ID: Obtain from Apple Developer account.
Bundle ID: Case-sensitive app identifier (e.g., com.YOUR_APP_NAME).
Click Setup iOS Push. A green success message confirms your app is connected.
In Klaviyo, click your organization name → Settings → Push Notifications.
Click Enable next to the Android option.
Fill out the required information:
Package Name: Found in your Google Play Store app URL (e.g., com.yourcompany.yourproject).
Google Service Authentication Key: Create a service account key, download the JSON, and upload it to Klaviyo.
Click Save. Your Android app is now ready to receive push notifications.
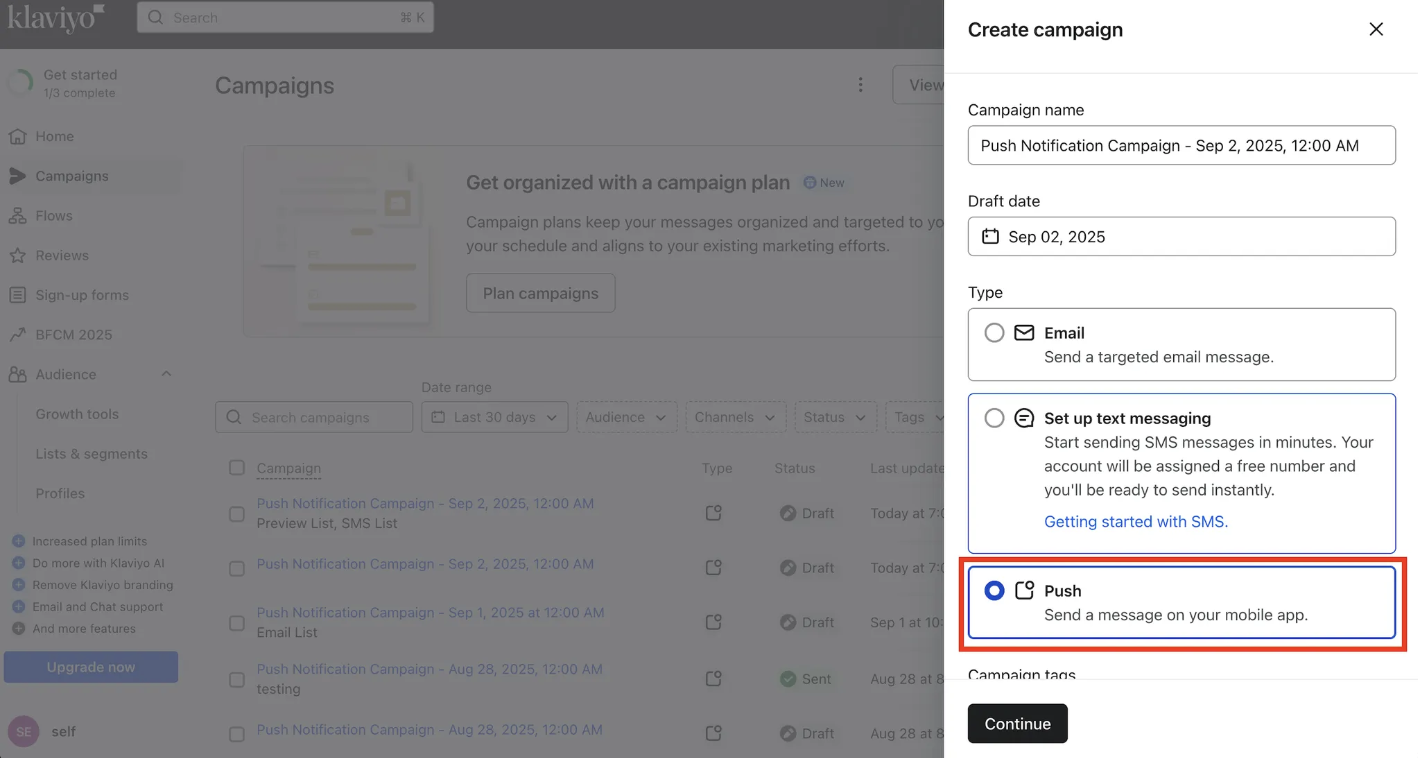
Step 1 : Head to the Campaigns section on your Klaviyo dashboard and click on Create Campaign to get started.
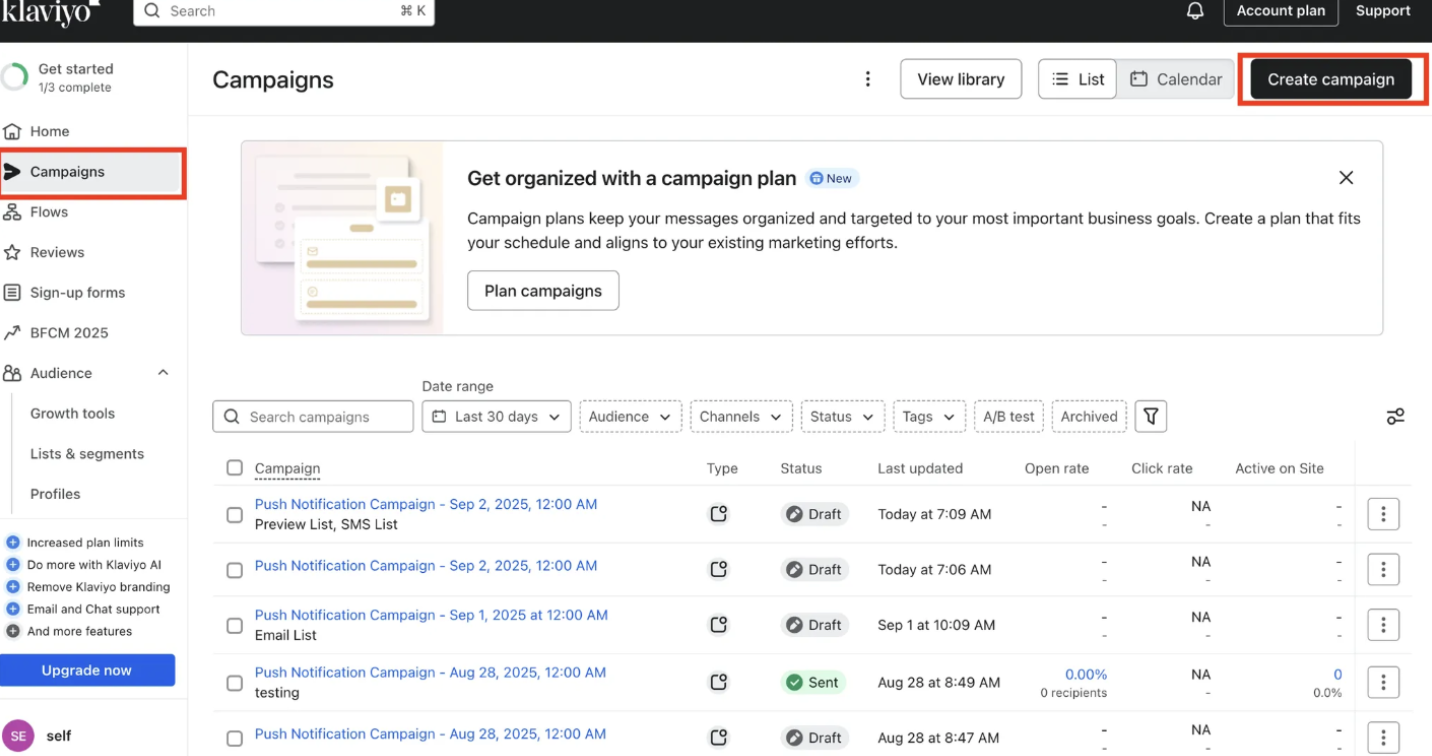
Step 2 : In the create campaign popup, Name your campaign, select Push as the campaign type, optionally add tags, and click Continue.
Note: Only subscribers who have given permission will receive push notifications on your iOS or Android app
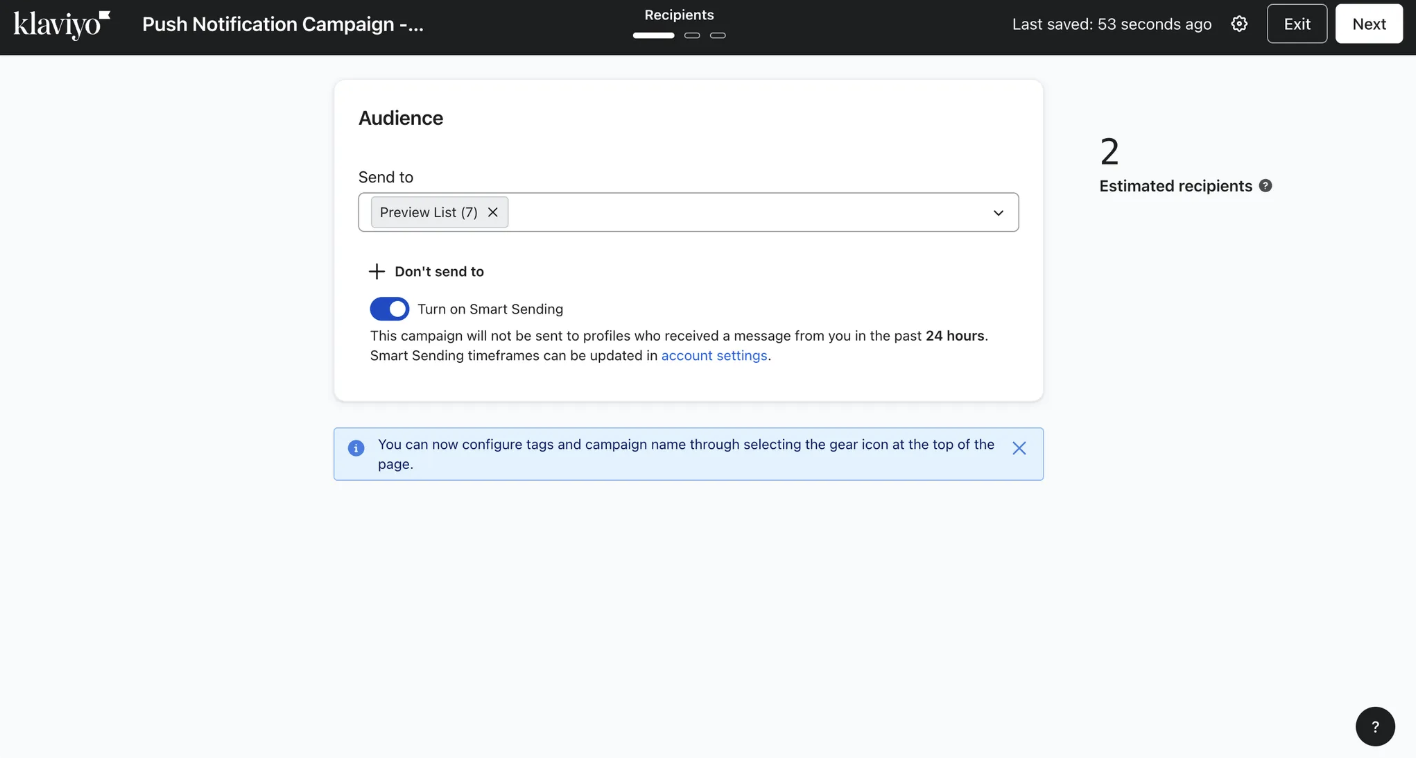
Step 3: Select the lists or segments to target, and see how many users have push enabled.

Step 4: Click Next to go to the Content tab. Add your notification title and text, optionally include an image or GIF (iOS only), and enter a notification name for internal tracking.
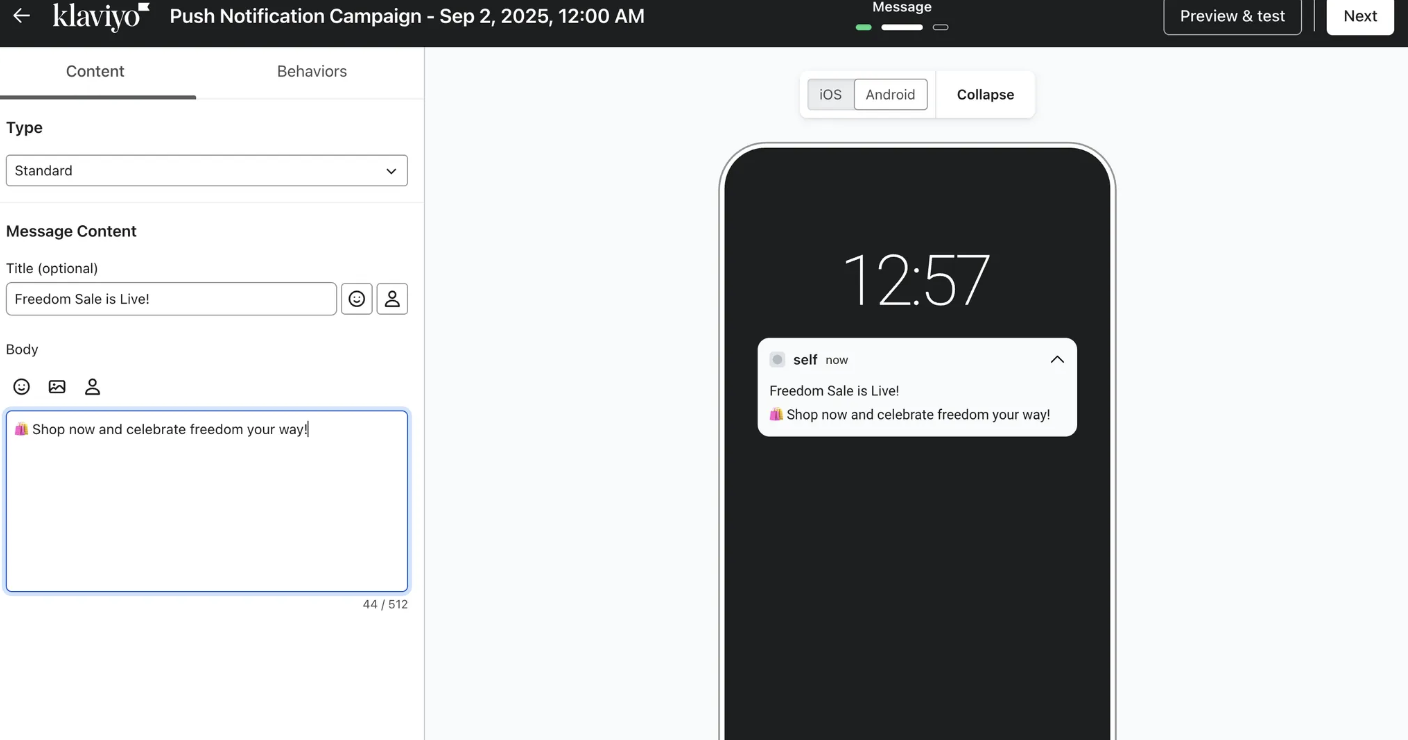
You can preview and test in Klaviyo before sending notifications.
Integrate the Klaviyo SDK, configure push, and ensure your test device has a Klaviyo profile with a push token.
In the push editor, click Preview & test, paste your token, and hit Send test.
You can send up to 100 preview push notifications per day on iOS (v2.2.0+) and Android.
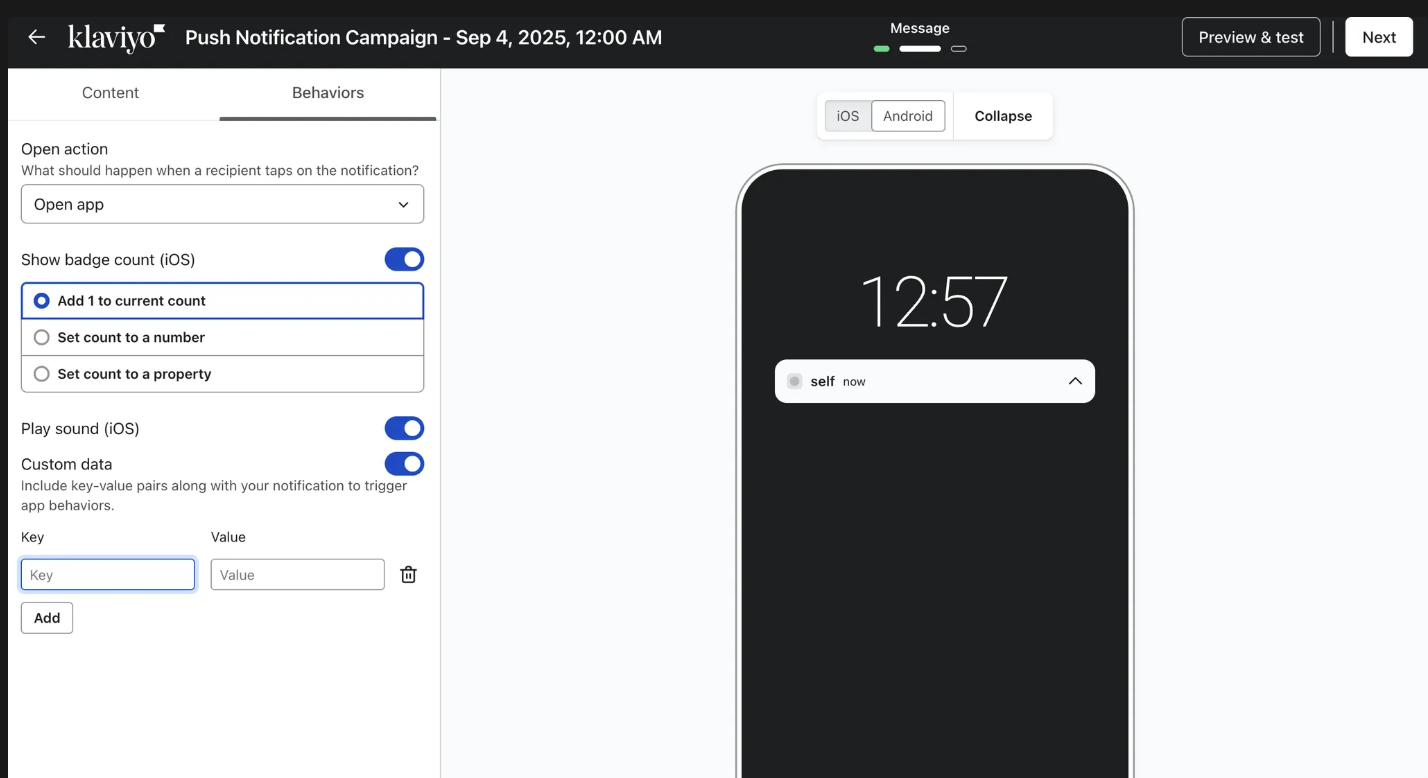
Step 5: After composing your notification, the Behaviors tab lets you choose Open app or Deep link.
Open app: Sends users to your app’s home screen (default behavior). Select Open app if you want the notification to simply open the main app page.
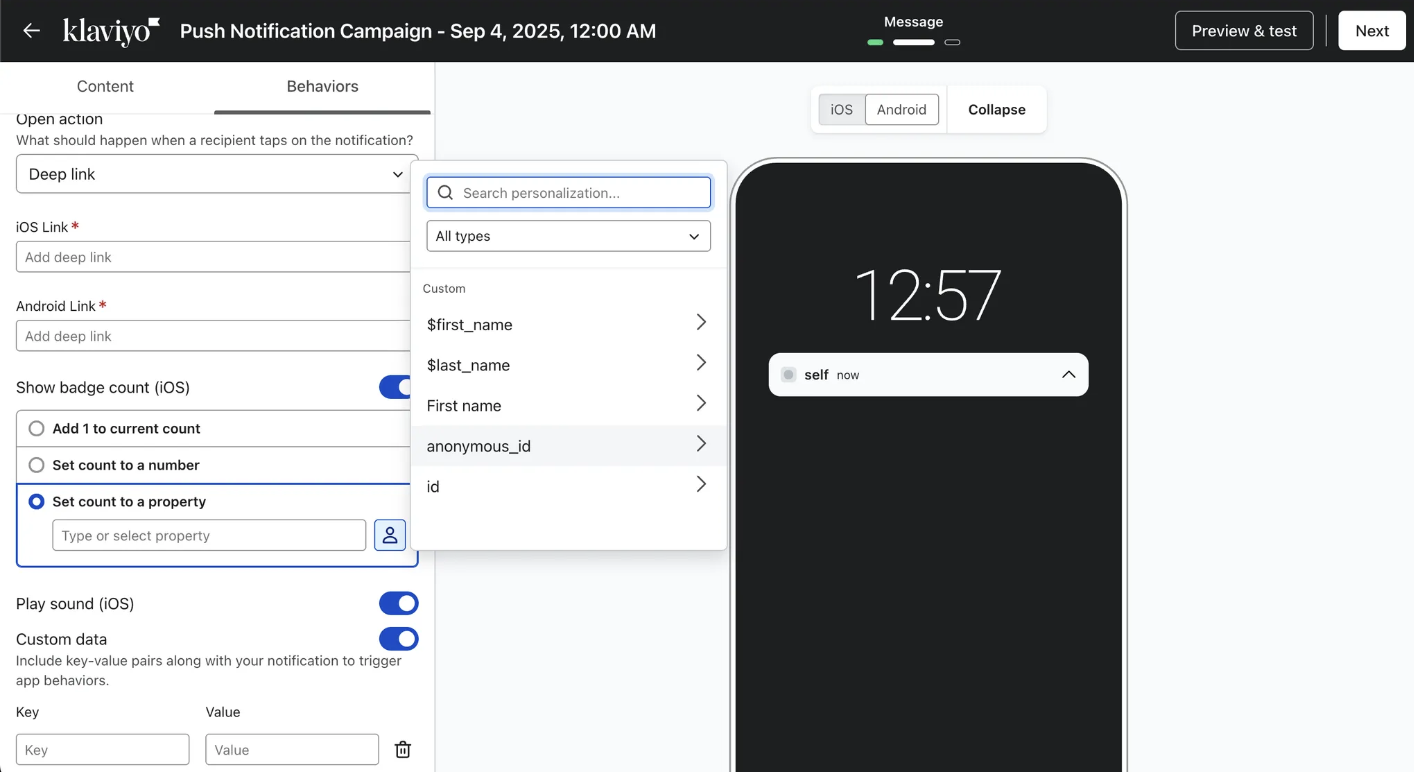
Deep link: Sends users to a specific page within your app (requires developer setup). Under the Behaviors tab, select Deep Link, then enter the page’s URI in the iOS Link and Android Link fields.
Show badge count (iOS): Control the red app icon badge -add 1 or set a specific number (1-999,999), or use a profile/event property (e.g., cart items).
Play sound (iOS): Enable or disable a sound alert for the notification.
Go to the Behaviors tab, select Deep Link, and enter the URLs you’d like to deep link.
Use full URLs when deep linking doesn’t work or when directing to public pages.
Fields: type: url, value: your-website-url
Supported URLs
Product Page: https://yourstore.com/products/nola-tee
Collection Page: https://yourstore.com/collections/women-dresses
Cart Page:https://yourstore.com/cart
Account Page: https://yourstore.com/account
Login Page:https://yourstore.com/login
Search Page:https://yourstore.com/search?q=summer+dresses
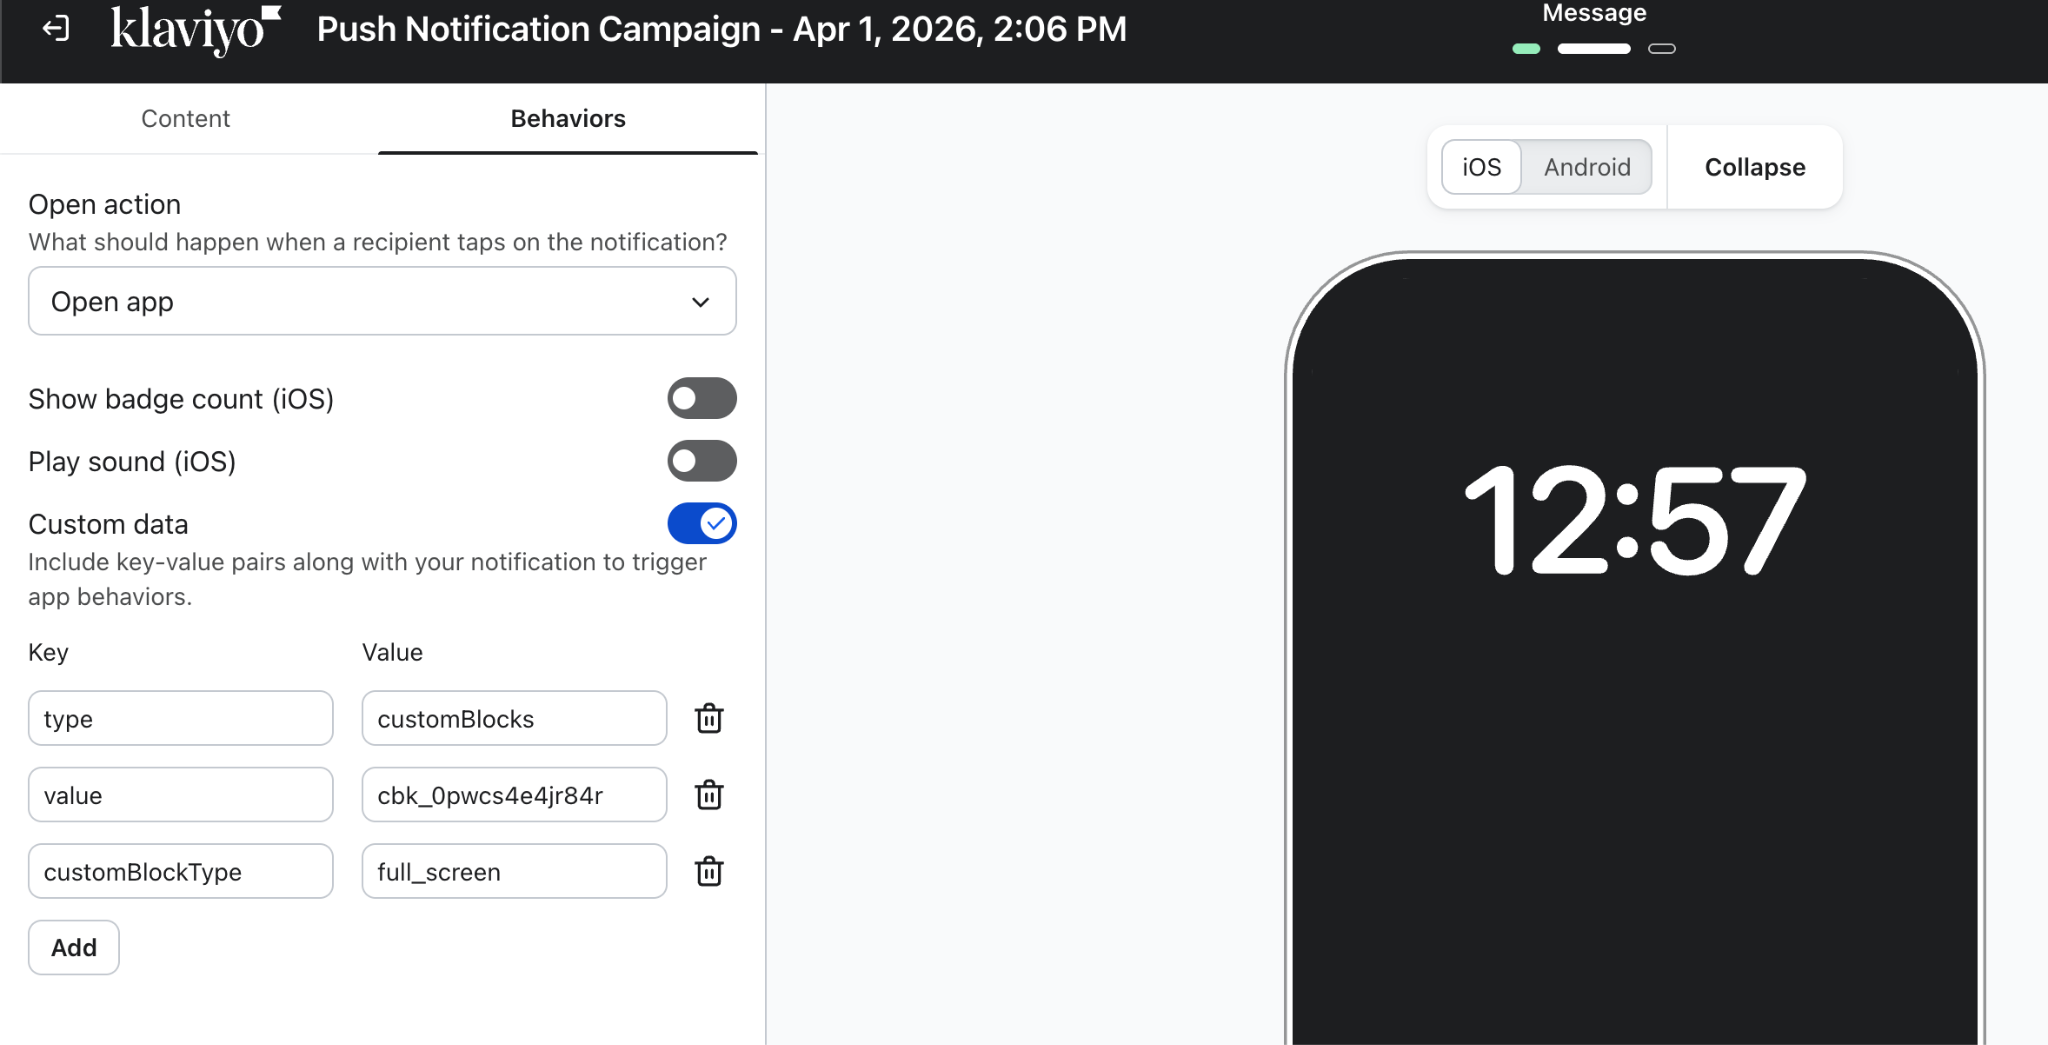
In the Behaviors tab, choose Open App, turn on Custom Data, and add the key-value pairs you want to deep link.
Redirection within App | Key-Value Configuration on Klaviyo |
Cart Page | Key: type |
Wishlist Page | Key: type |
Account/Profile Page | Key : type |
Notifications History Page | Key : type |
Search Page | Key : type |
Product Page | Key : type |
Collection Page | Key : type |
Landing Pages | Key : type |
Custom Blocks | Key : type |
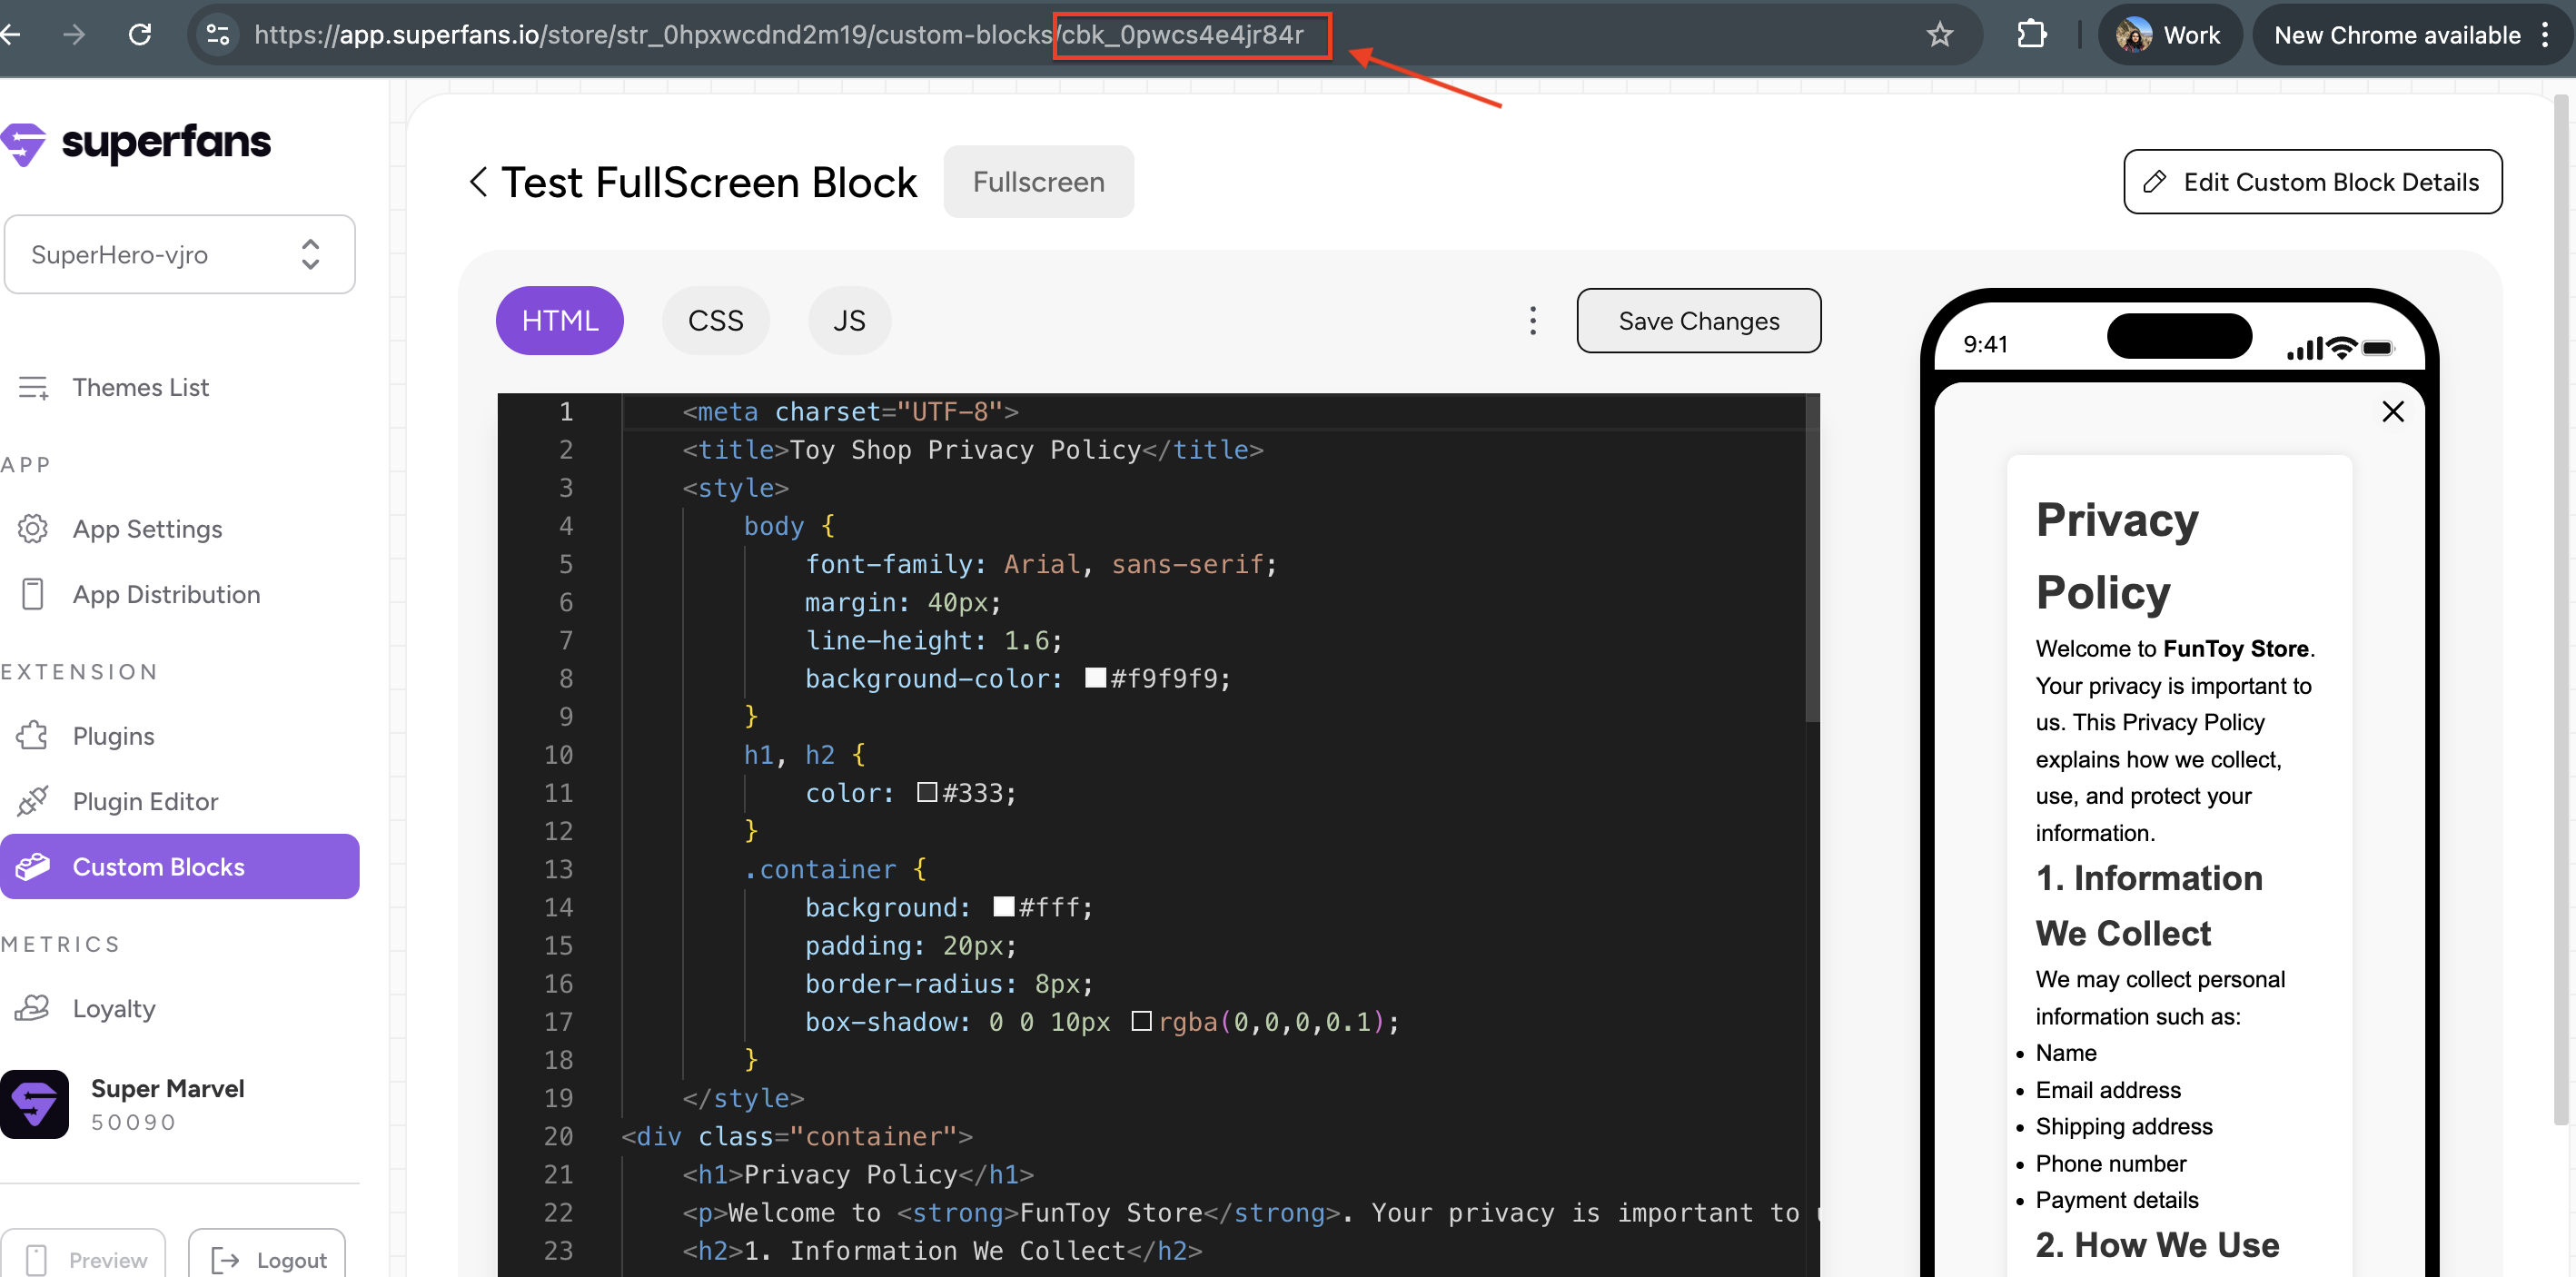
How to Retrieve Page ID & Custom Blocks ID
Retrieve Page ID:
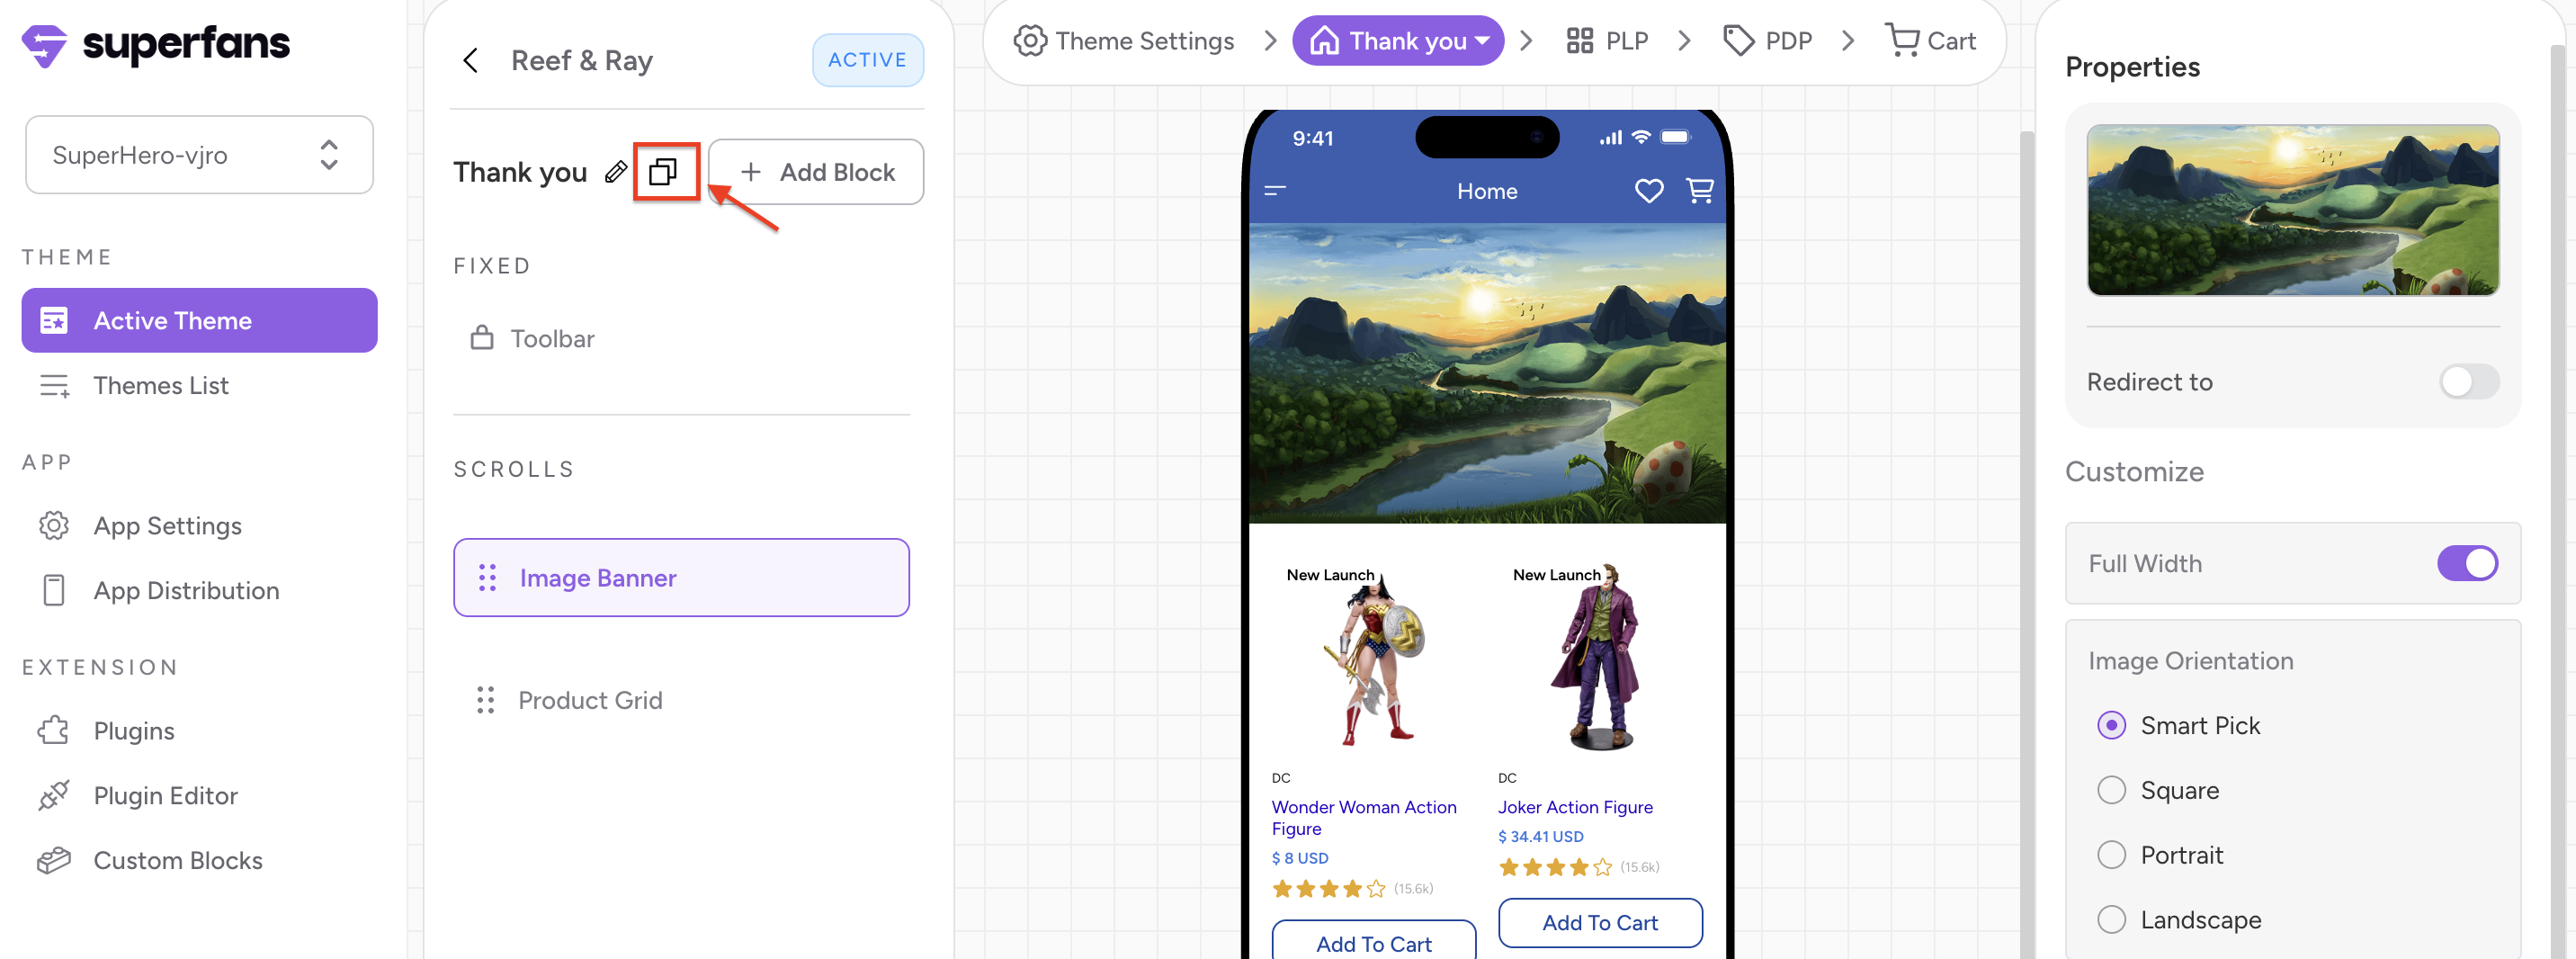
Navigate to the Active Theme on the Superfans Dashboard.
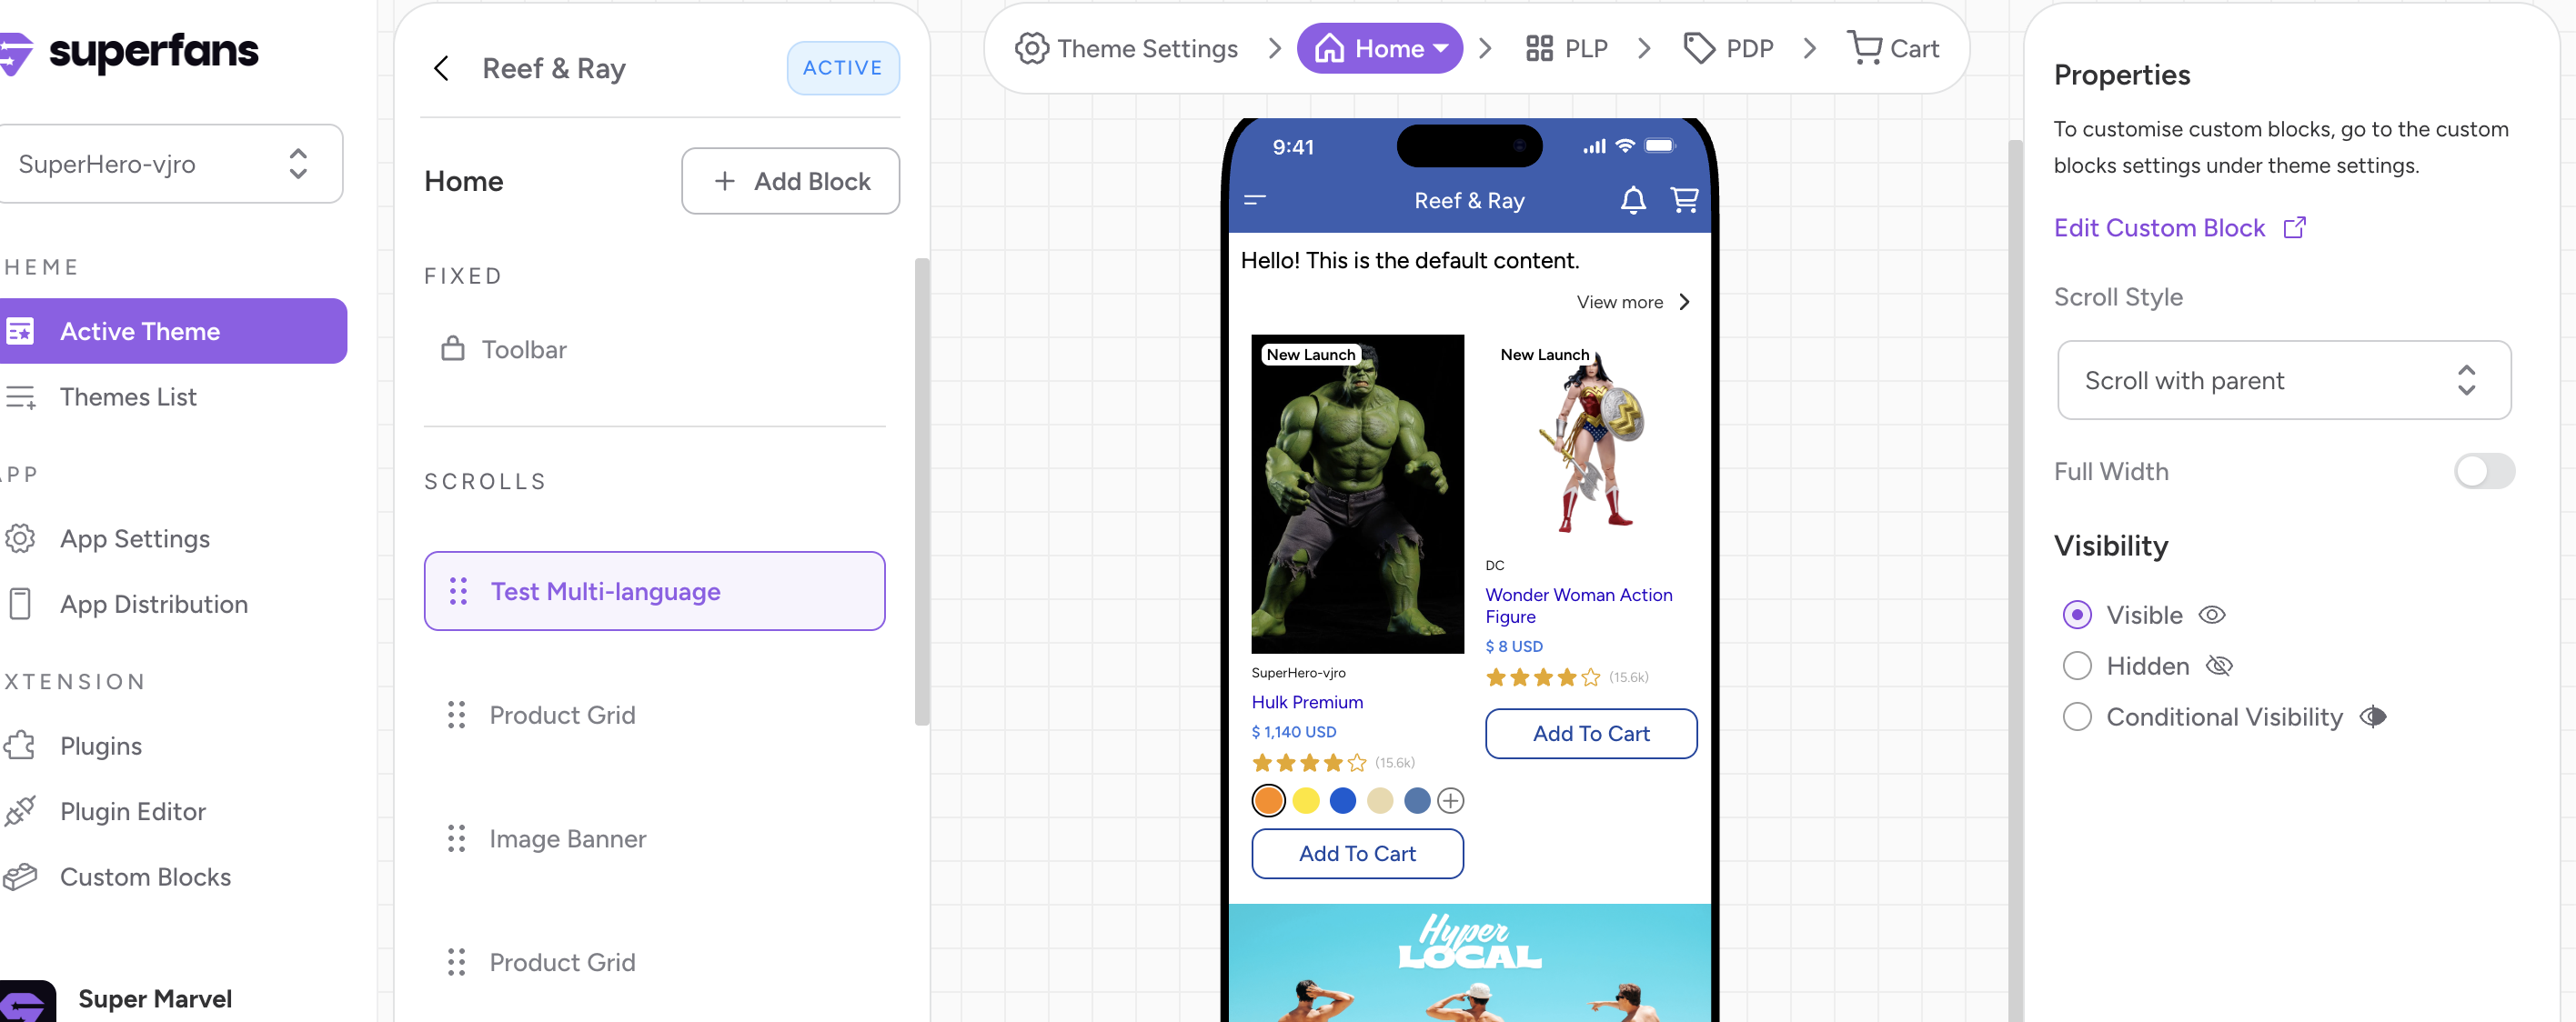
Select the page you want the push to redirect to.
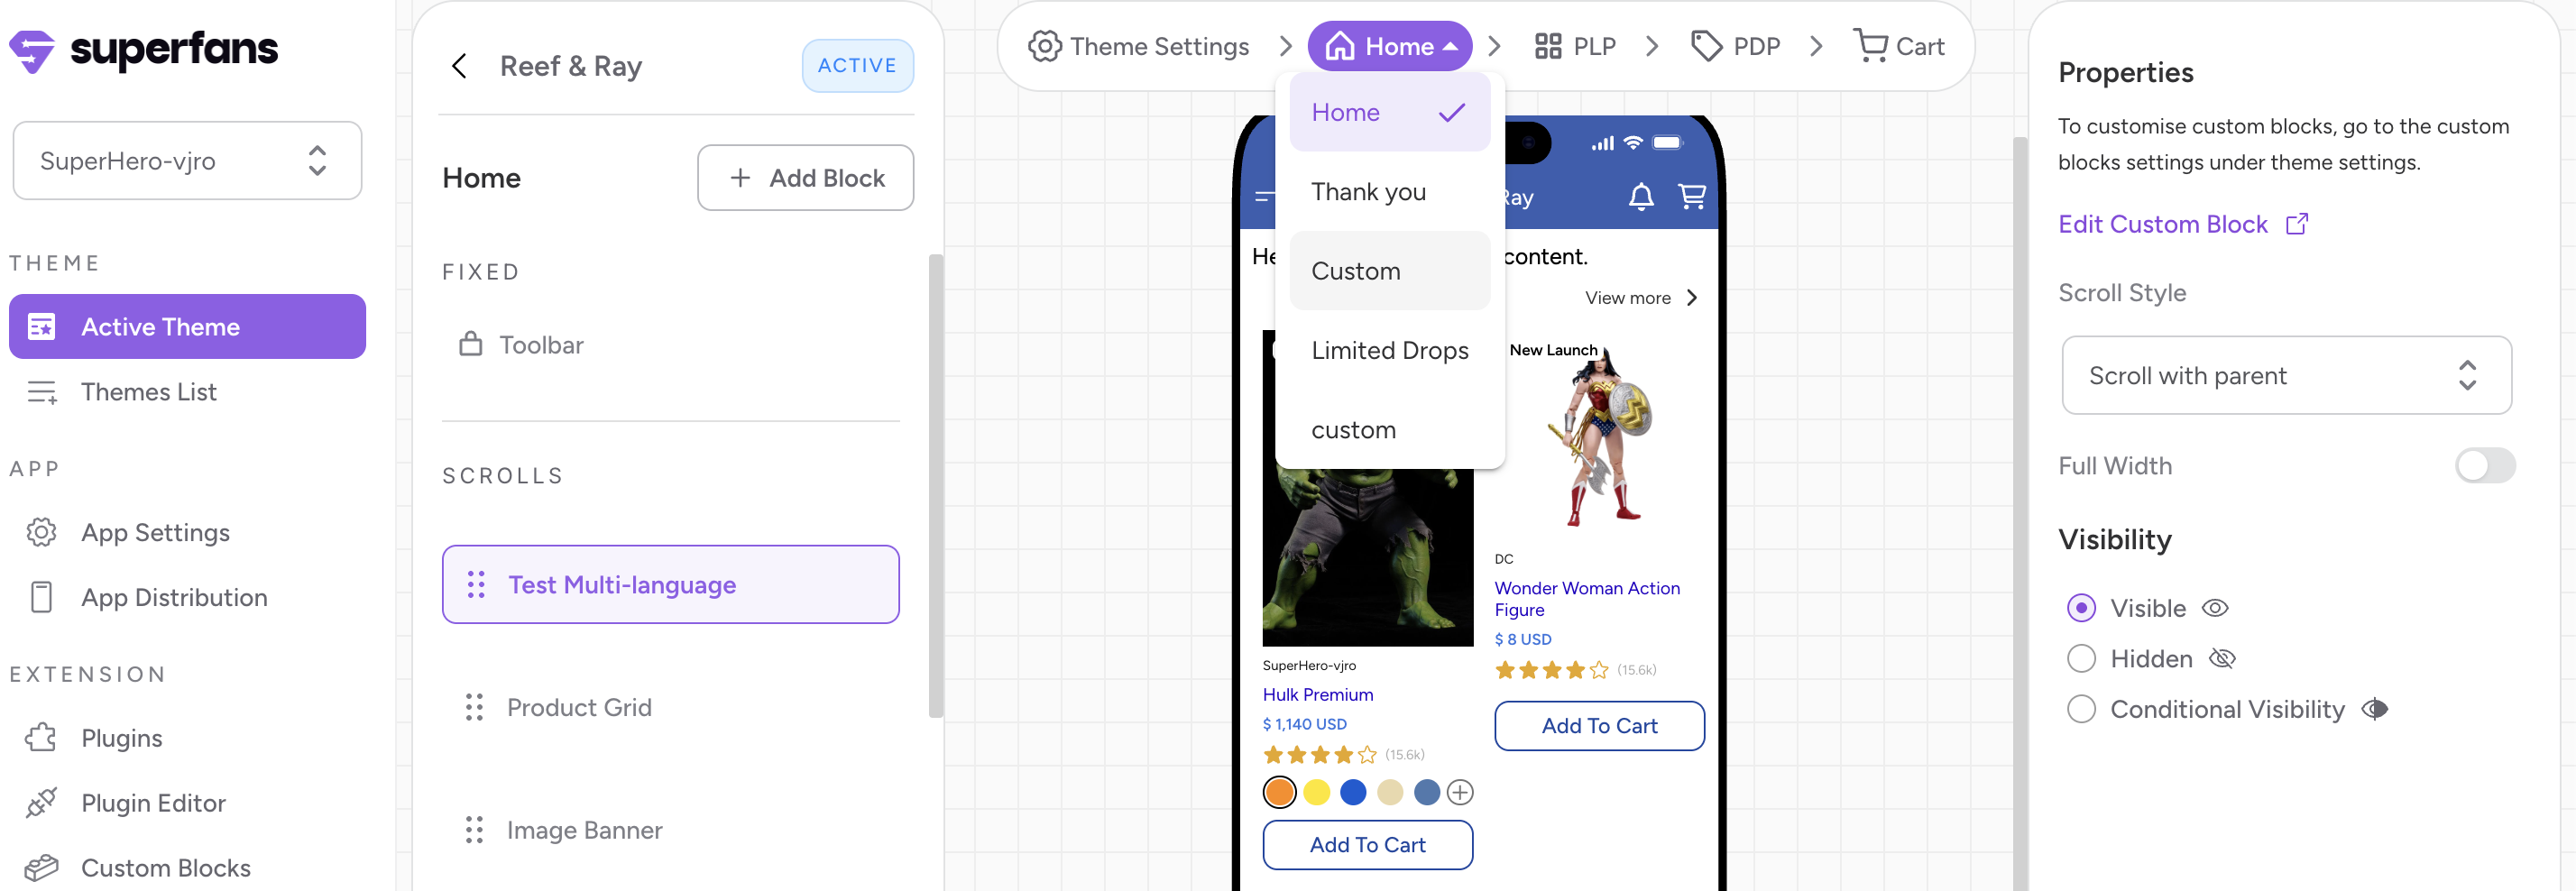
Copy the page ID by clicking the Copy Icon. (Next to Pencil icon)
Retrieve Custom ID:
Navigate to the Custom Blocks section on the Superfans Dashboard.
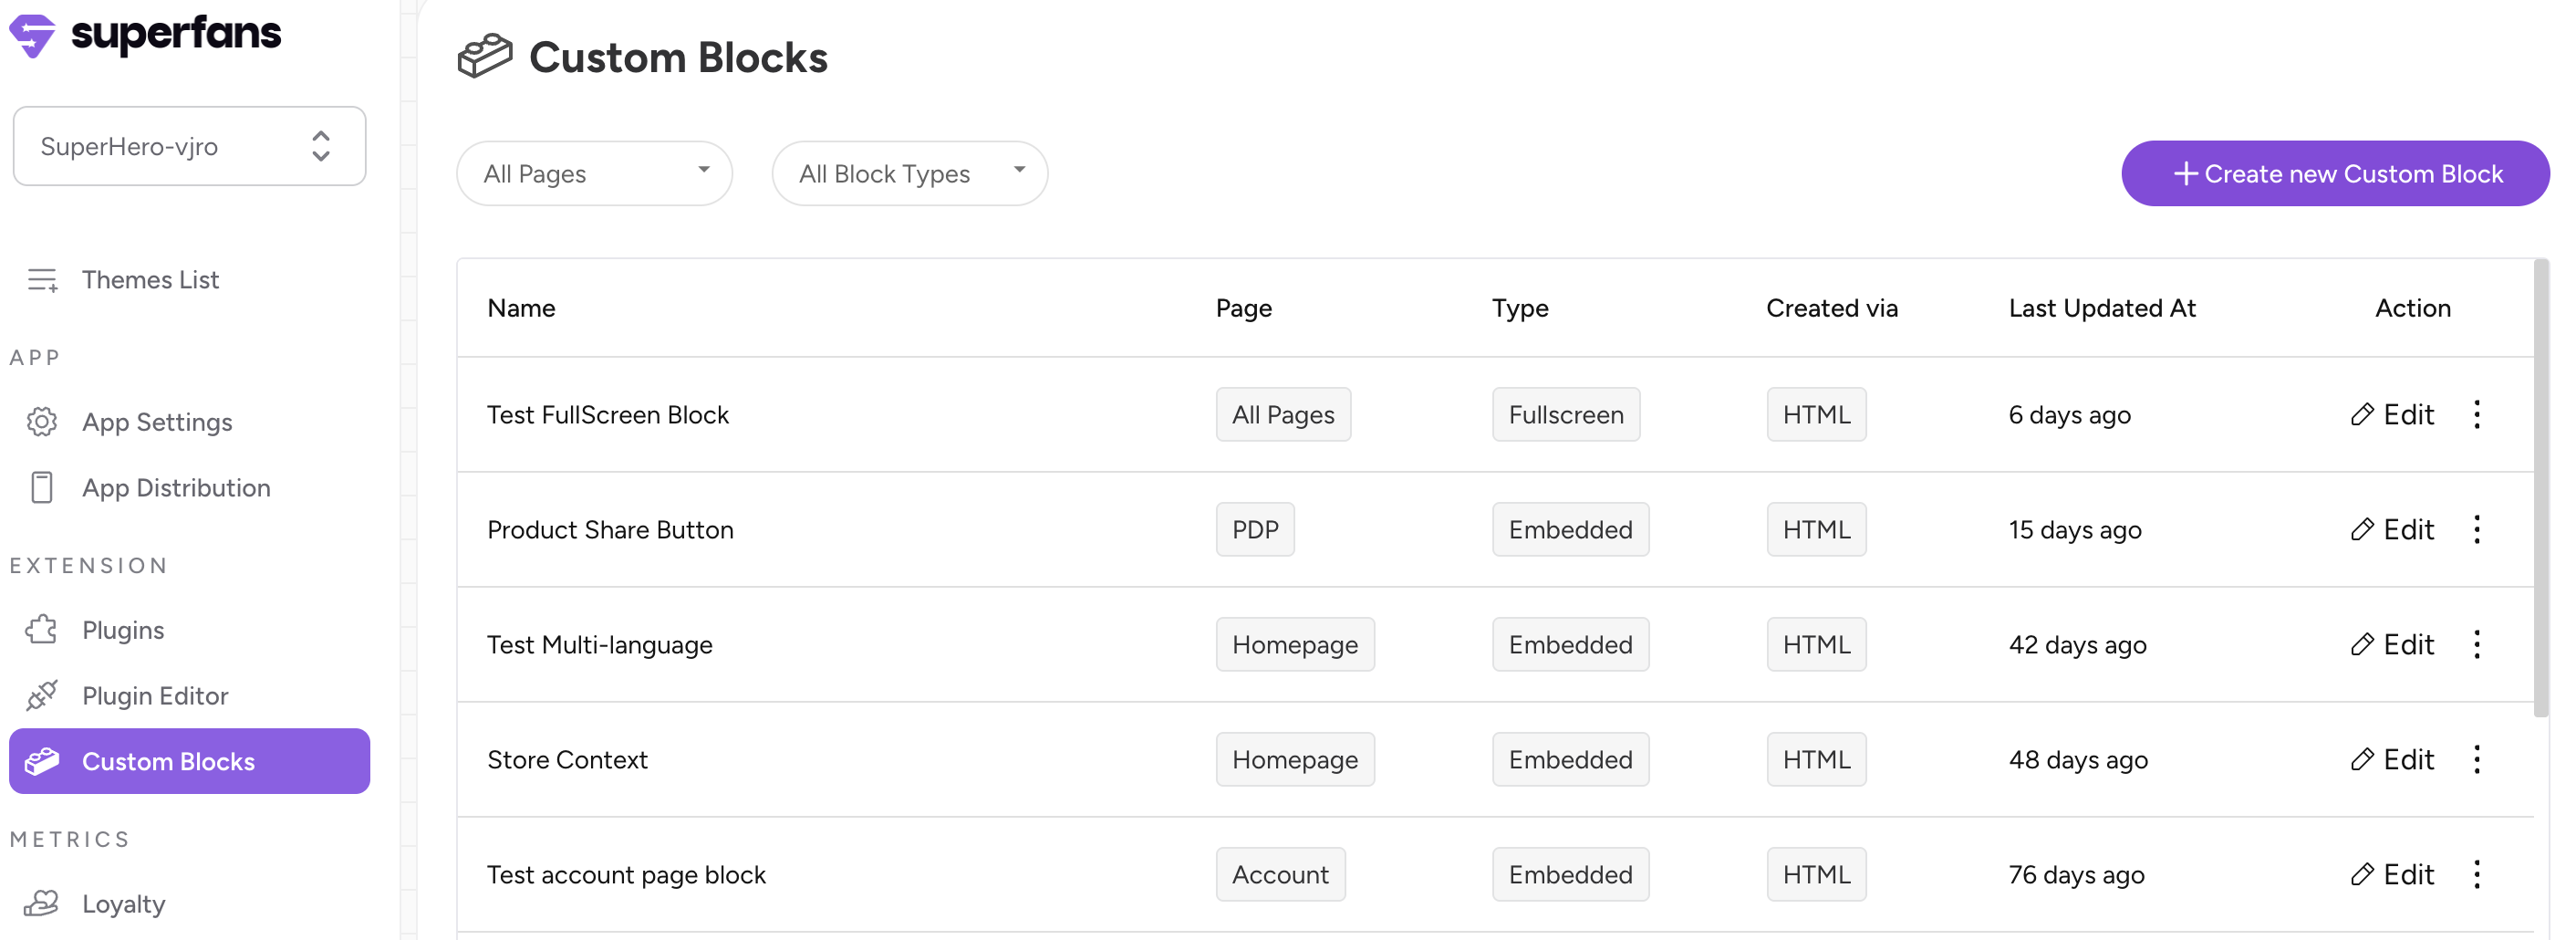
Select the Custom Blocks you want the push to redirect to.
Copy the Alphanumeric number which is at the end of the URL with the prefix “cbk“. This is the Custom Block ID.
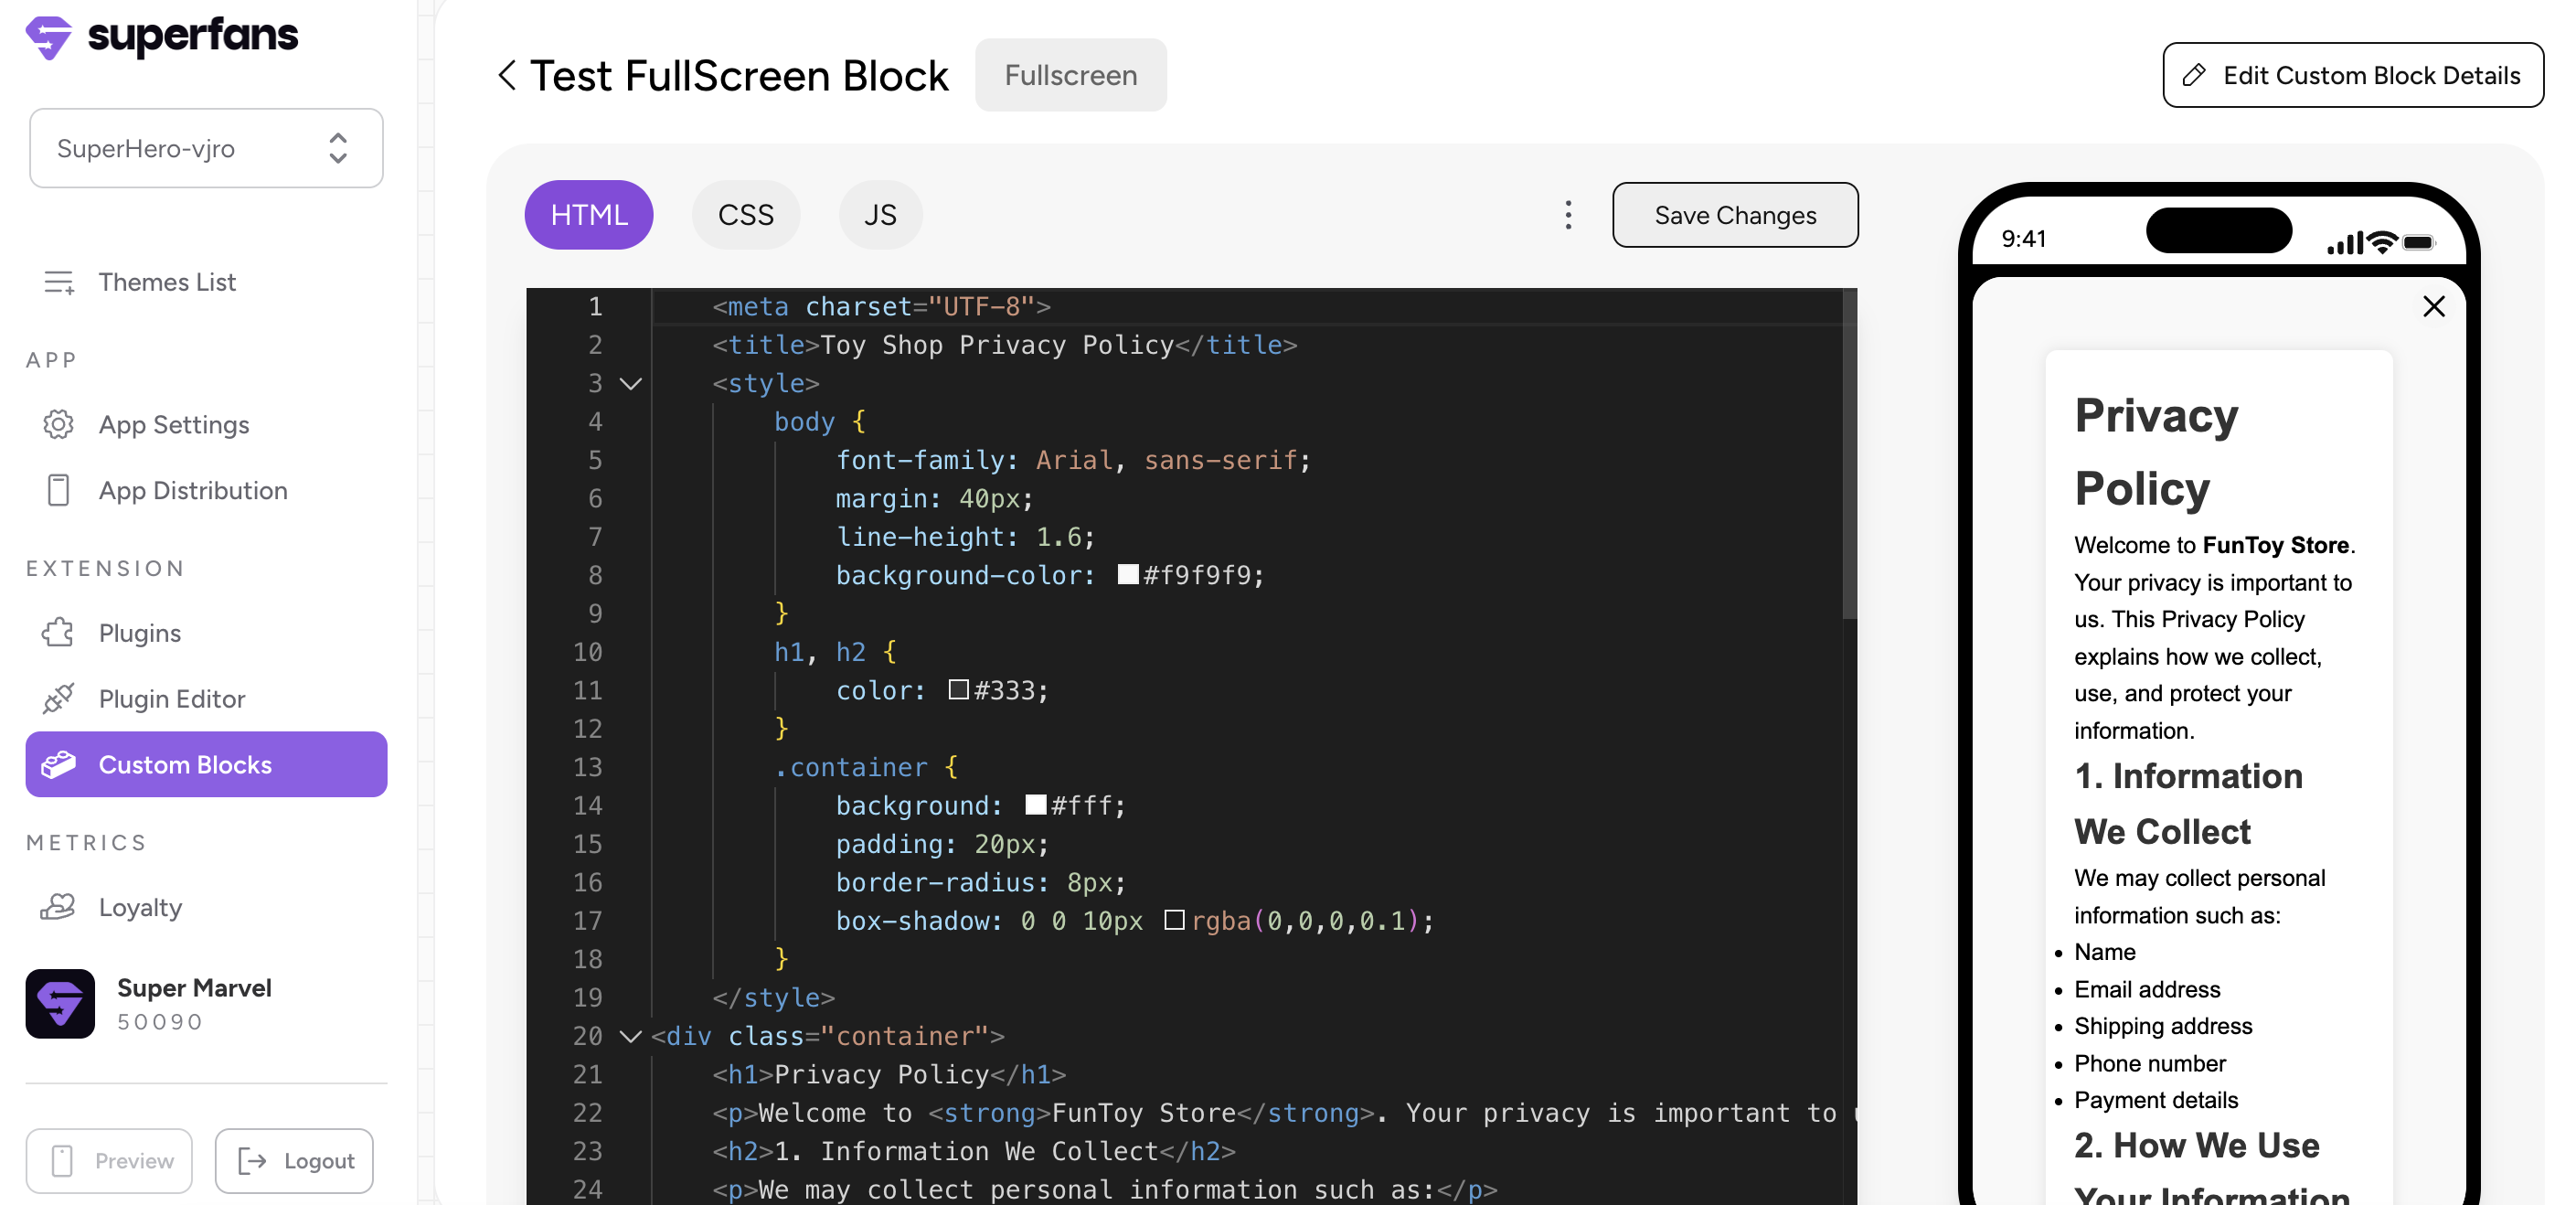
Step 6: Configure the Key Value Pairs as below in the screenshot.
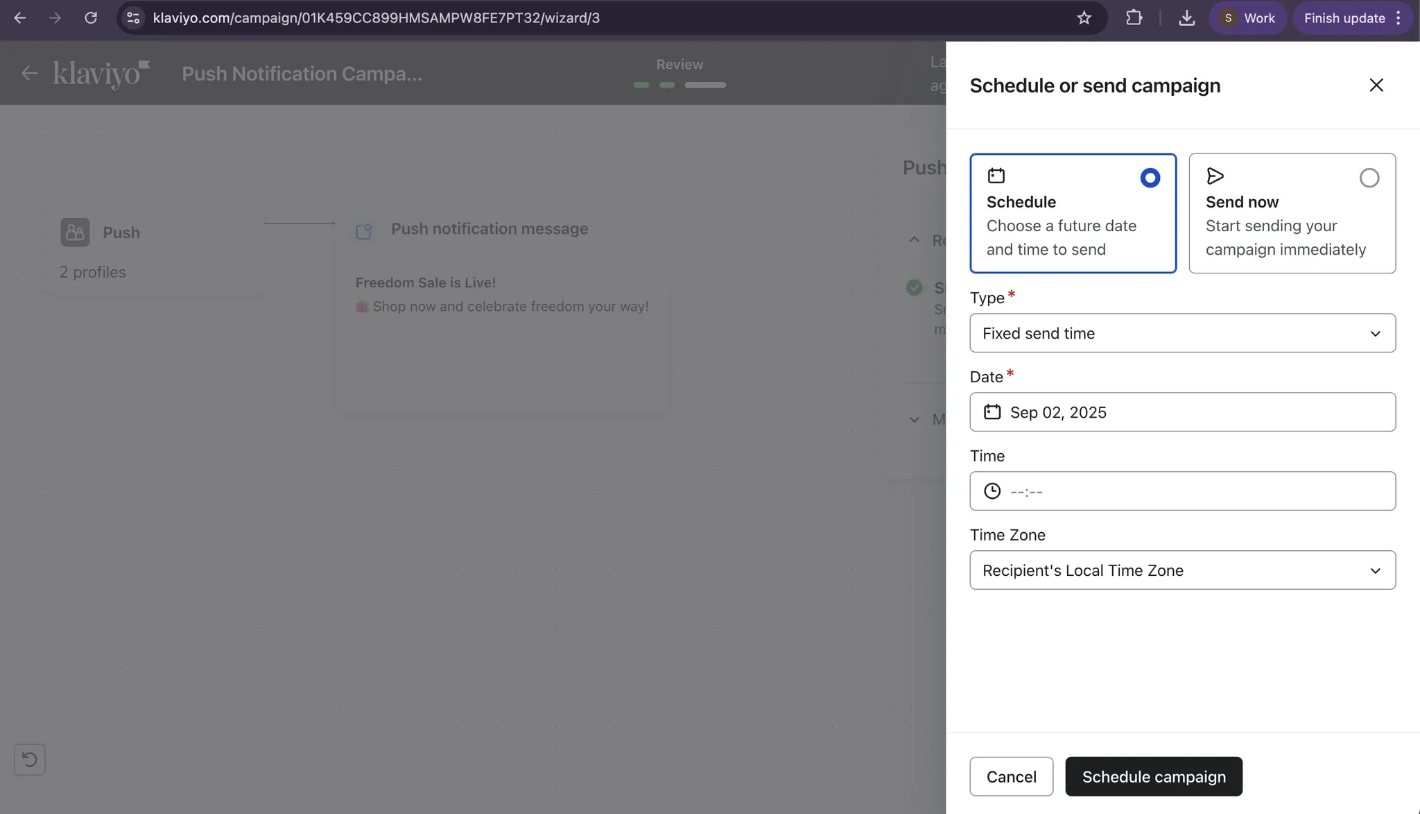
Step 7: Review your campaign content, target audience, and scheduling (Send Now or Schedule), then click Send to deliver or save as a draft if not ready.