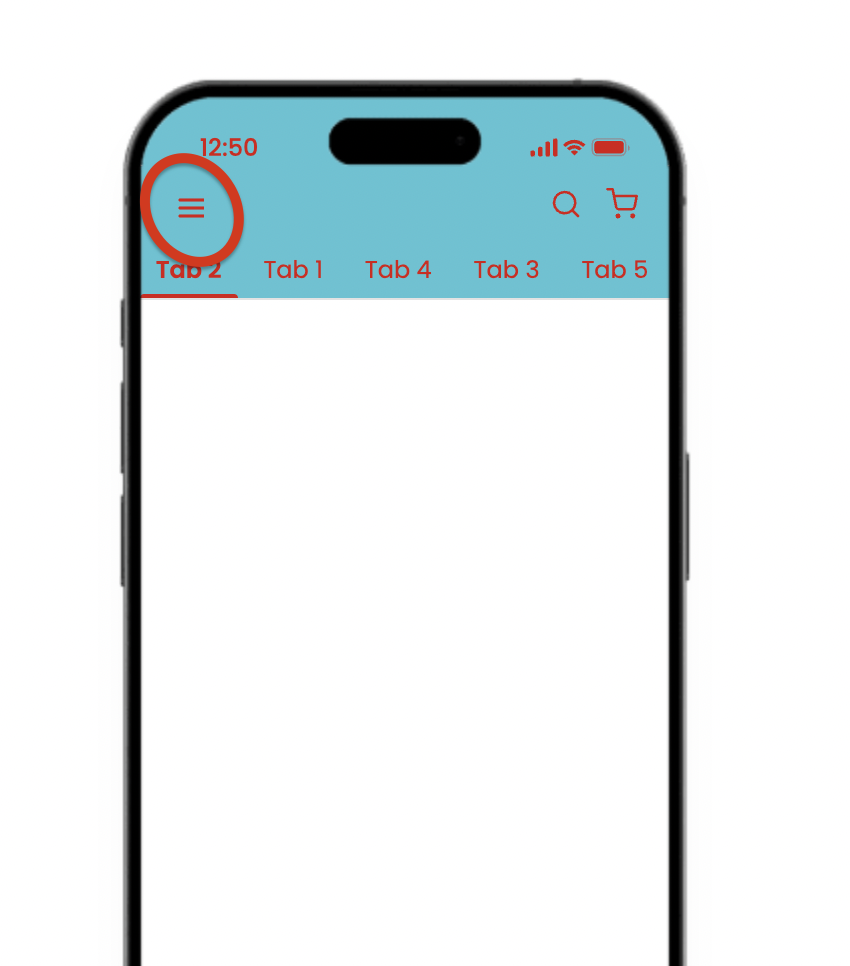
Drawer Navigation, often called the Hamburger Menu, is a side panel that slides in (usually from the left) when users tap the ☰ icon. It stores multiple navigation options without taking up constant screen space.
 |  |
it stores all the useful but not always urgent options in a neat, hidden space.
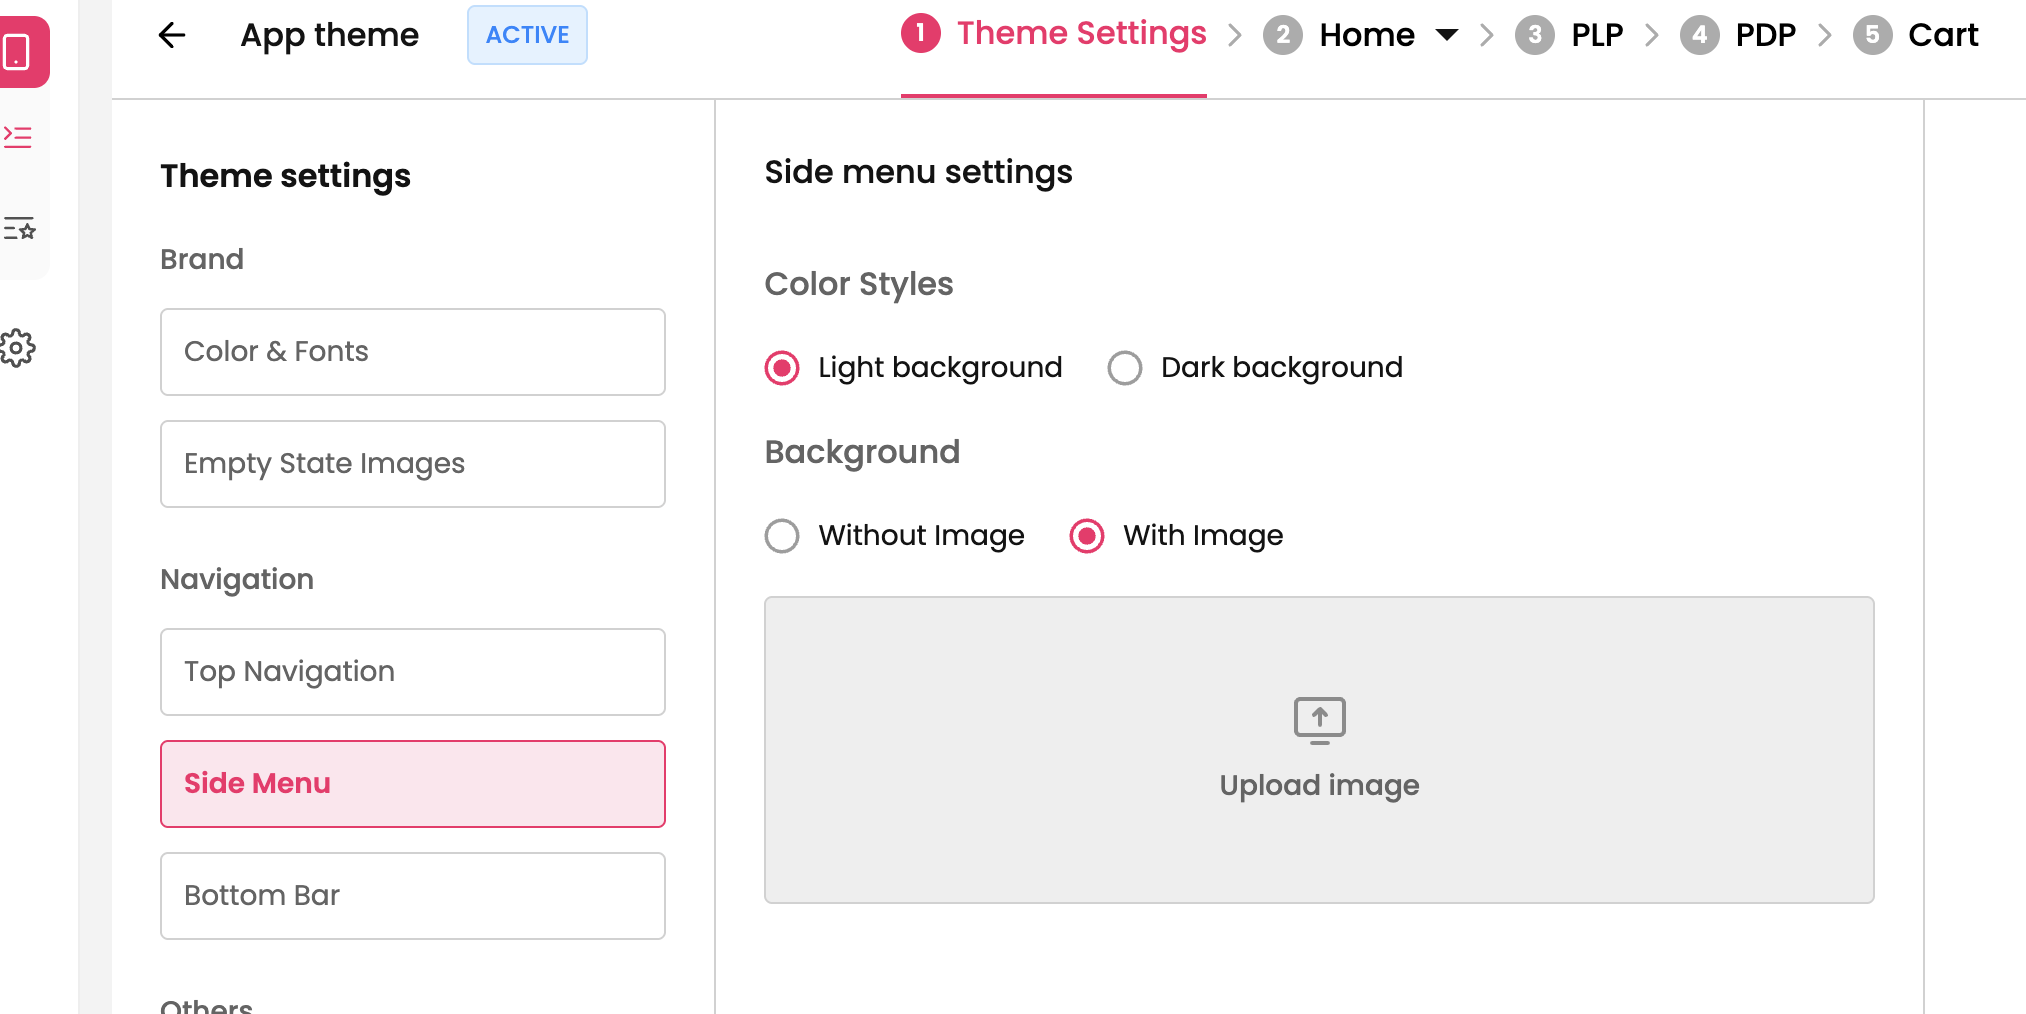
Goto Theme Settings → Navigation → Side Menu to setup side navigation on the app.
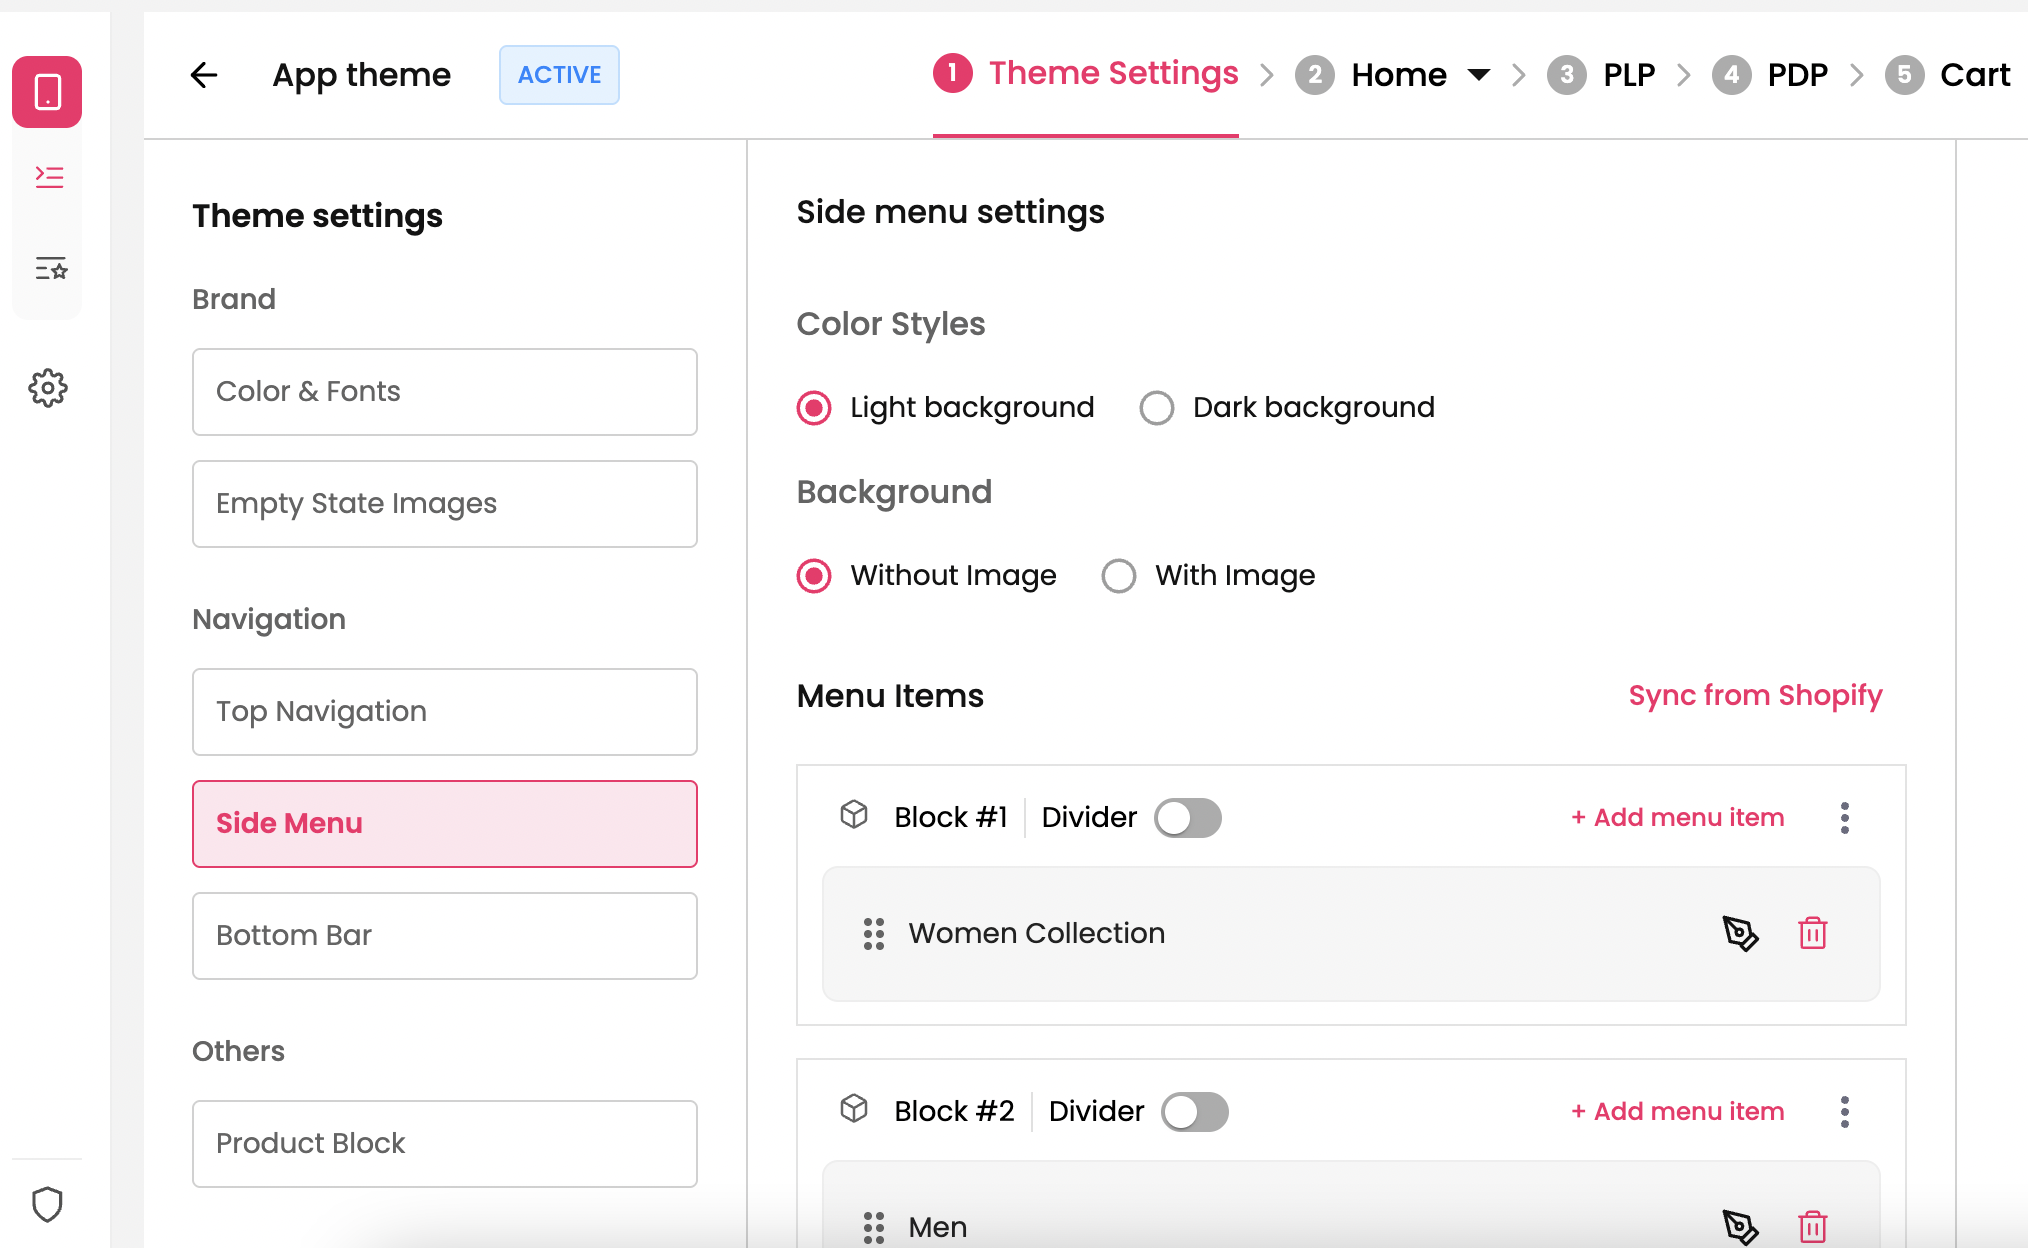
There are two options to set the design of the side navigation
Setting up the color style → The side navigation can have Dark mode or Light mode. You can select one among them from the options listed.

How it is on Mobile App ?
Light Background 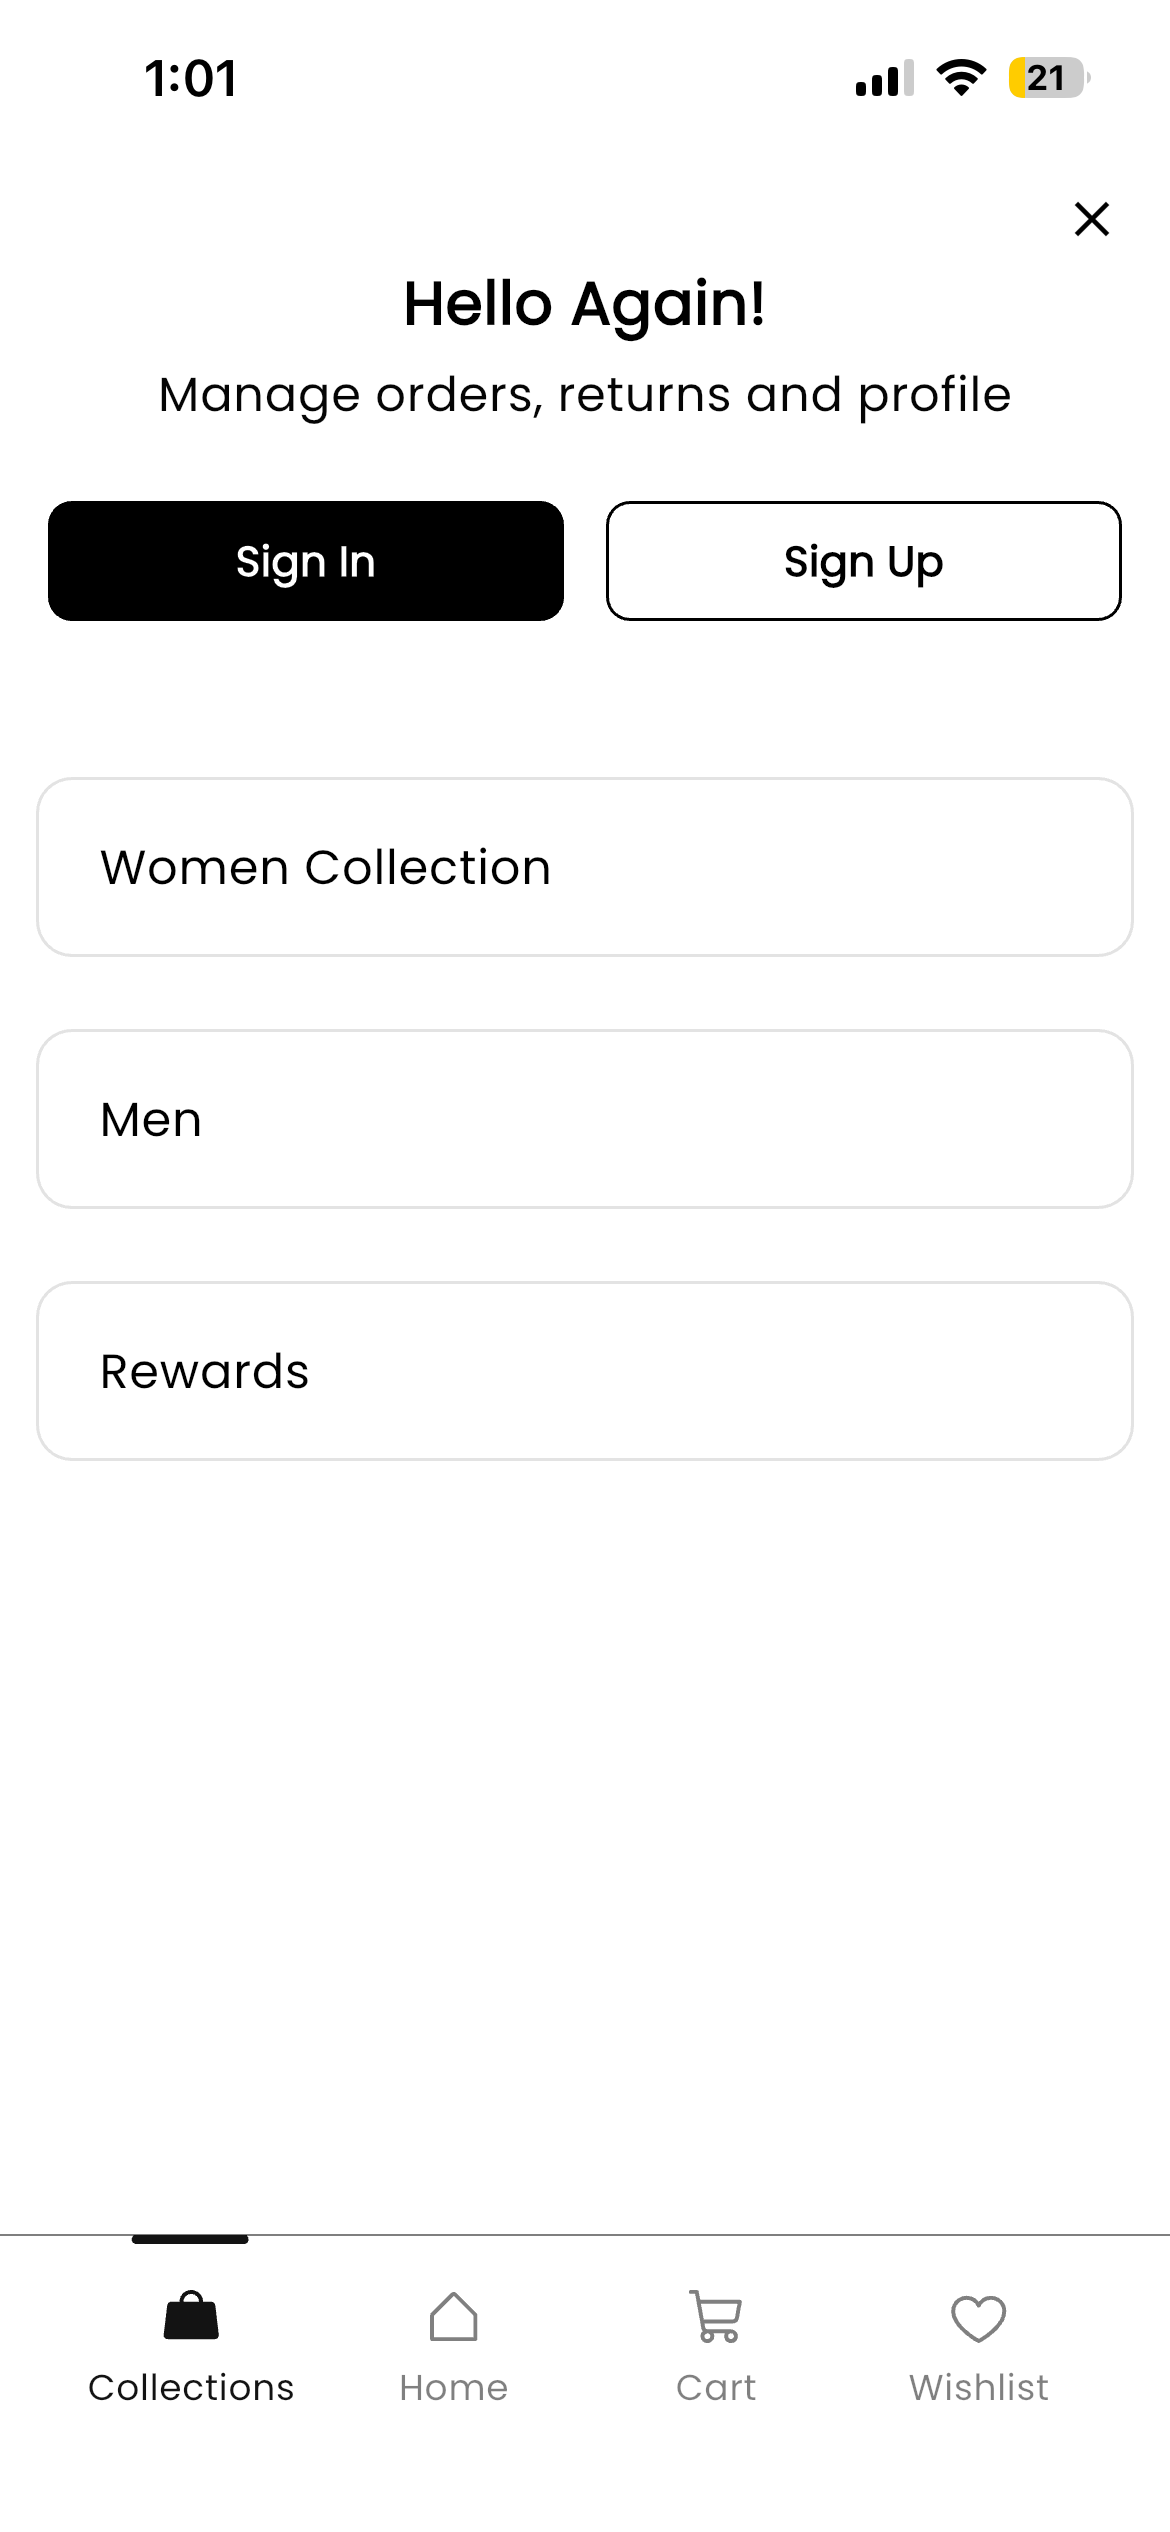 | Dark Background 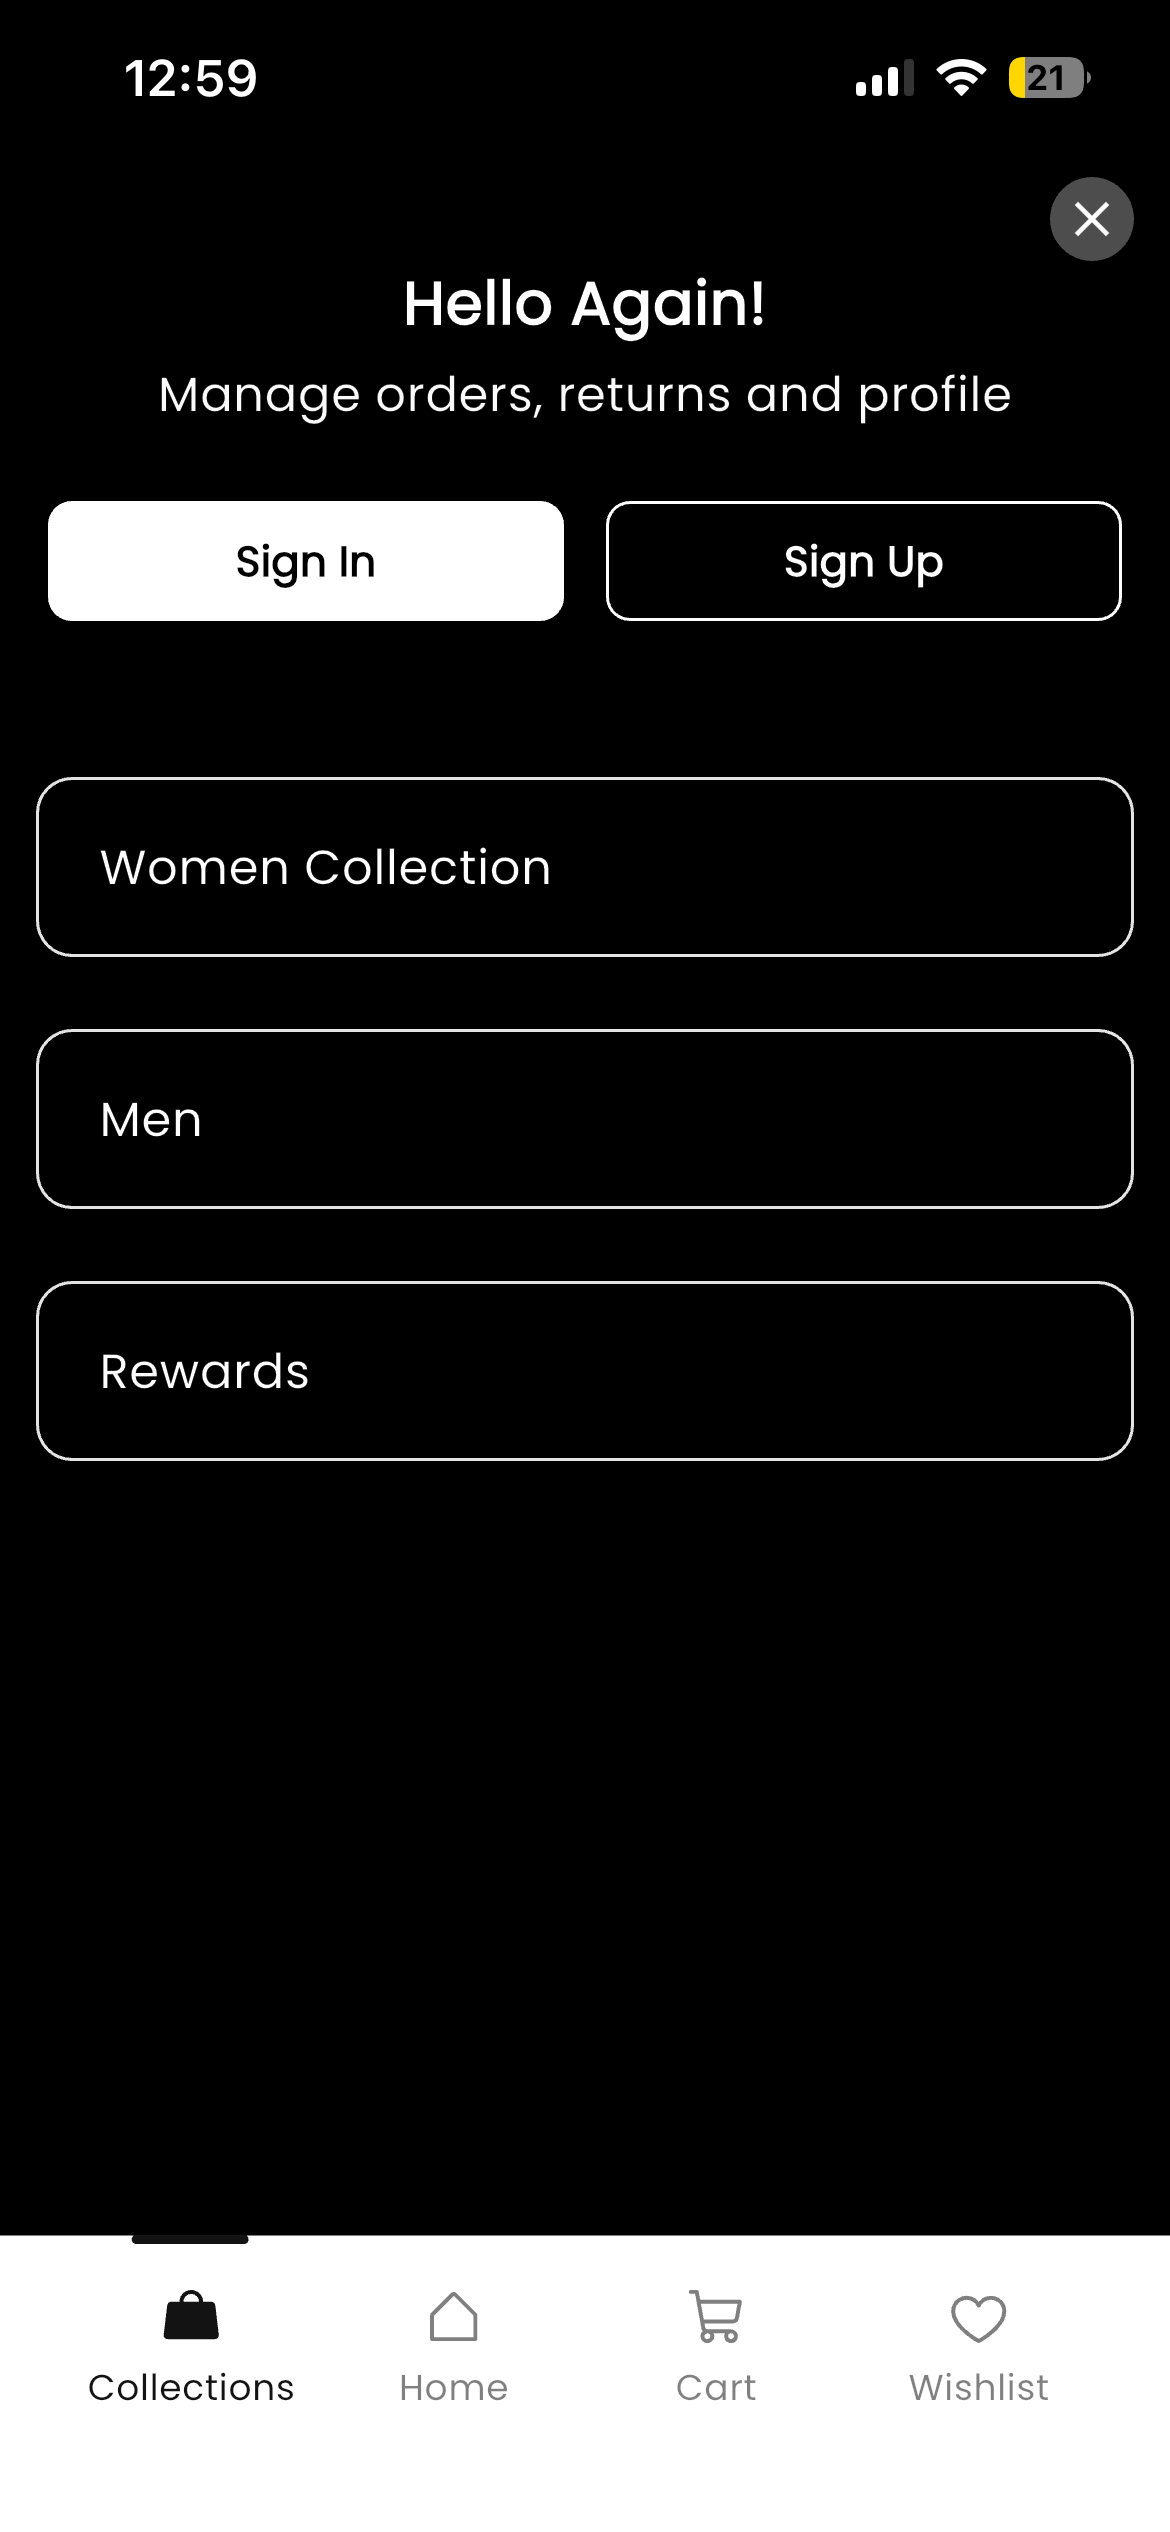 |
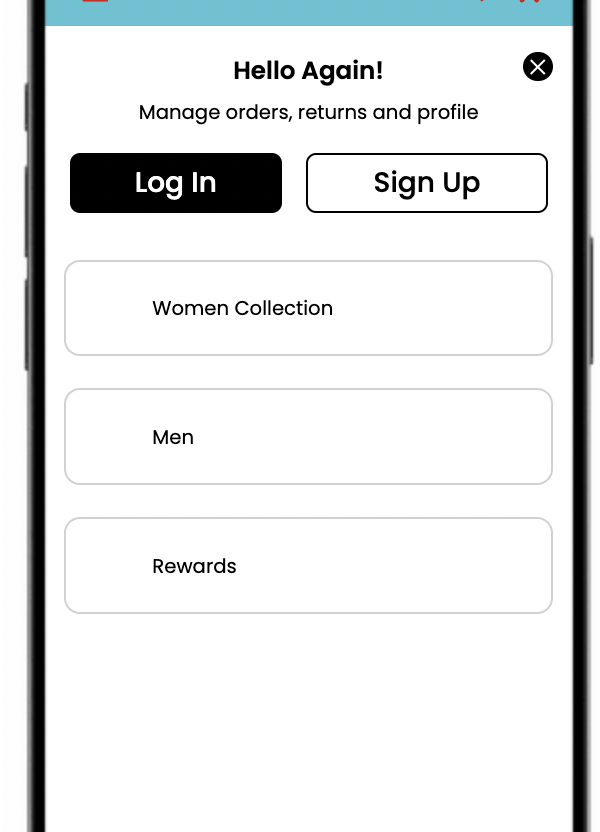
Setting up background image → The side navigation has the “Sign-up” block on top by default. We can set the background image for that block.
To have background image, Choose the options “With Image” and upload the image of your choice.
How it is on Mobile App ?
Without Background Image | With Background Image 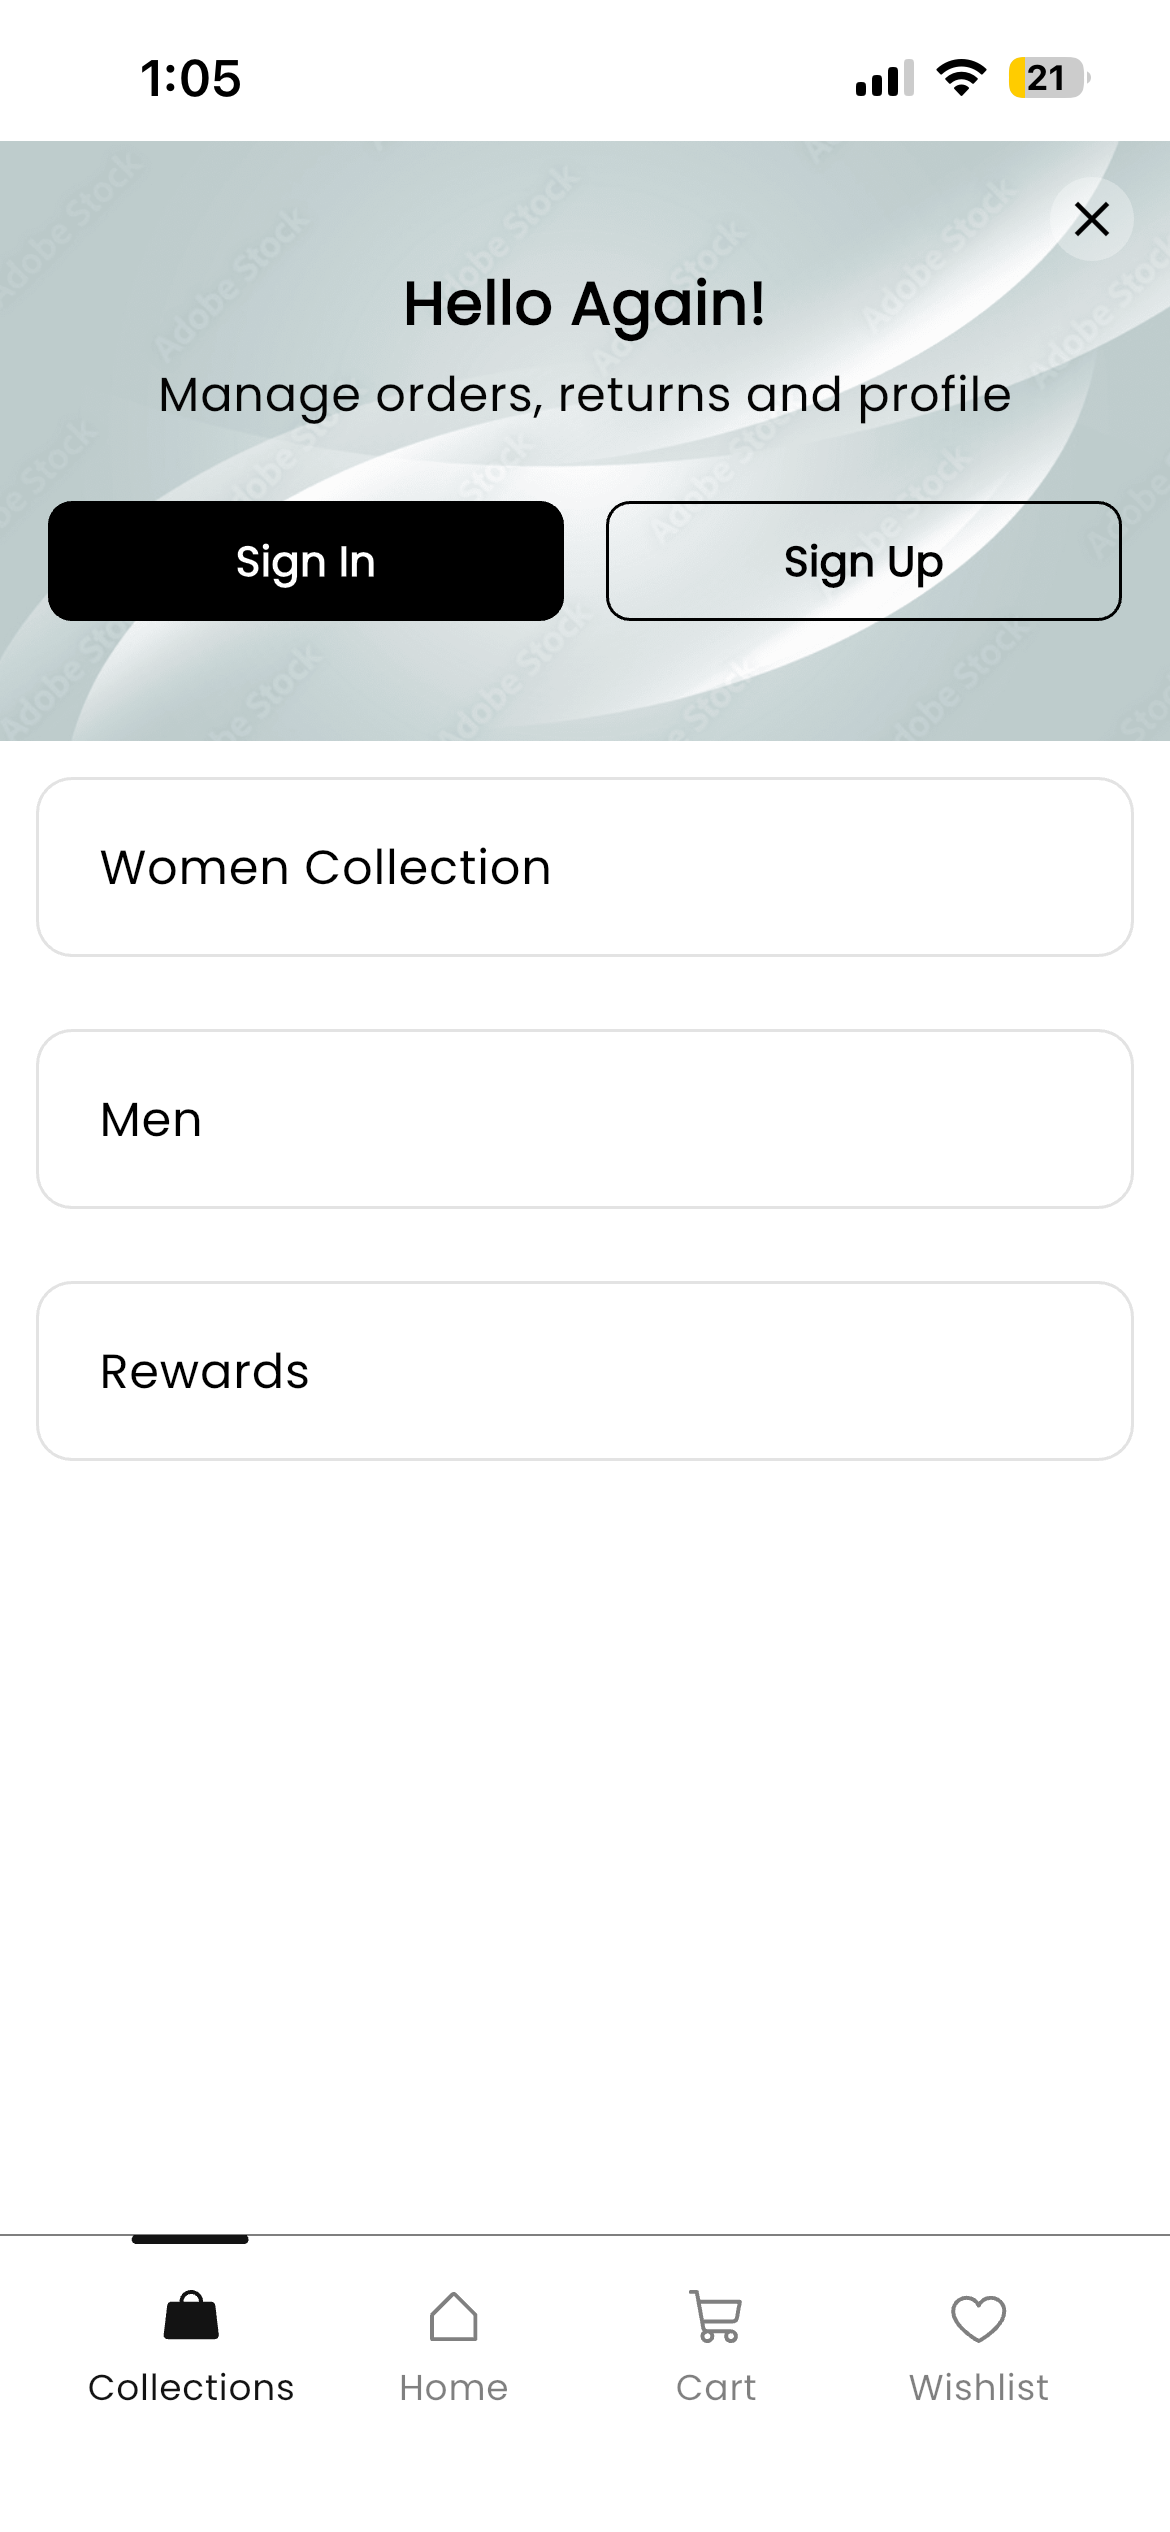 |

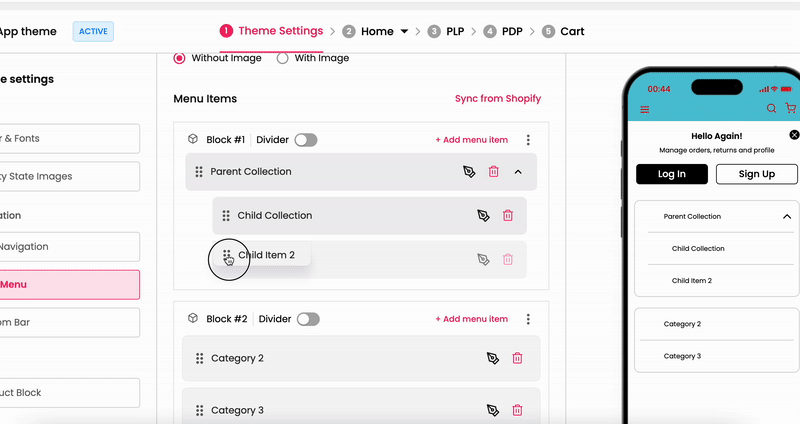
Add menu item to Side Nav
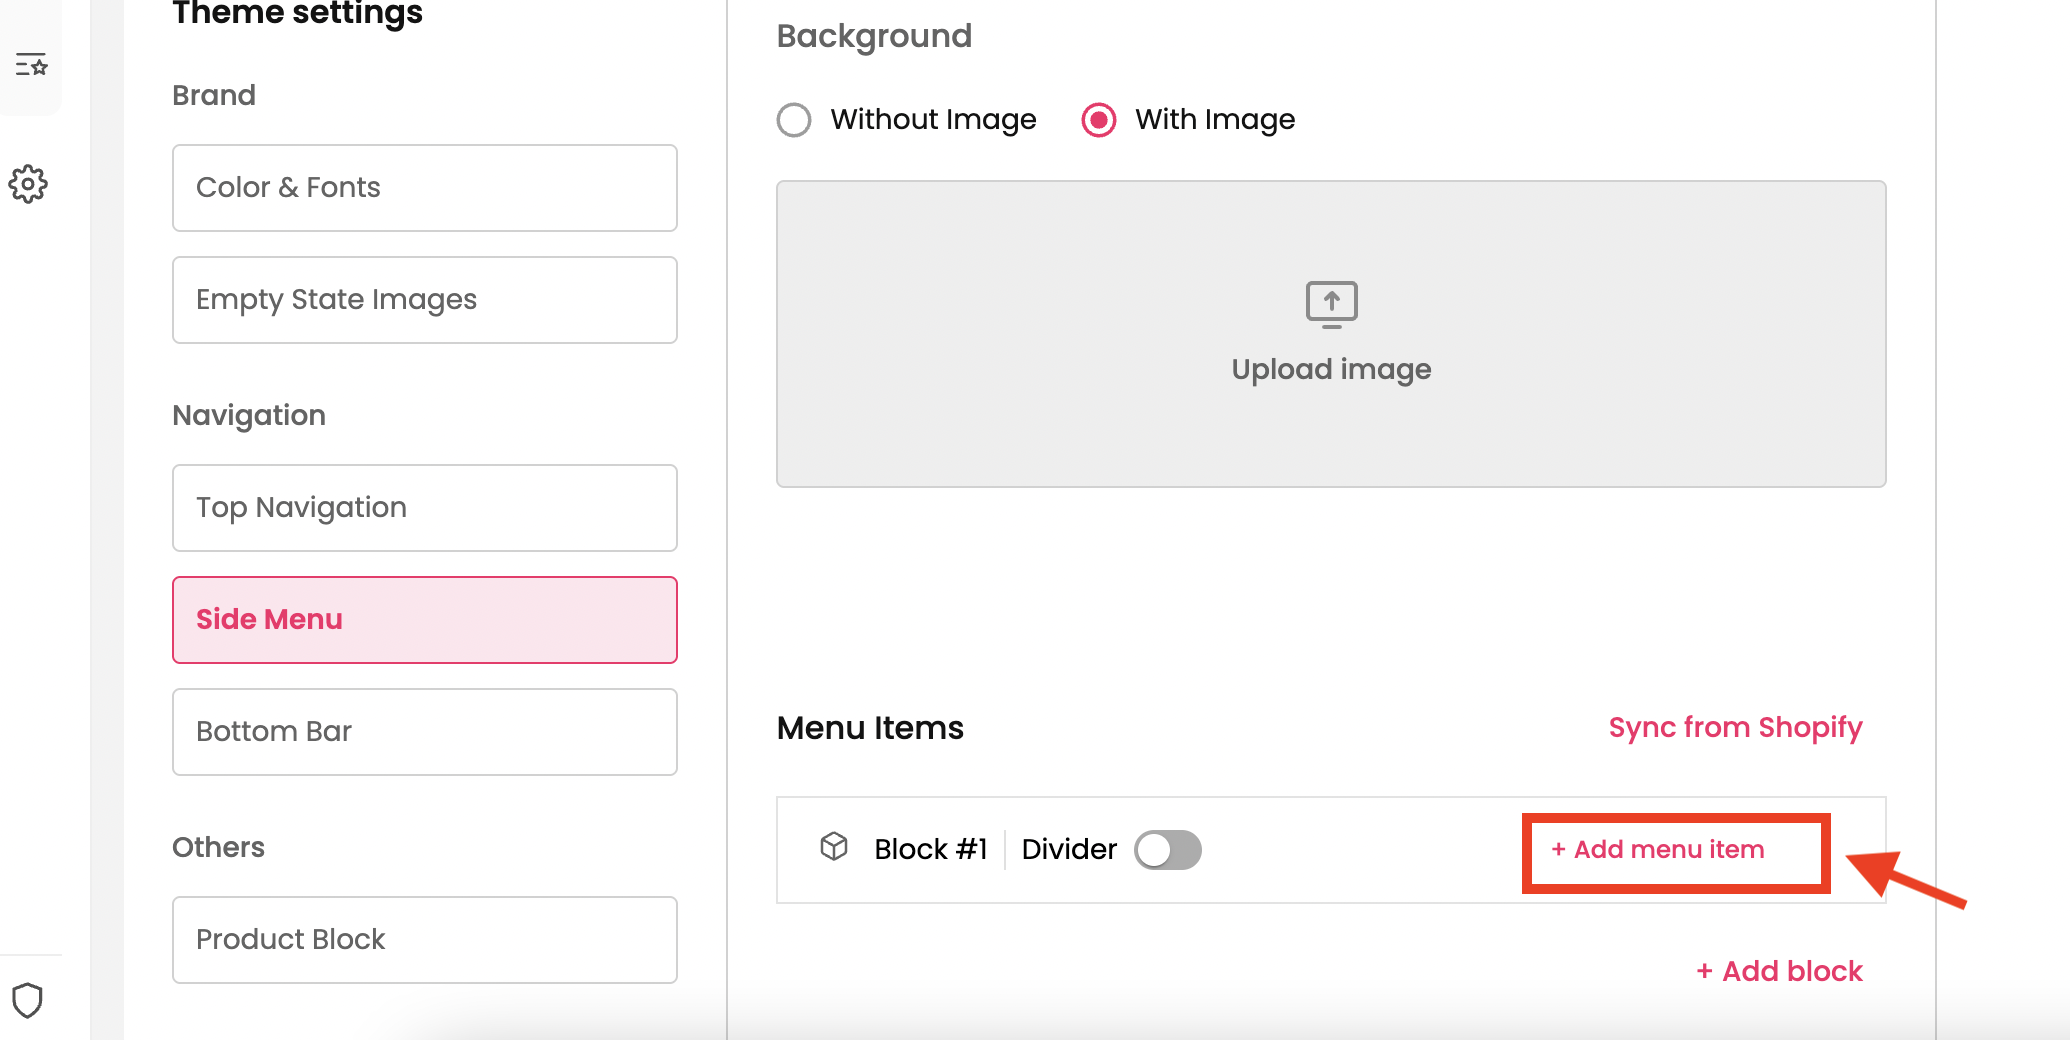
Step 1: Click on Add a block which is at the right side. A block will be added.
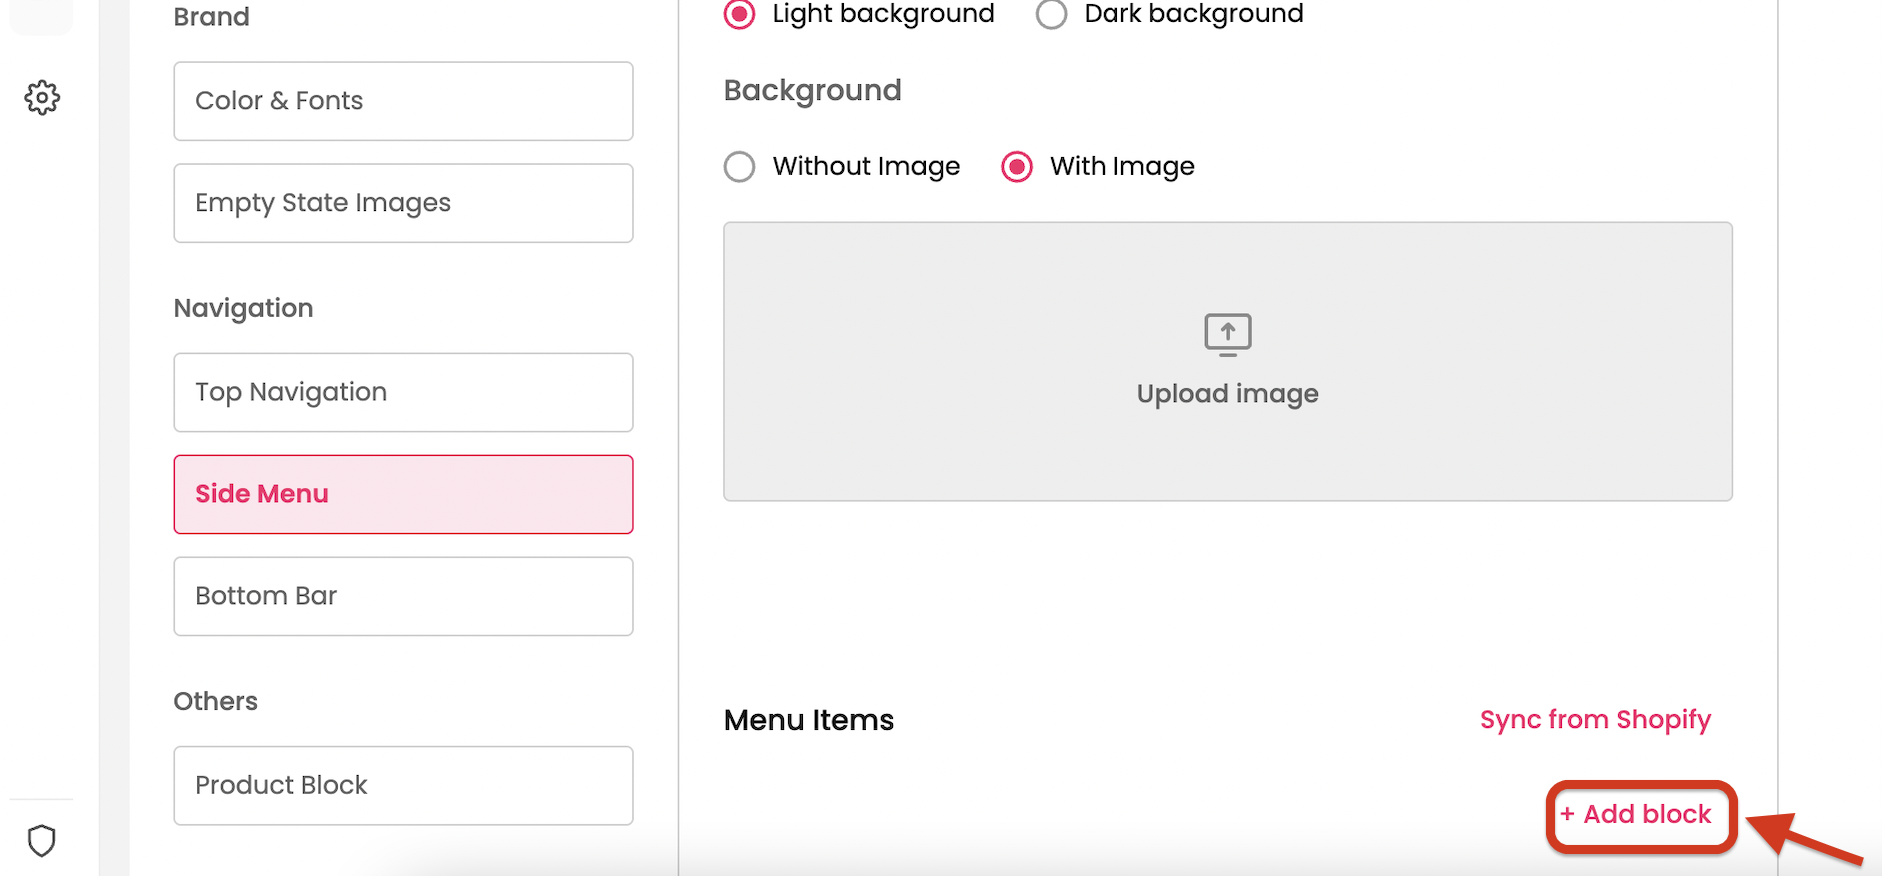
Step 2 : In that block, click on Add Menu item.
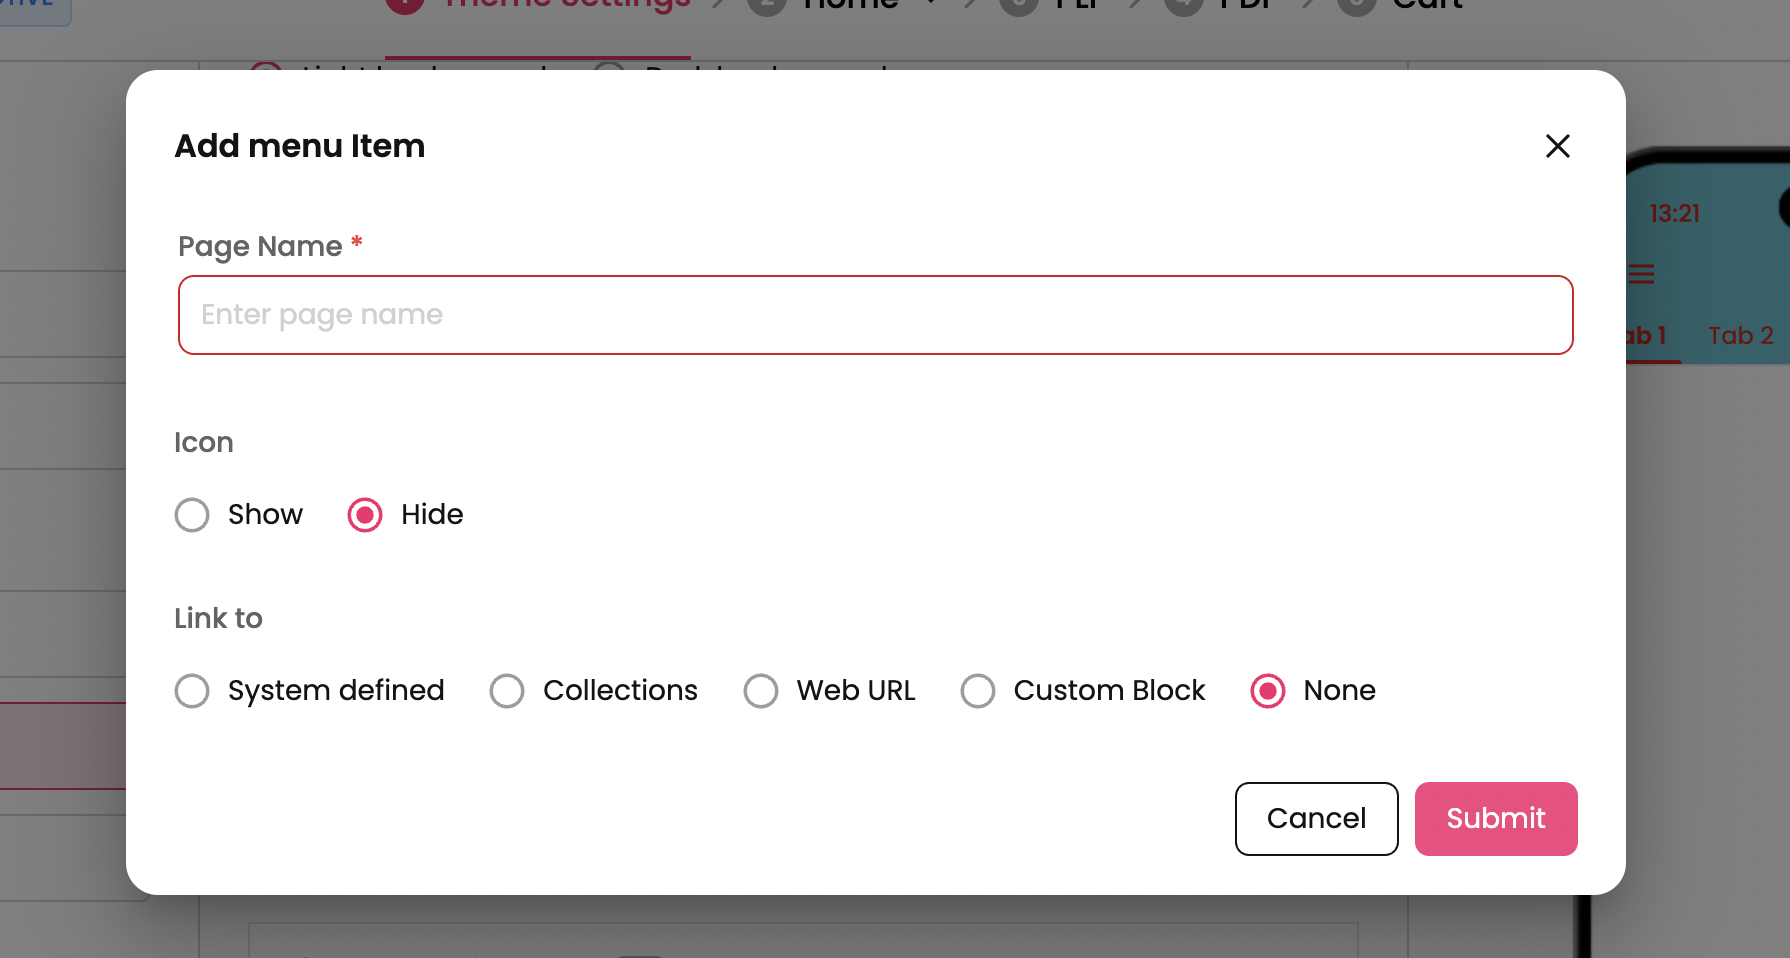
Step 3 : Provide the name, icon(optional) and redirection and click on Submit.
Your menu item is added to the navigation menu. (This is the parent menu added to the block)
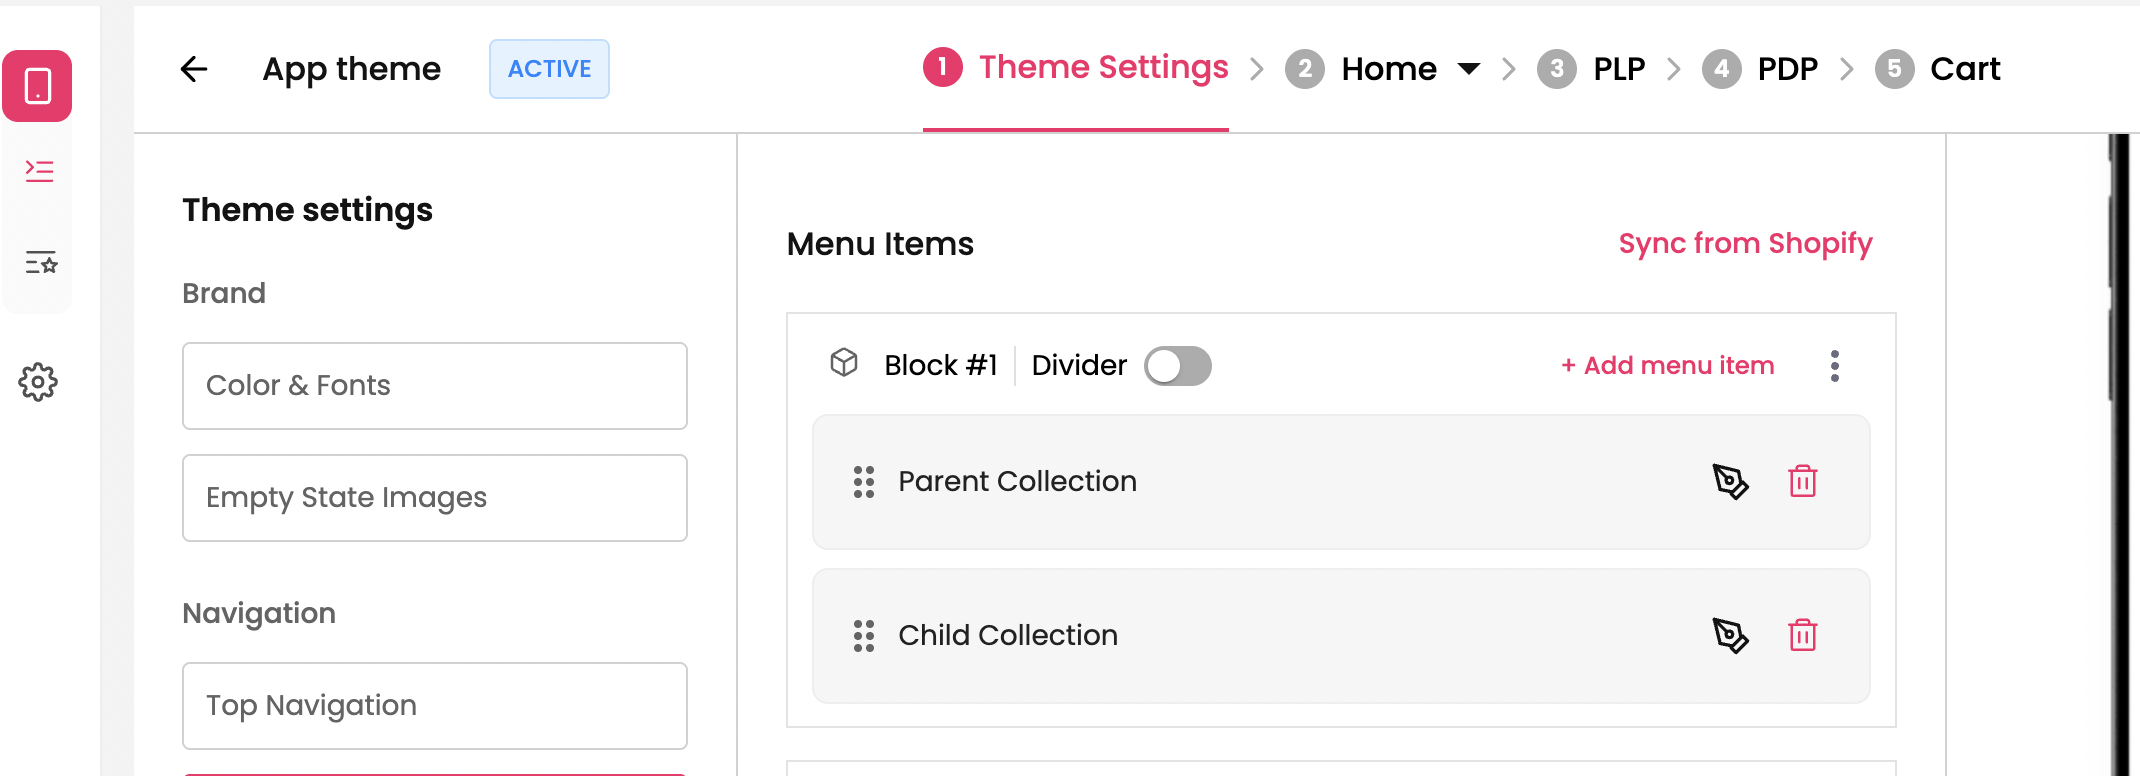
Step 4 : To add a child menu under parent (to show hierarchy), follow the same steps from Step 2 and Step 3.
Step 5 : Click on the 6 dots which is at the left of the menu item, drag it slightly towards right. the item will get added as child item within parent.
Similarly, if you want to remove it from hierarchy, hold the 6 dots of the selected menu item and drag it towards right.
Likewise, you can create as many blocks as needed and place them one below the other.
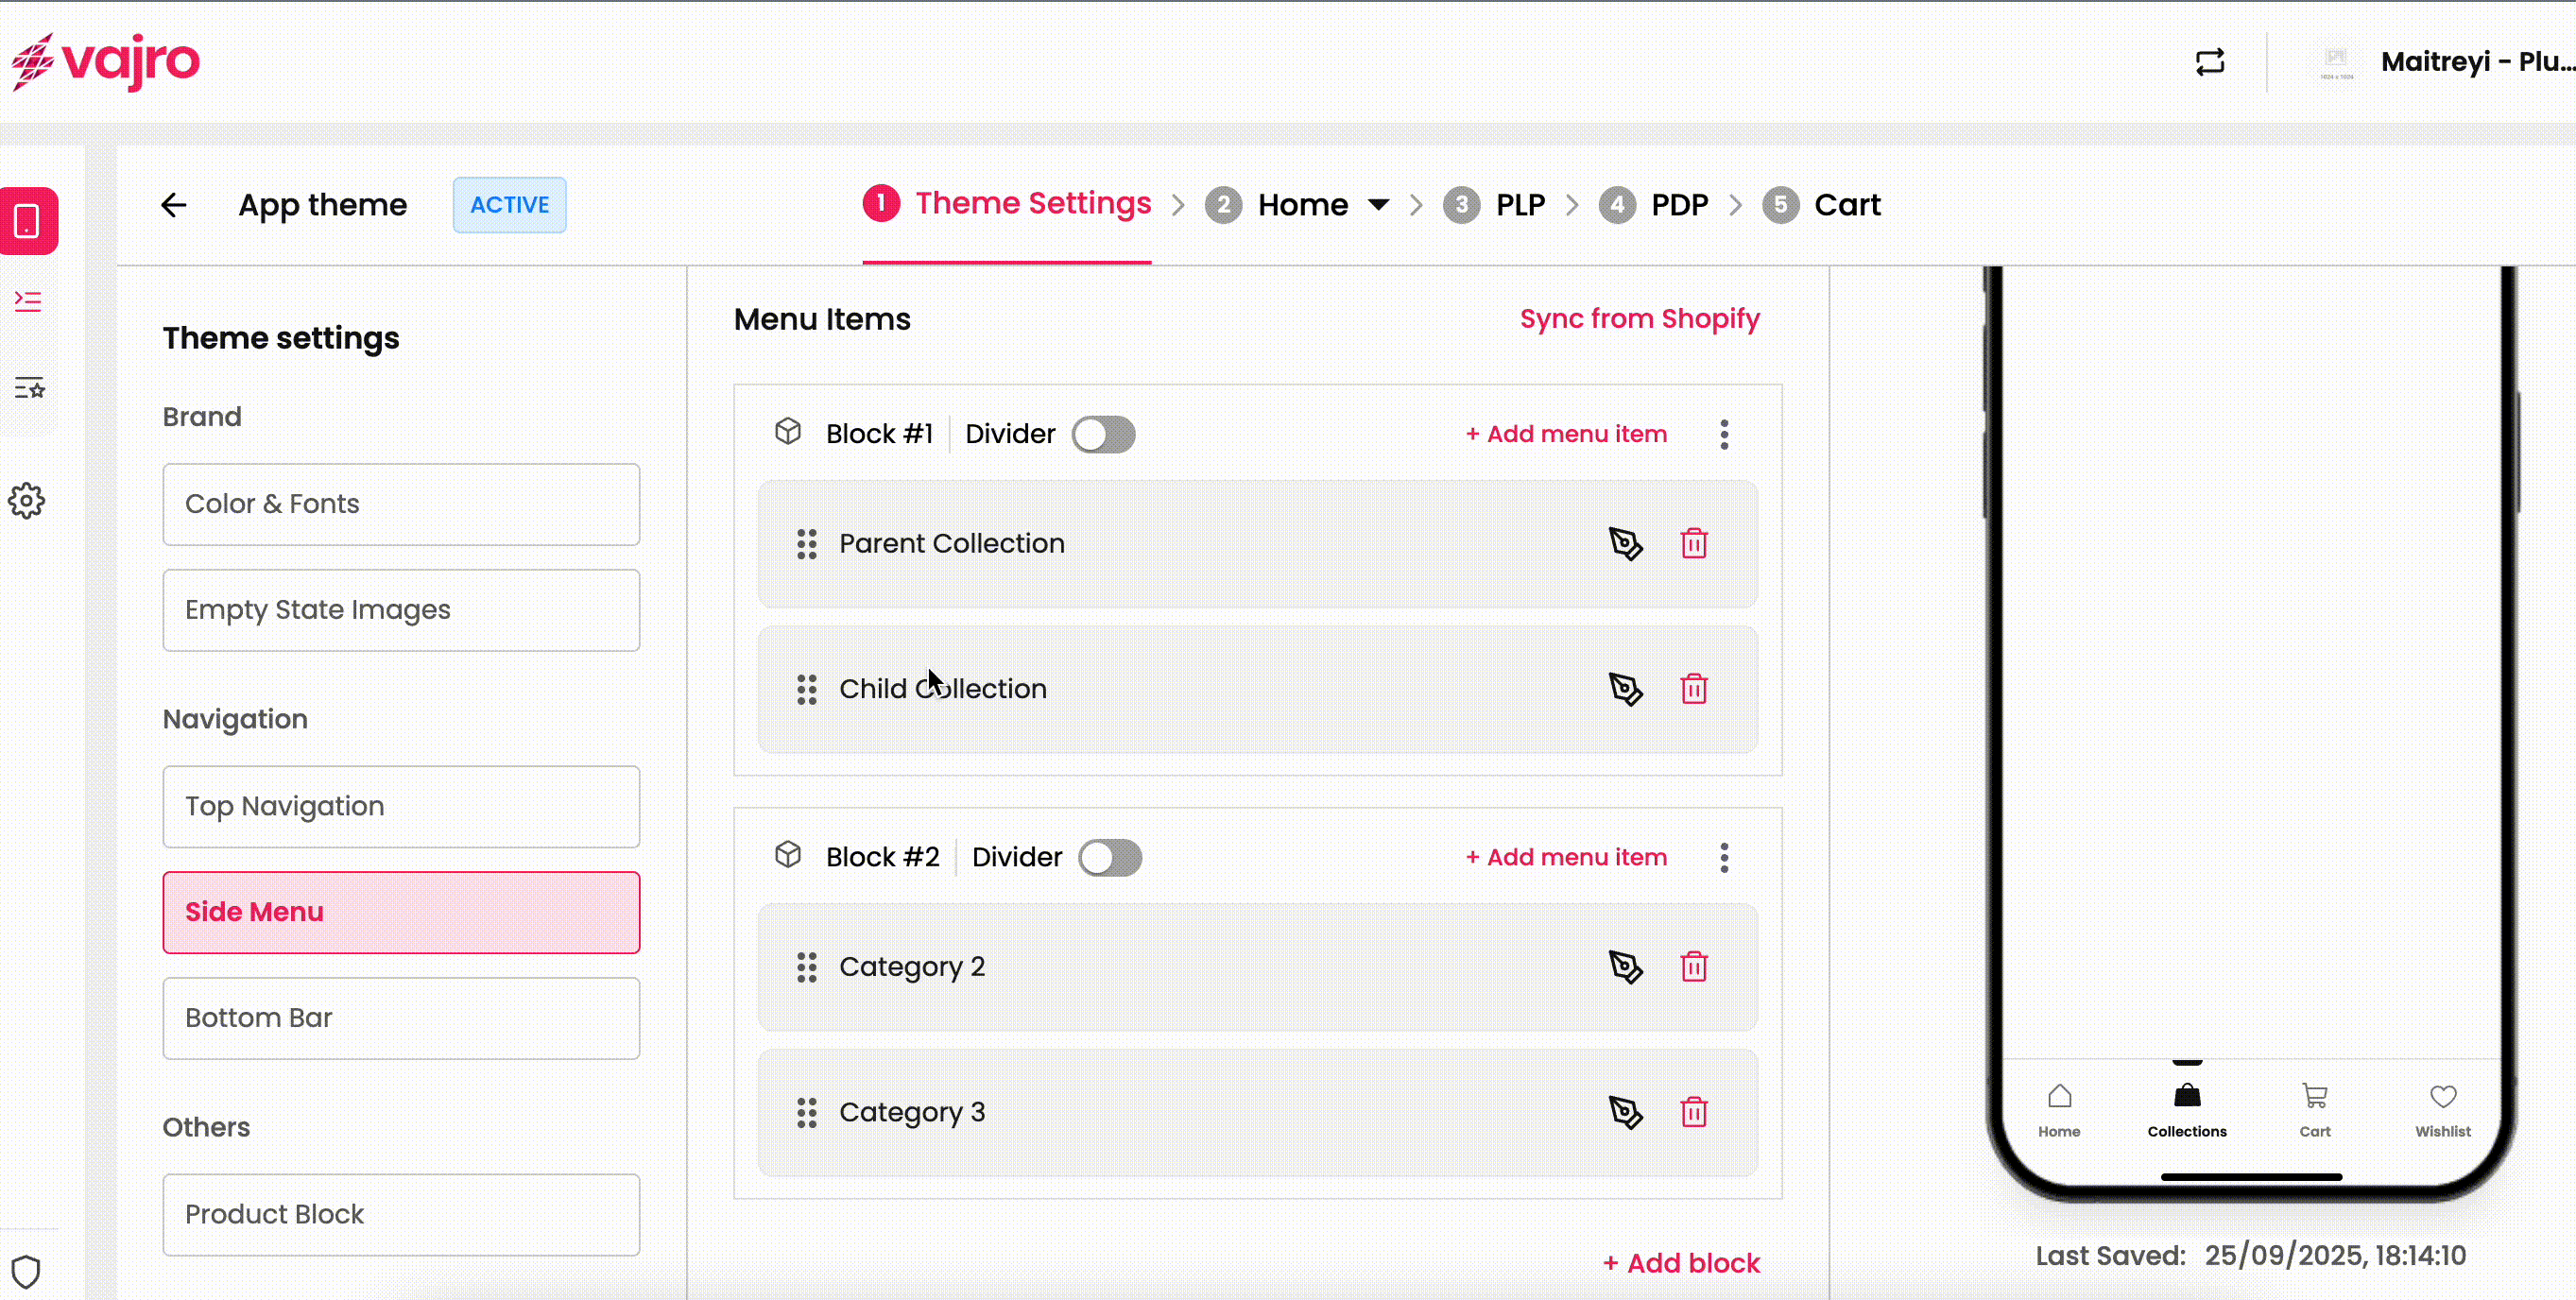
The line items within the block can be displayed with / without a separator. To show it with a separator, enable the “Divider” toggle which is on top of the block.
Edit menu item of the Side Nav
To edit any menu item of the side navigation, click on the Pen icon on the right and update the necessary changes and save.
Delete menu item of Side Nav
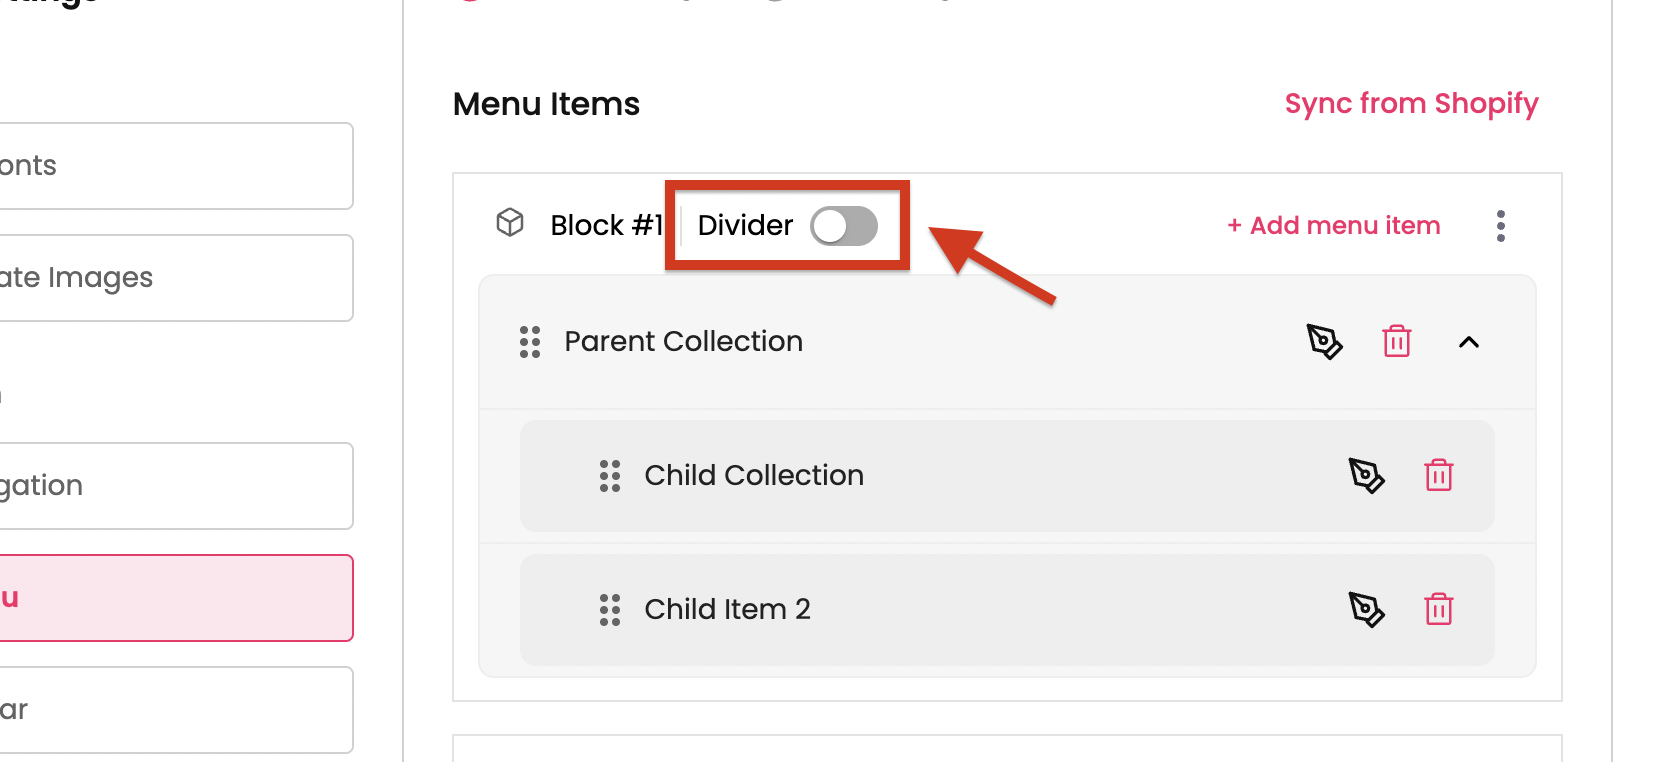
To delete any menu item of the side navigation within the block, click on the delete icon on the right.
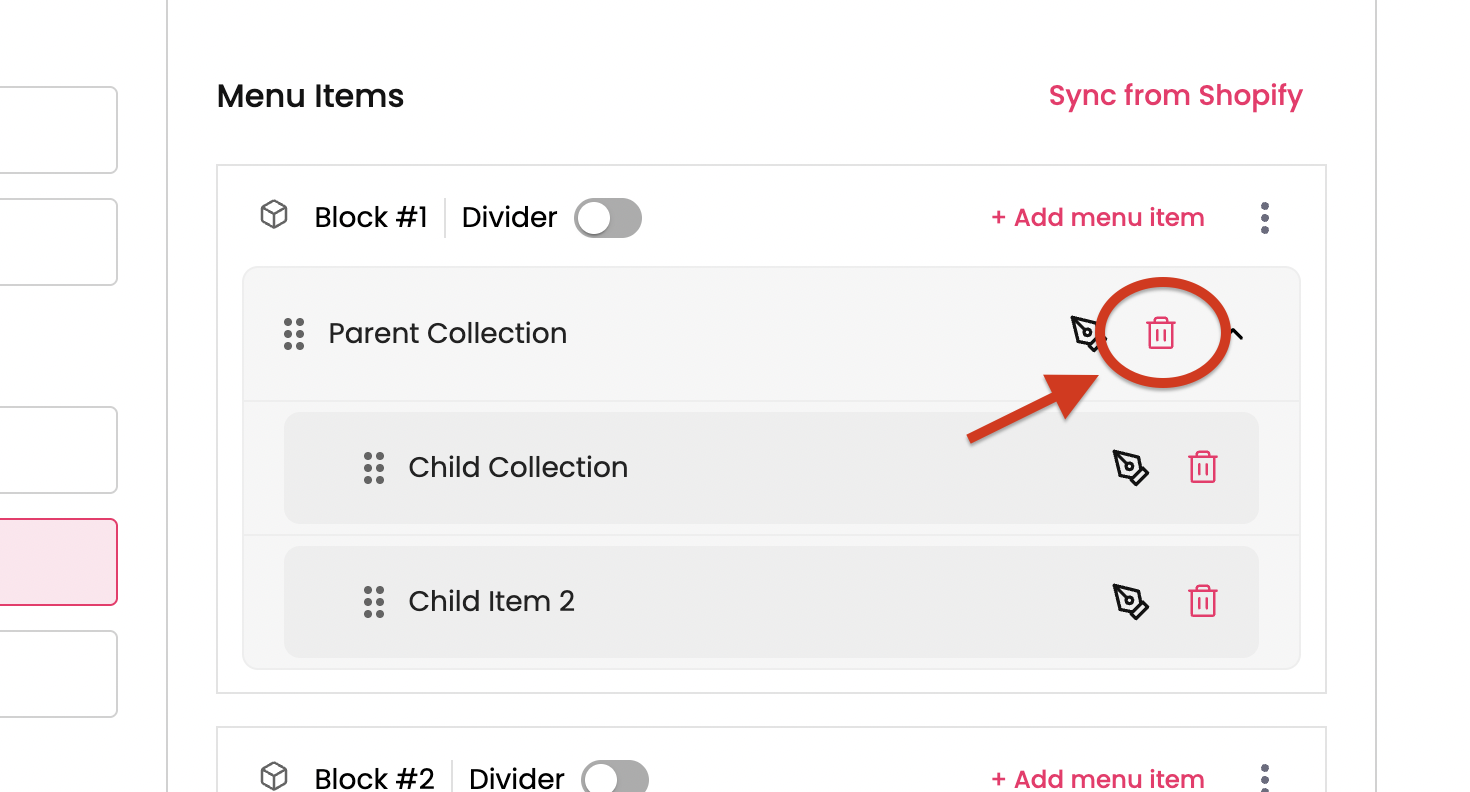
To delete an entire block, click on the 3 dots on right of the block and click on Remove Block CTA. The block will get removed from the navigation.
Rearrange menu items of Side Nav
To re-arrange the menu items within the block, click on the 6 dots and drag and drop to the desired position.
Note: You’ll not be able to rearrange the entire block.
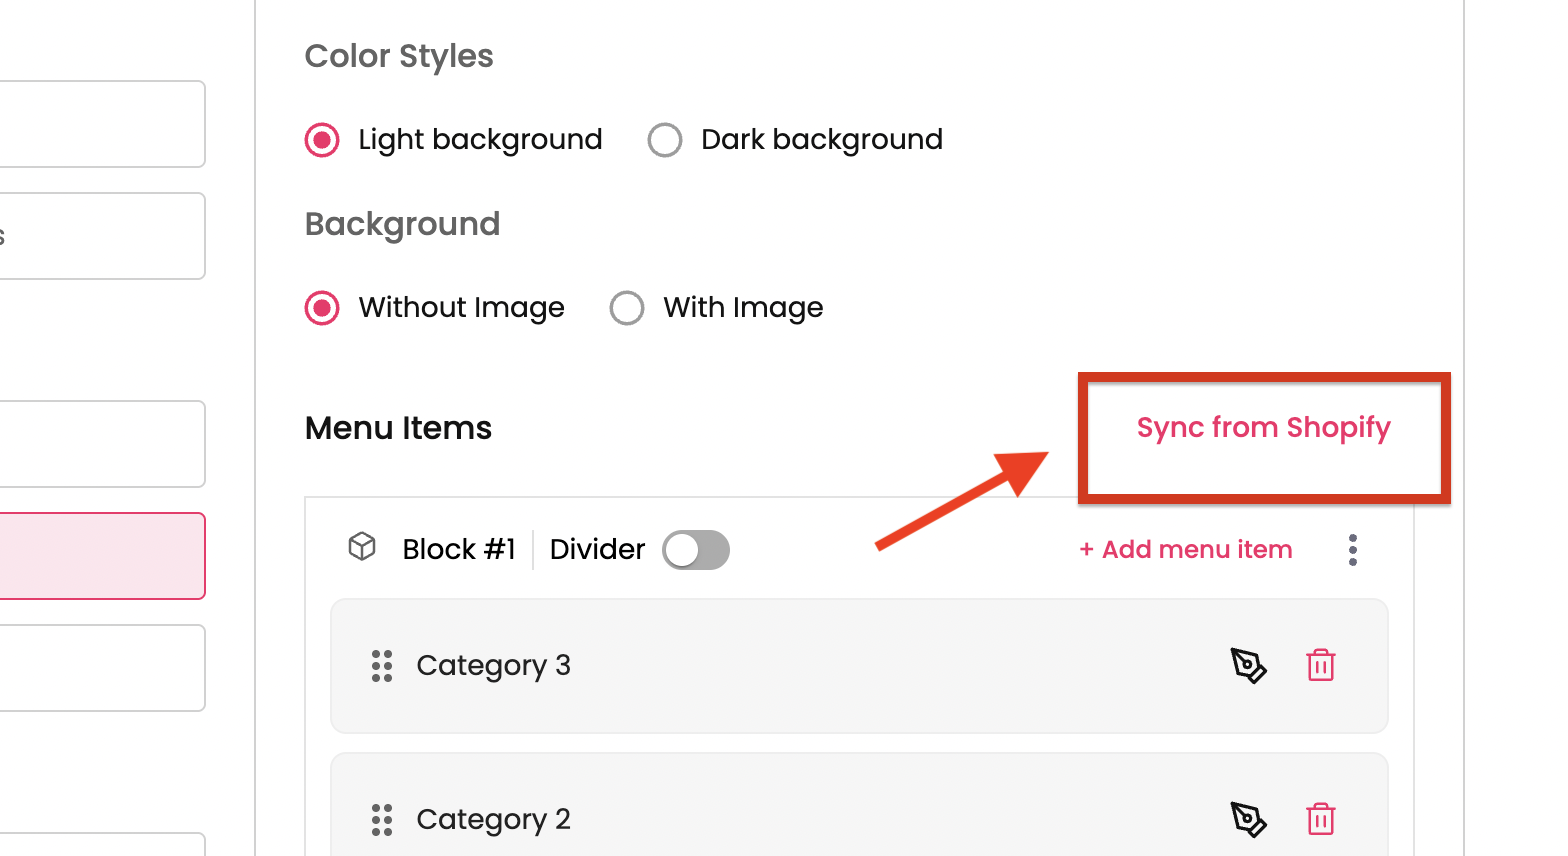
If you want to have same menu items as on on your website, there is no need to add menu items one by one.
You can have the same menu from Shopify by syncing it to the mobile app.
How to Sync?
Click on the “Sync from Shopify” on the right side of the menu.
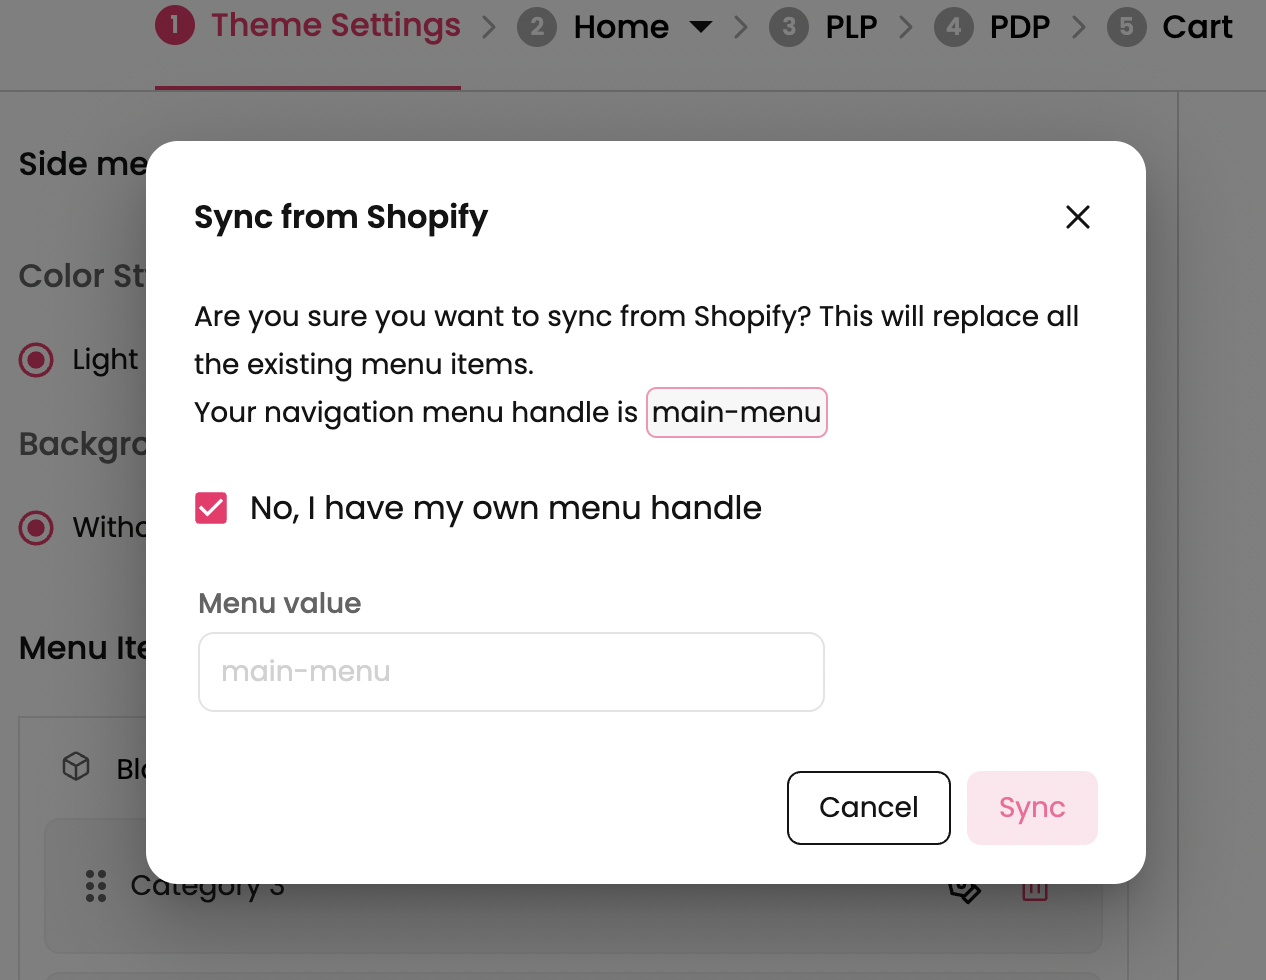
By default, the items from navigation menu handle “main-menu” will be synced to the app.
If you want to sync some other menu, click on the checkbox and provide the Shopify handle of the navigation menu and click on Sync.
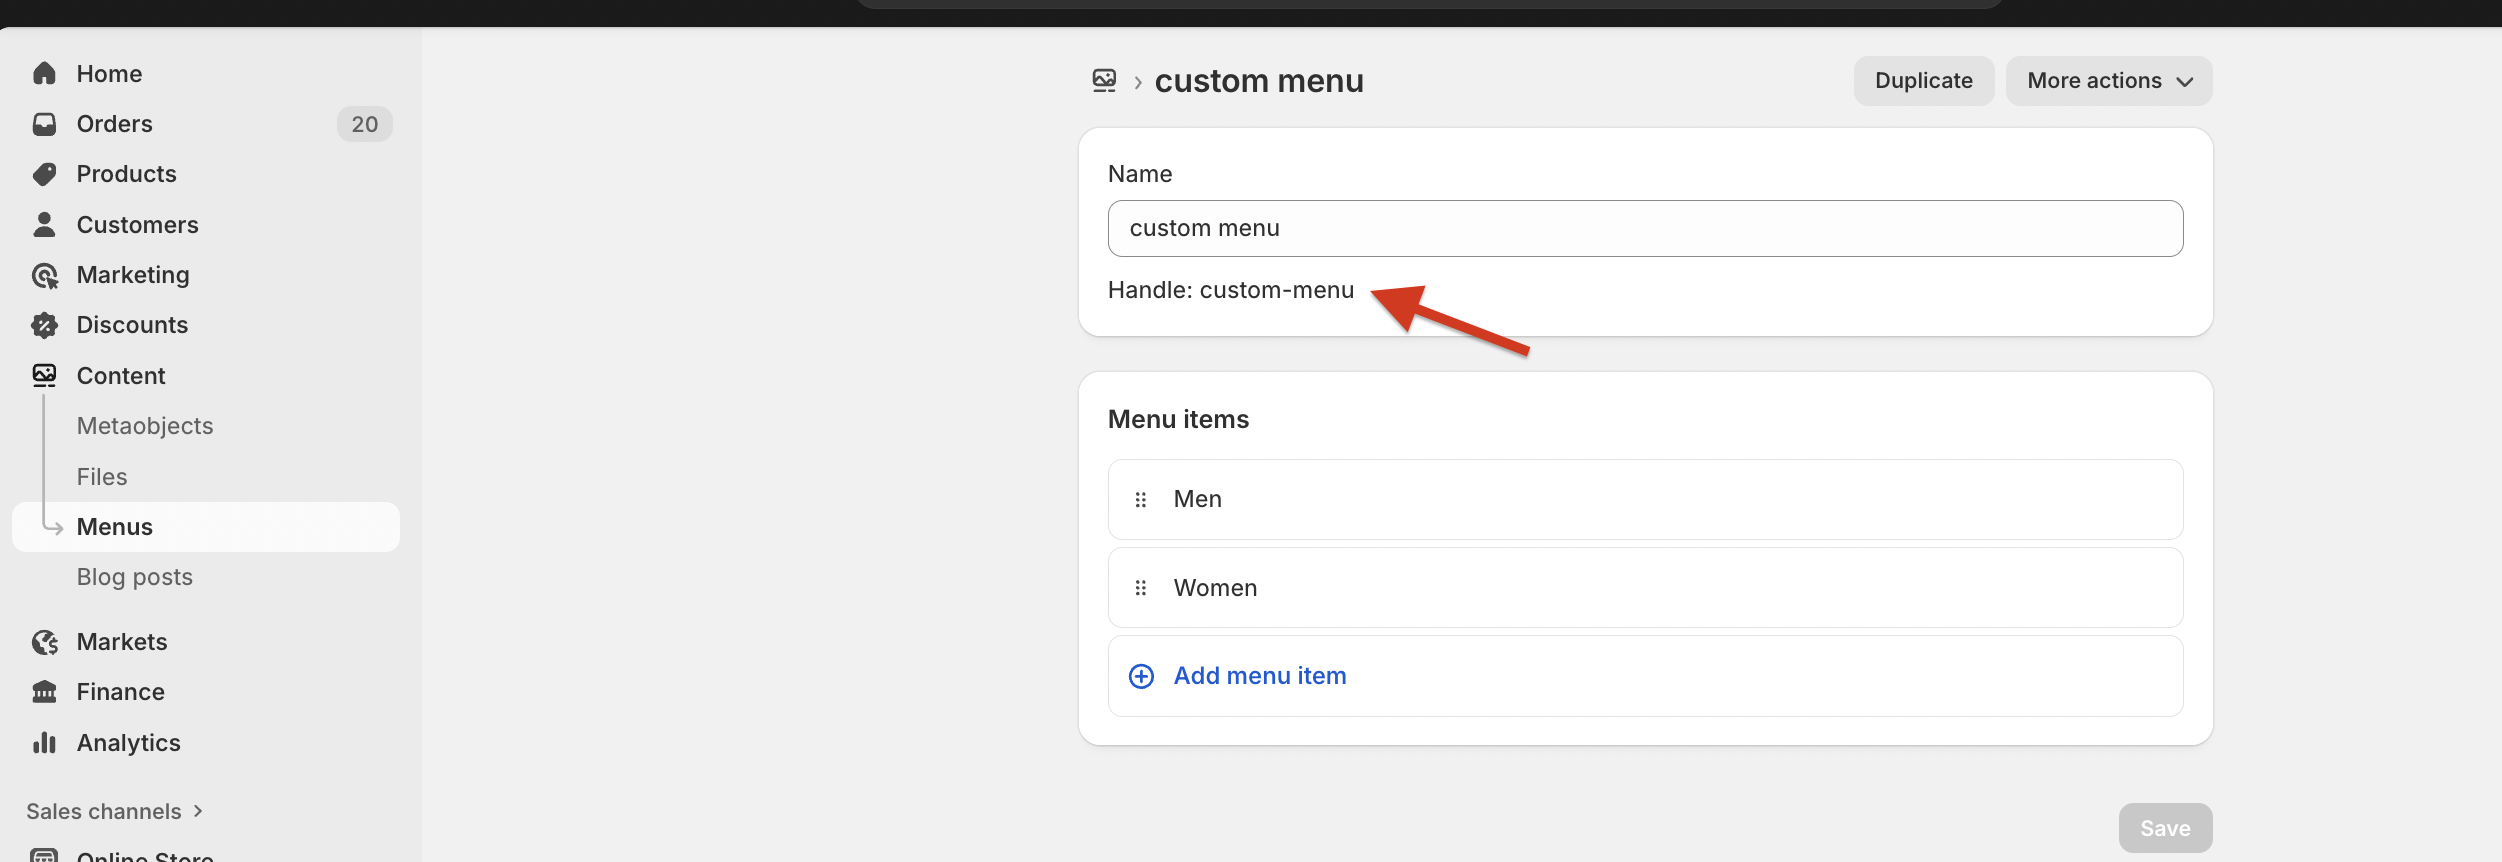
How to get Navigation menu handle from Shopify?
Step 1 : Open your store on Shopify.
Step 2 : Navigate to Content → Menus and click on the menu you want to sync on the mobile app.
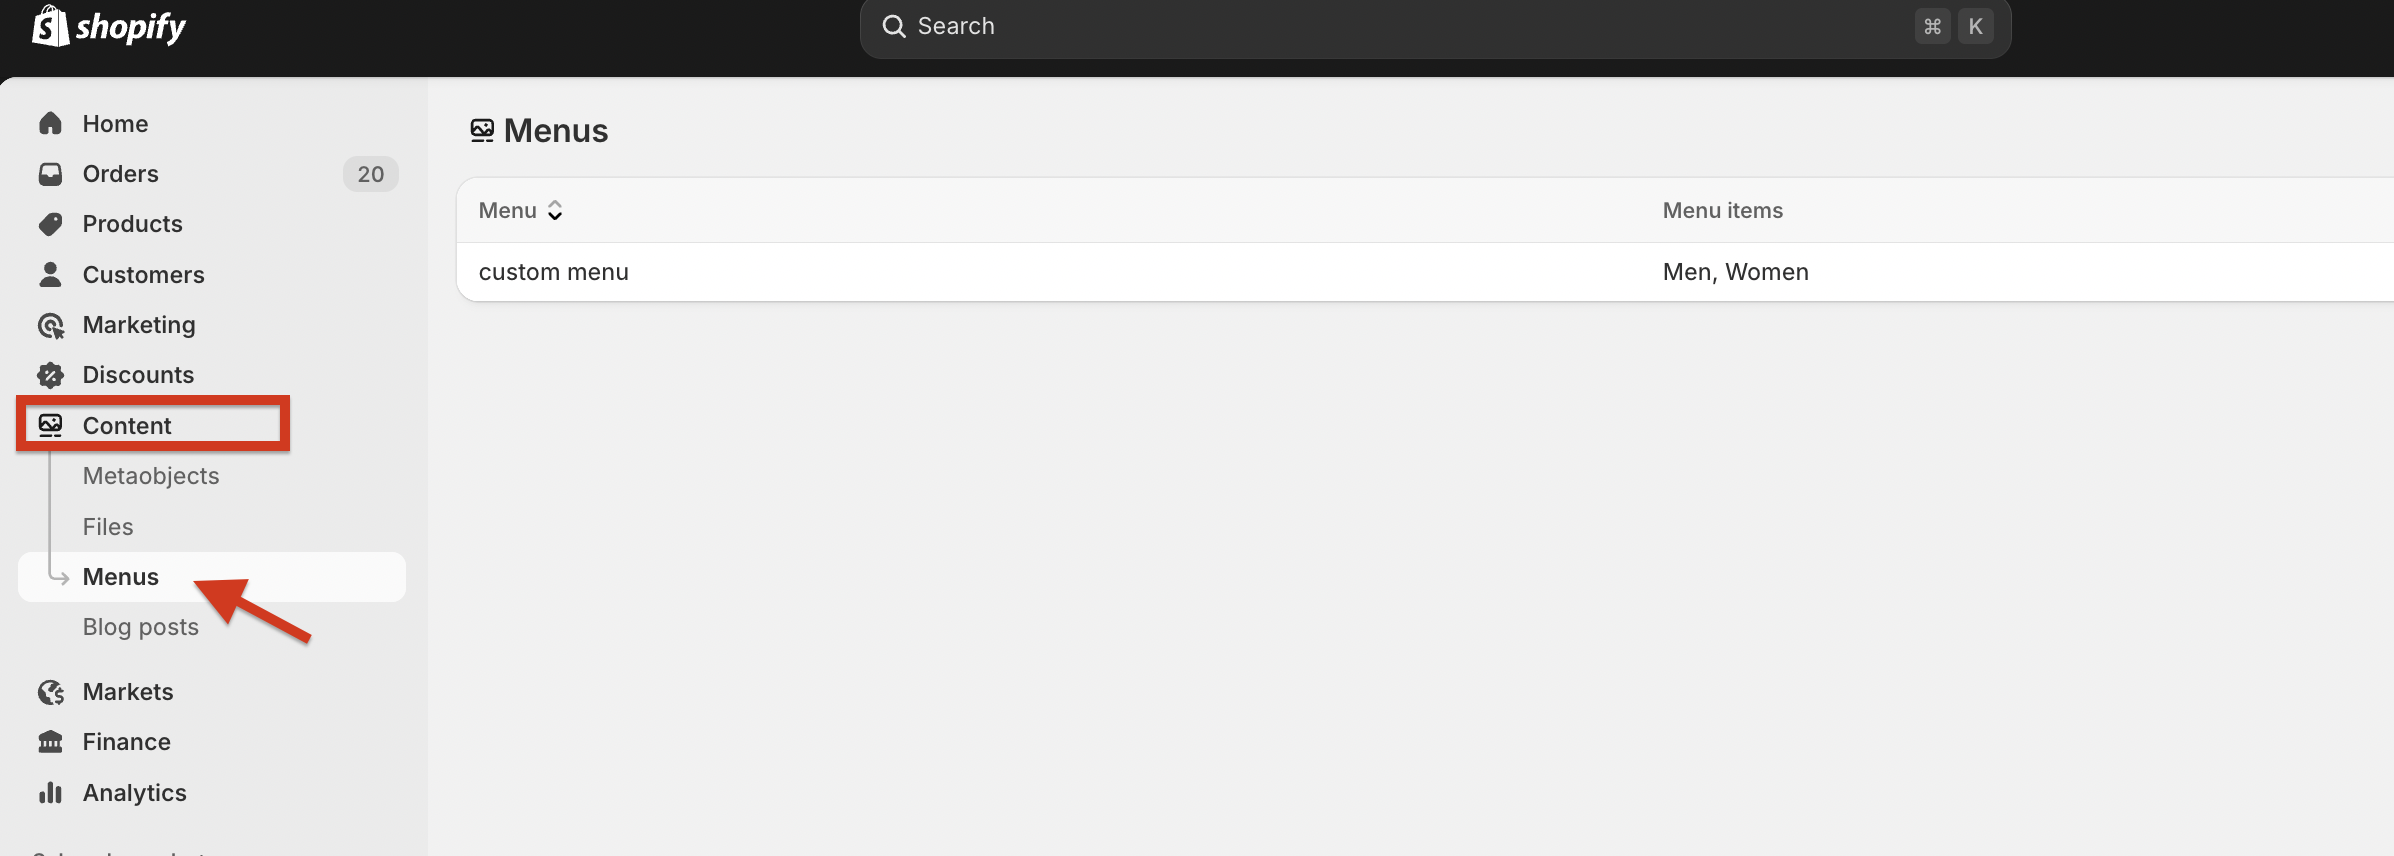
Step 3 : Provide the handle name displayed under the menu on the dashboard.