There are two ways to set up a Firebase account:
Default (Superfans-created): A Firebase account is created by us ([email protected]). To get access, contact our support team.
Migration/existing setups: If you already have a Firebase account, add the details in your Superfans dashboard and enable it.
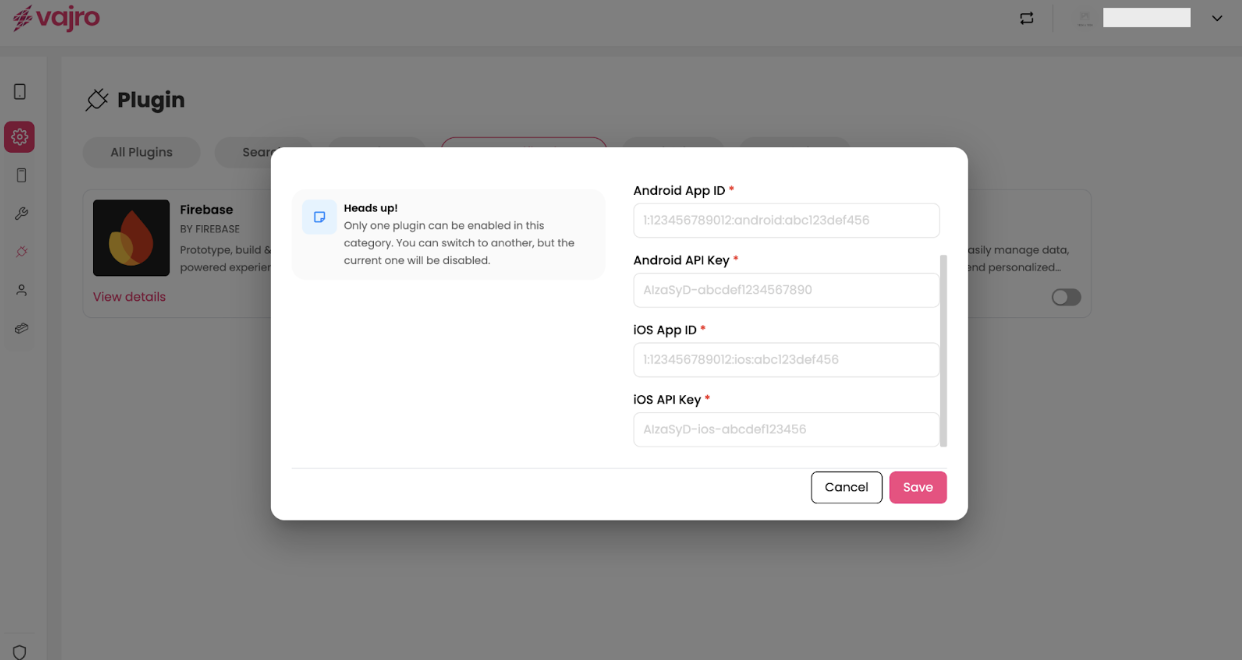
Step 1 : Log in to your Superfans dashboard and go to Settings > Plugins.
Step 2 : Under the Search category, select Firebase and toggle it on.
Step 3 - Paste the Project name, Project number, Android App ID, Android API key, iOS App ID & iOS API Key in the dialogue box, and click on Save & Enable plugin.
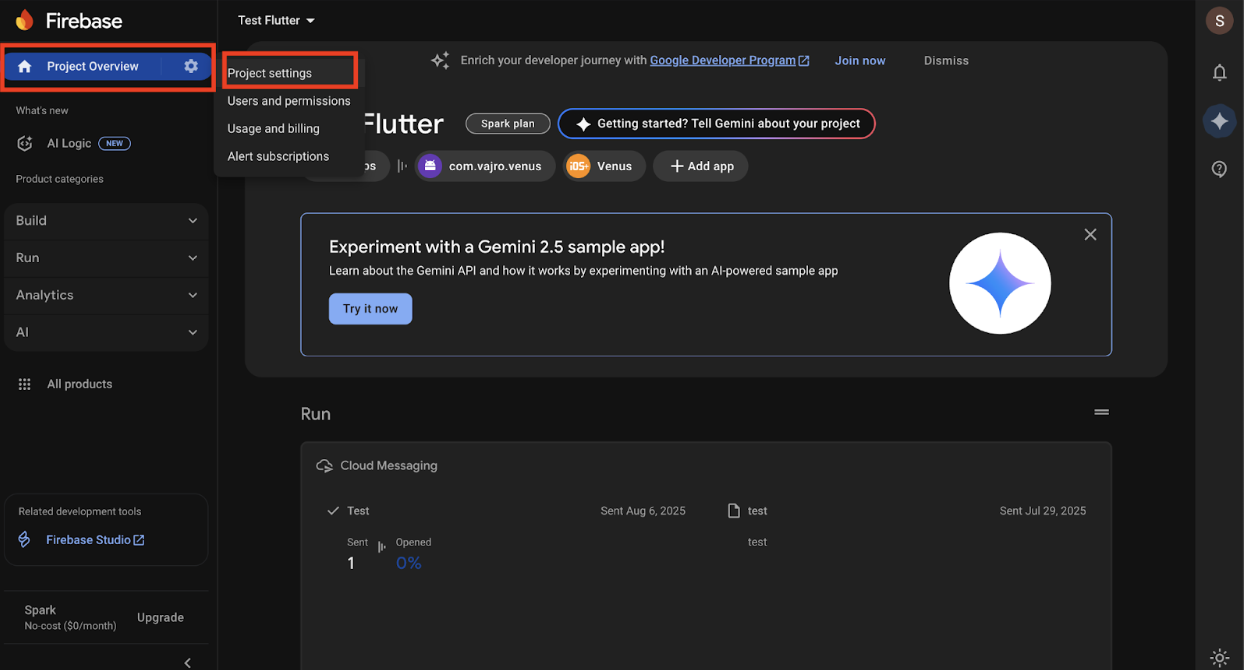
Open the Firebase Console, navigate to the Project Overview, and click on Project Settings.
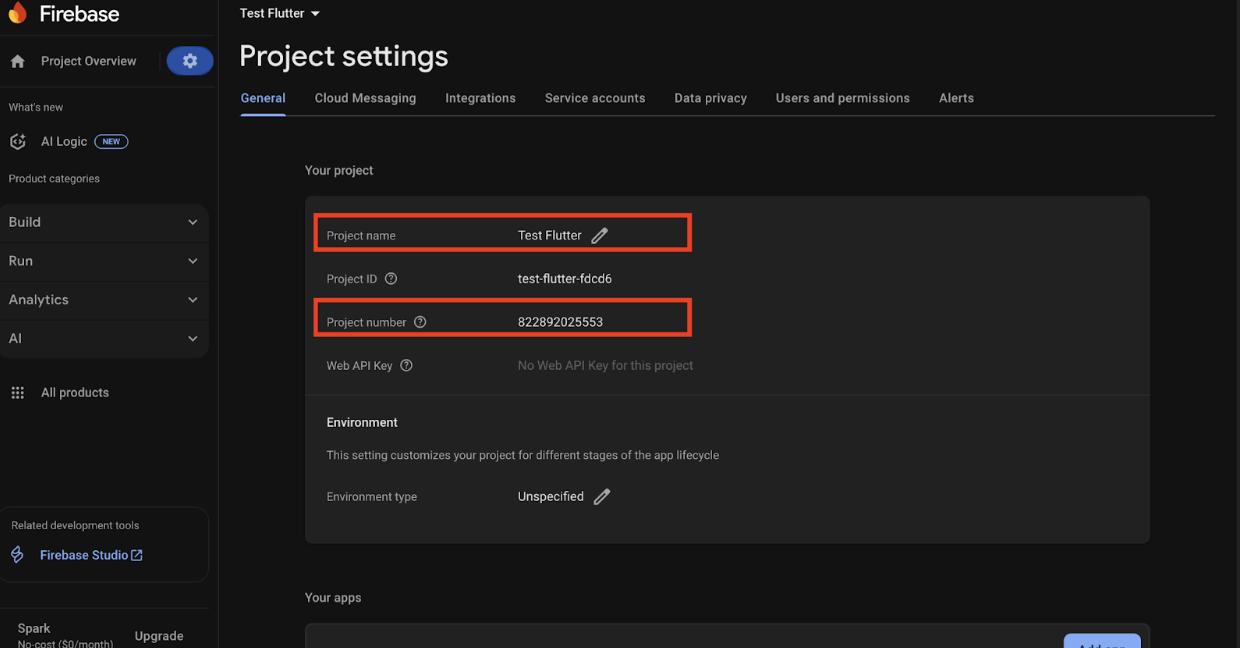
Under the General tab, copy the Project Name and Project Number.
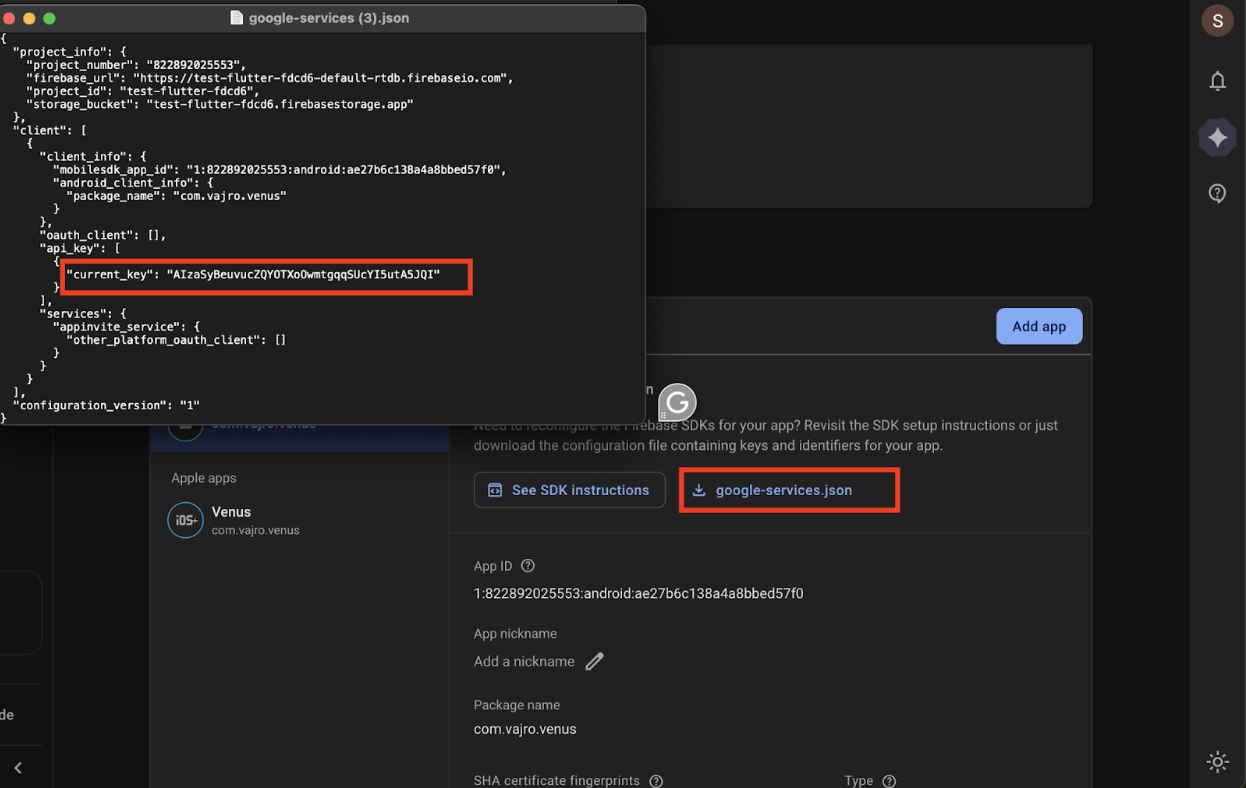
Under the Your Apps section, click on the Android apps, and copy the Android App ID.
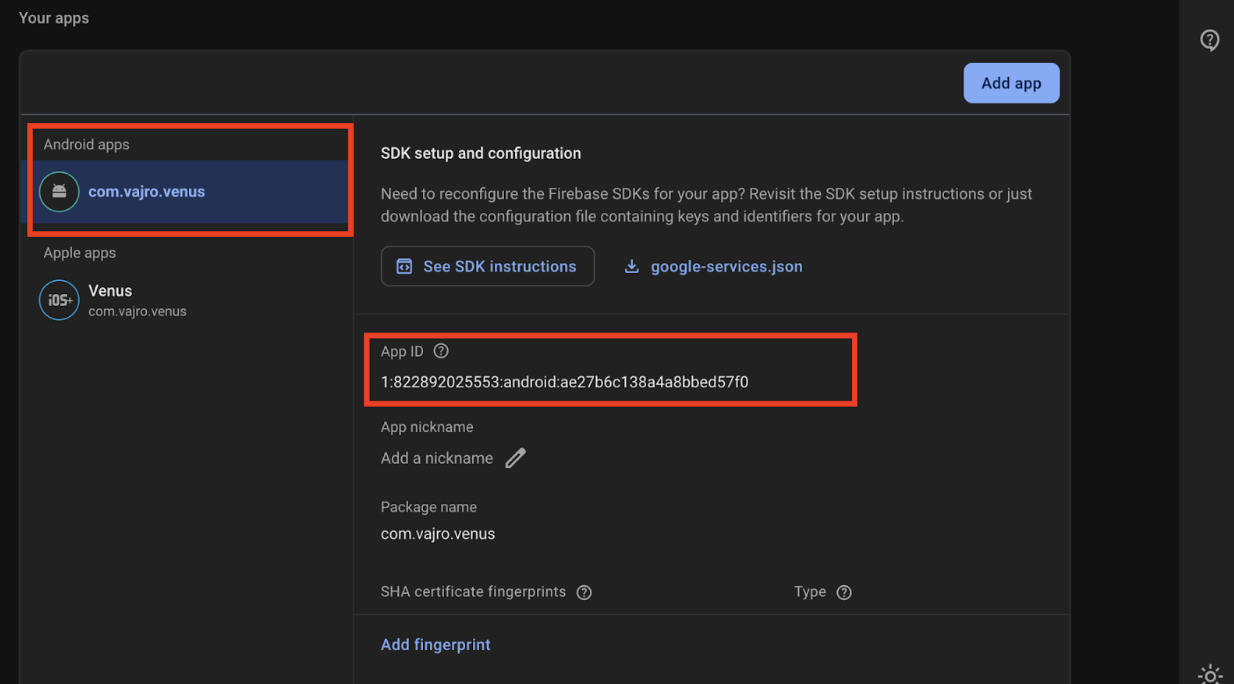
Download the google-services.json file, and copy the current_key.
Where to get iOS details?
Under the Your Apps section, click on the Apple apps, and copy the App ID.
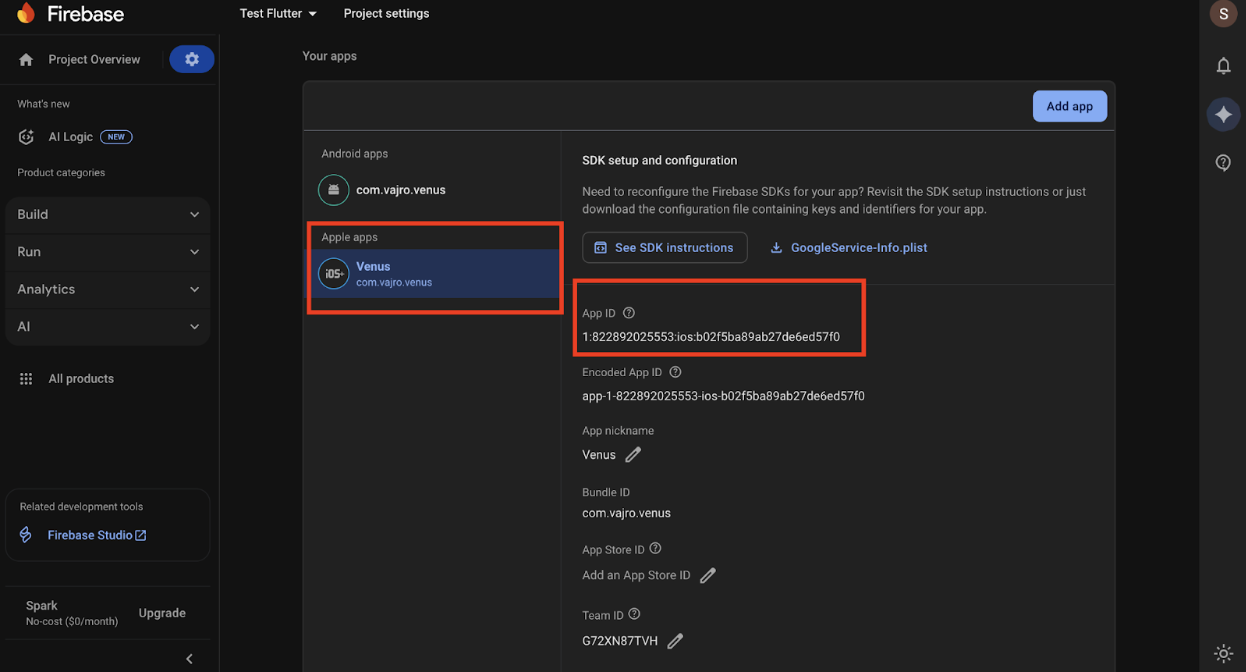
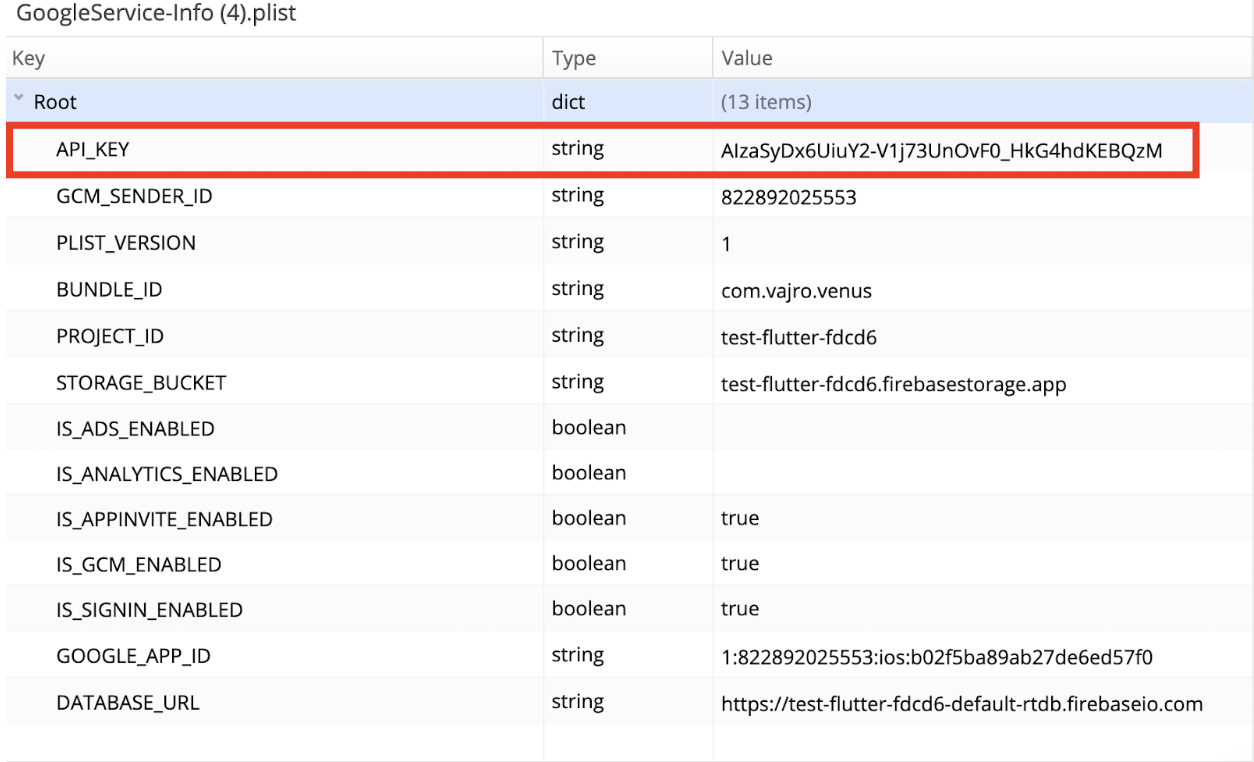
Download the google-service-Info plist, and copy the API key.

Step 1: Open Firebase Console
Go to https://console.firebase.google.com and select your project from the list (e.g., Test Flutter).
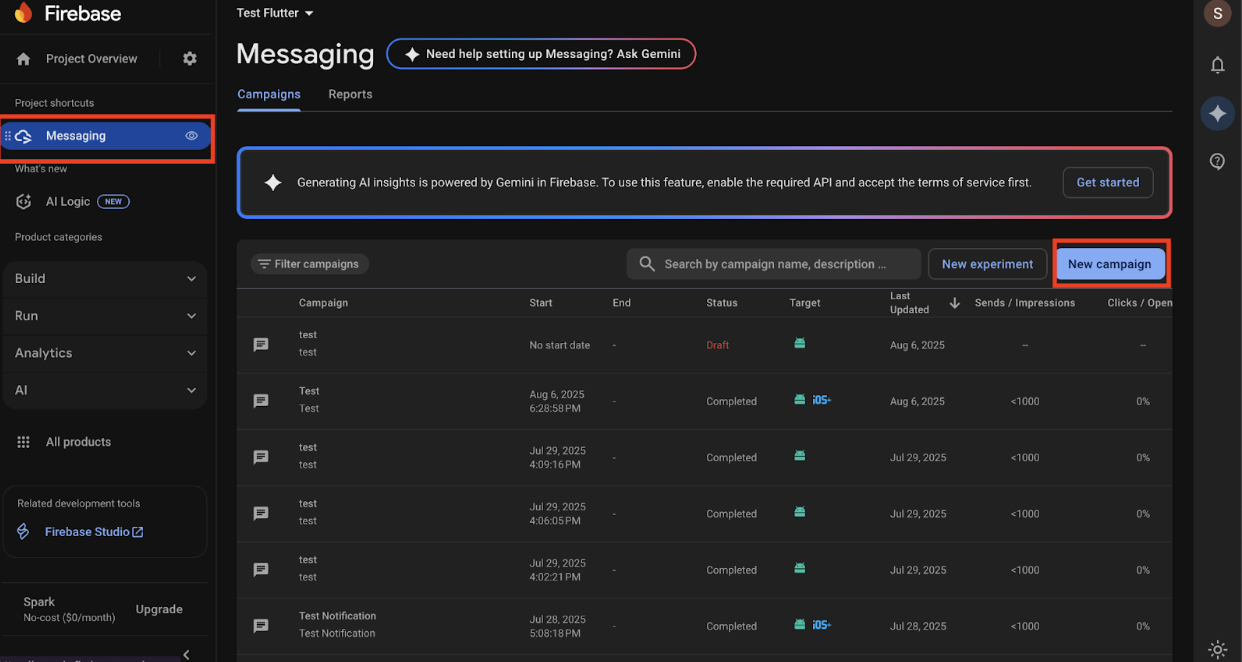
Step 2: Navigate to Firebase Messaging
In the left sidebar, expand Run and click Messaging (message icon). Once opened, it will appear under Project shortcuts for easier access next time.
Step 3: Create a New Notification Campaign
In the Messaging tab, ensure you’re in the Campaigns section, then click New campaign at the top right.
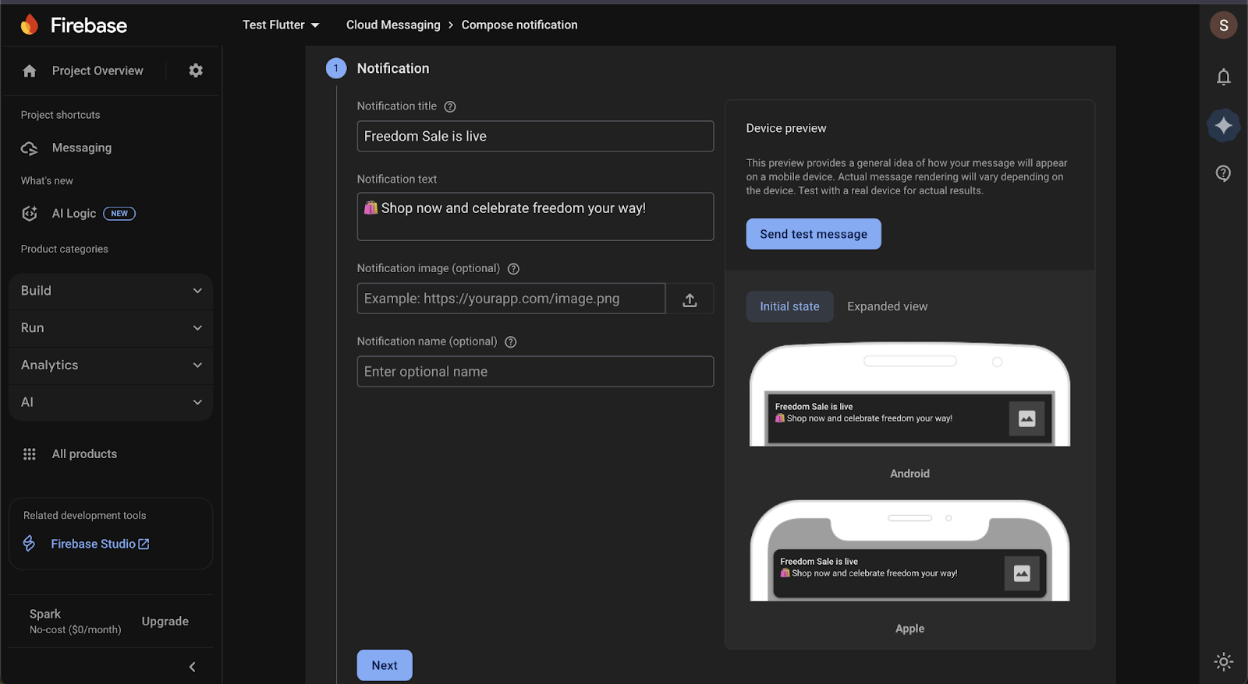
Step 4: Compose the Notification
Title: Enter your notification title (e.g., Freedom Sale is live). Limit: 40–50 characters.
Text: Enter the message body (e.g., 🛍 Shop now!). Limit: ~100 characters.
Optional: Add an image URL or internal campaign name. (Image uploads are available starting with Blaze plans)
Preview: Check the Device preview for Android/iOS.
Test: Optionally, send a test message.
Click Next to continue.
Best Practices:
Keep notification text concise (max 40-50 characters for title, 100 characters for body)
Use emojis sparingly for engagement
Include personalization where possible (user name, recommended product)
Use rich notifications (images, buttons, deep links) to improve click-through
Avoid sending too frequently → implement frequency capping
Step 5: Define the Target Audience
Target Type: Choose User Segment (app usage) or Topic (subscribed users, currently, we do not offer support for topics).
Select Apps: Pick the apps to send notifications to (e.g., com.vajro.venus for Android, Venus for iOS).
You can also choose a pre-set audience if one has already been defined.
Additional filters are available to narrow down your audience:
App Version -Target users on a specific app version.
Languages - Target users by preferred language.
Country/Region - Limit notifications to users in specific locations.
User Audiences - Use existing custom or predictive audiences.
First Open - Target based on when the app was first opened.
Last App Engagement - Reach users based on their most recent activity.
Firebase will display the estimated number of users matching your criteria. Once set, click Next to continue.

Review: Check notification content, target apps/audiences, and scheduling.
Publish: Click Publish to send immediately.
Optional: Save as draft or edit before sending.
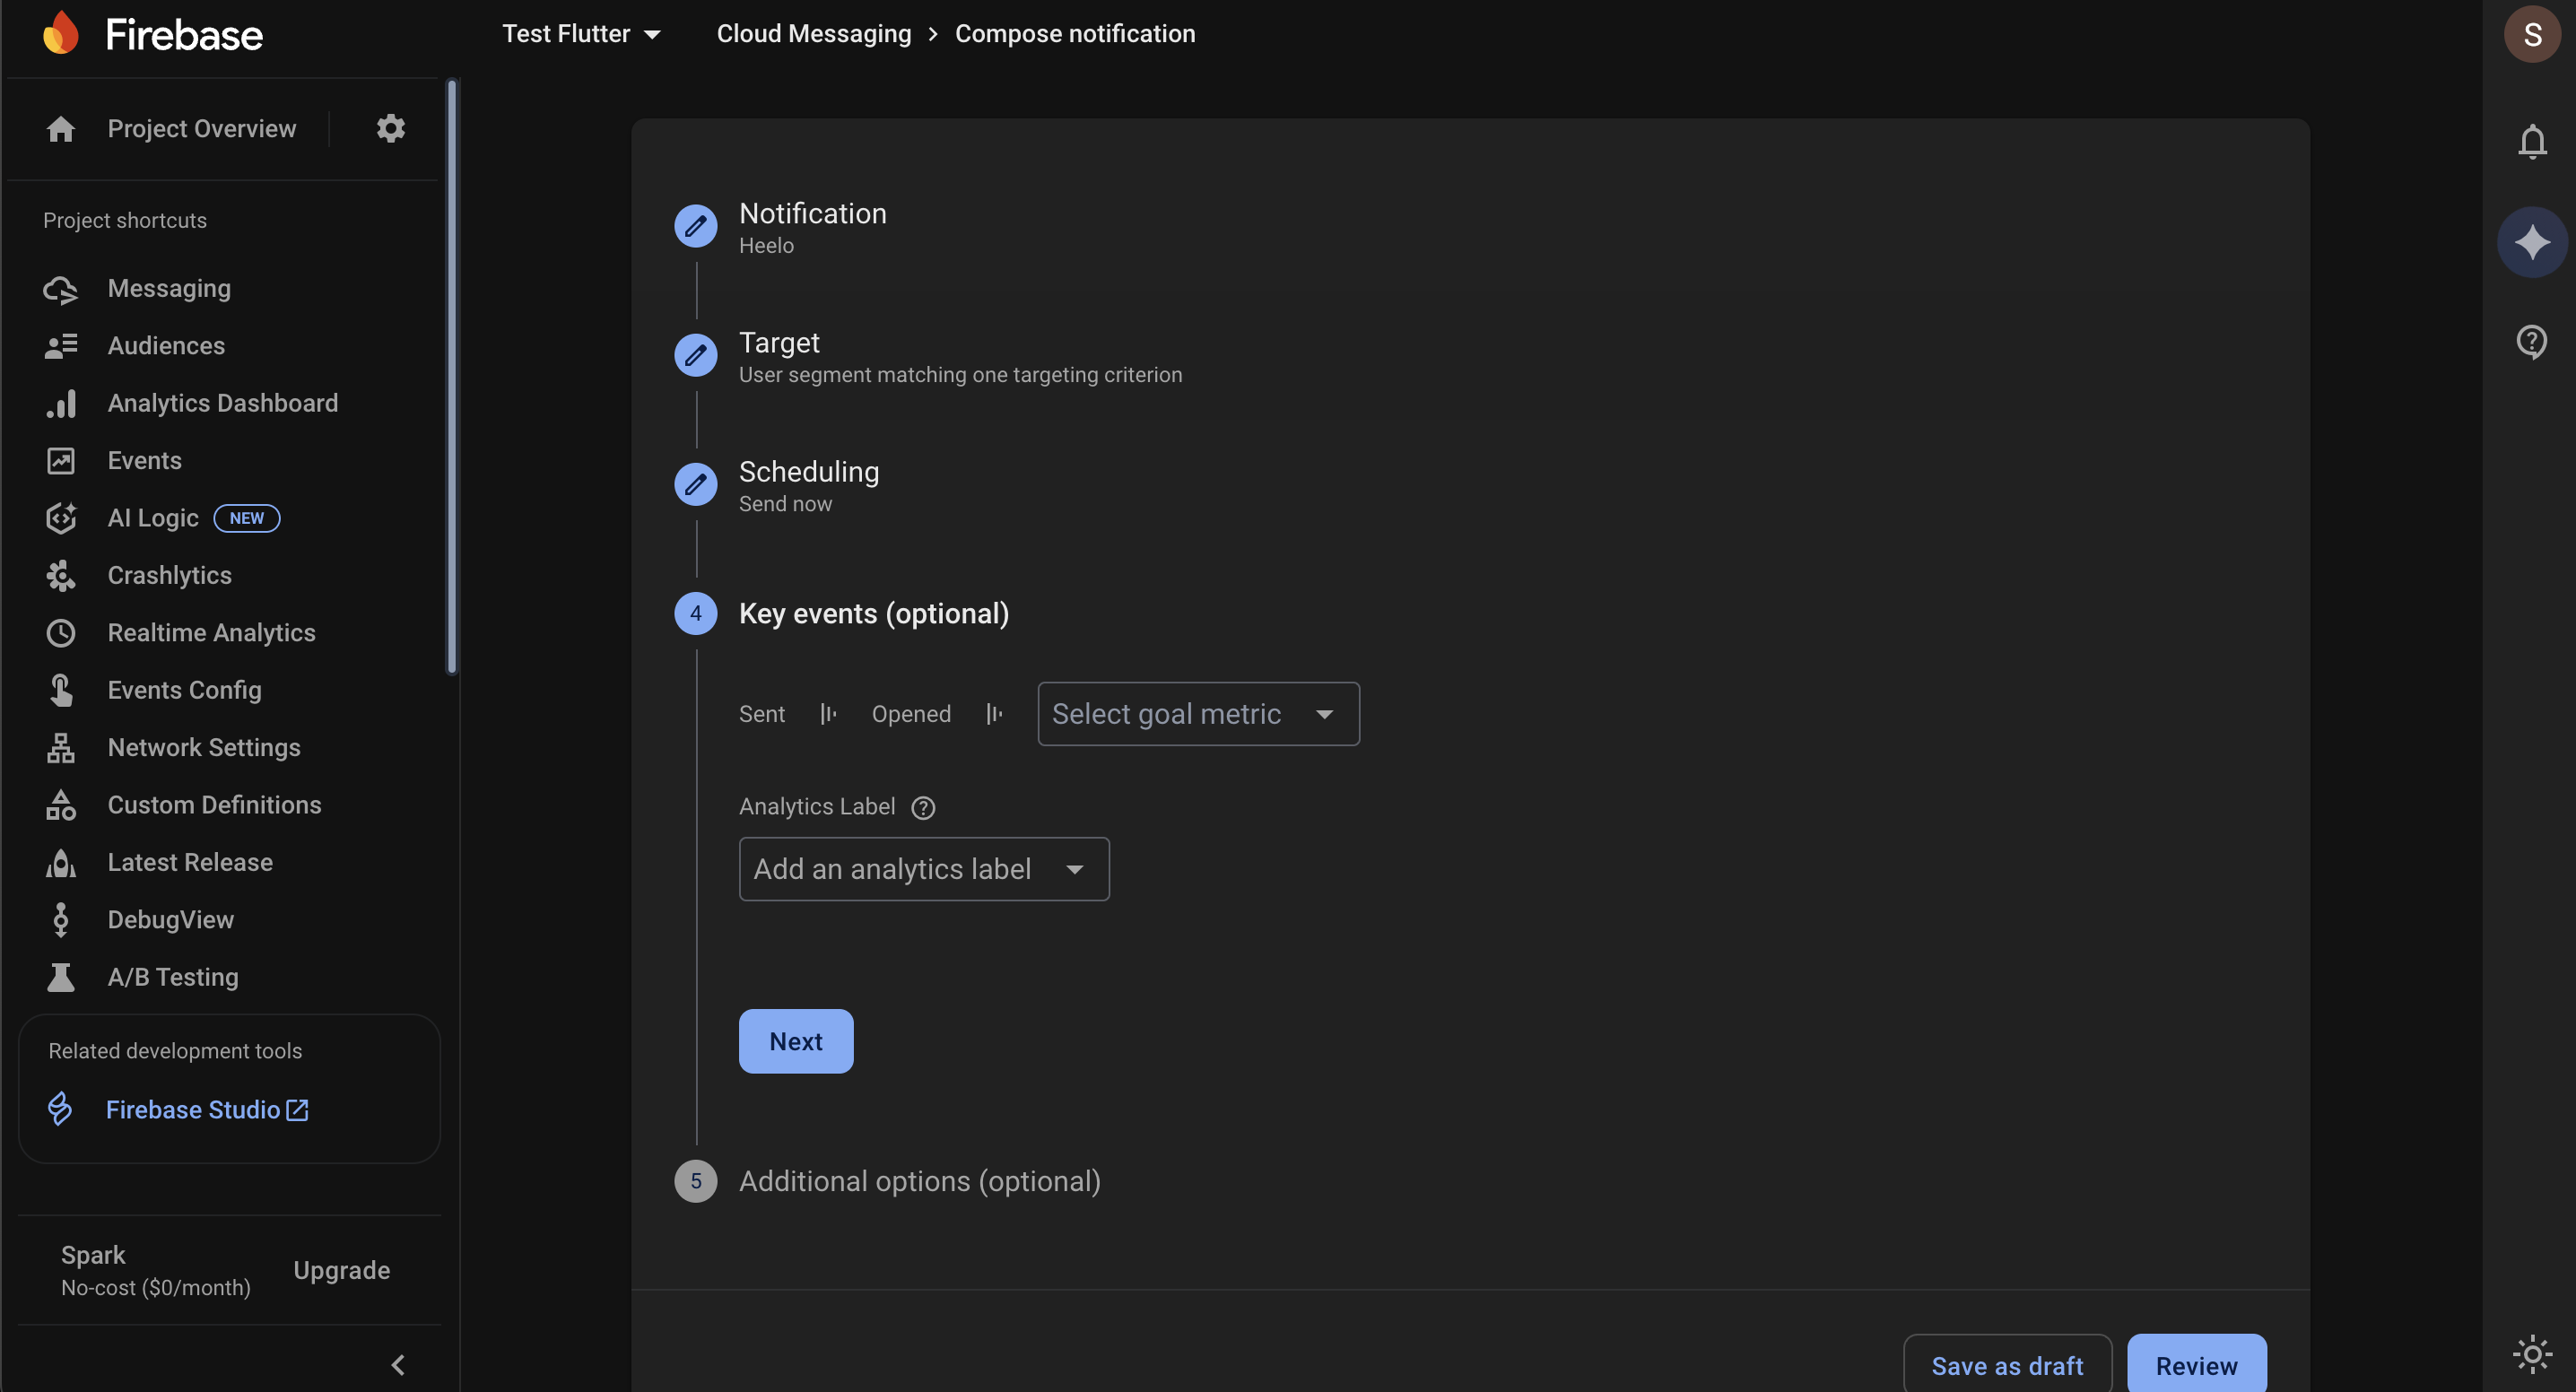
This section is optional and helps you measure how your messages drive user actions.
Select goal metric: Choose a specific event you want to track, like a purchase or sign-up. This lets you link the message to a business outcome.
Labels are a great way to filter your message statistics for deeper analysis.
Add an analytics label: From the dropdown menu, select or create a label to tag your message.
Requirement: To use this feature, your app needs the Analytics SDK enabled with Firebase data sharing.
Refer to Labels for more information.
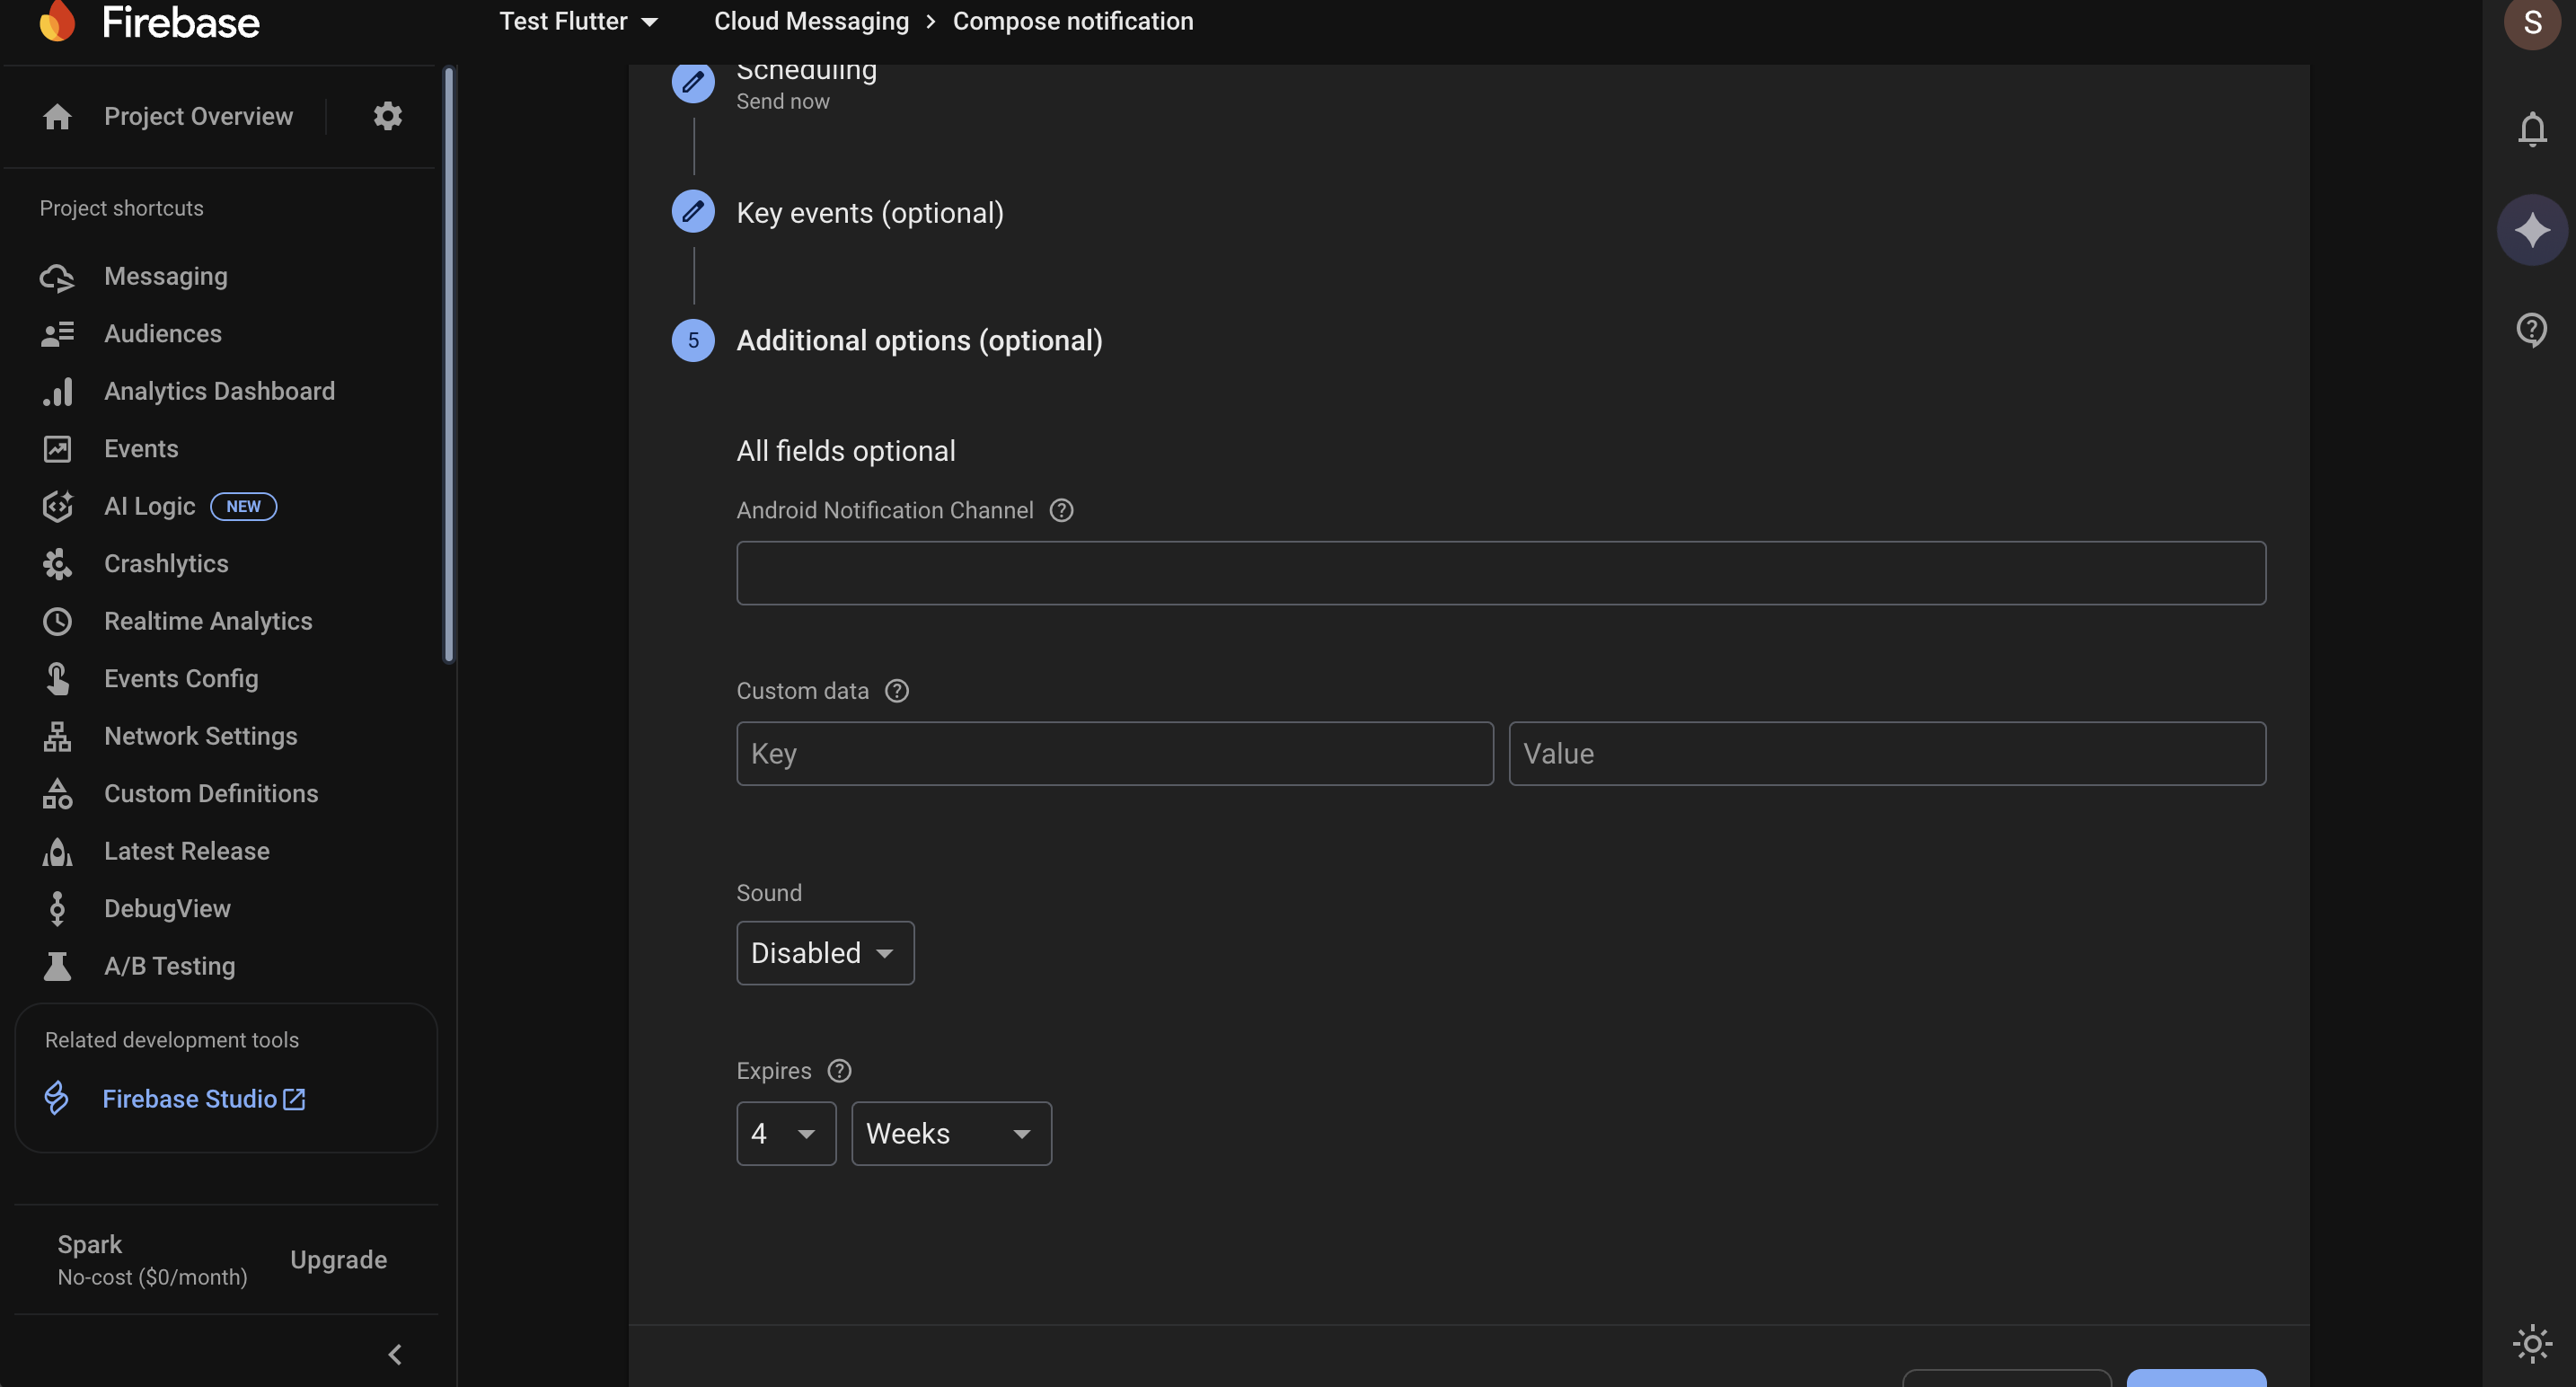
This section allows you to customize your notification with advanced settings. All fields are optional.
How to: Enter the ID of a notification channel you have created in your Android app. This allows you to categorize notifications for users to manage their preferences (e.g., enable/disable promotional alerts).
When to use: Use this when you want to group similar notifications together and give users more control over what they receive.
How to: Enter a Key-Value pair to send custom data with your notification payload.
Example:
Key: link
Value: product/shoes/item123
When to use: This is primarily used for deep linking to navigate users to a specific page or screen inside your app when they tap the notification. Your app code needs to be set up to read this key-value pair and handle the navigation.
URL-Based Navigation
Use full URLs to send users to a webpage outside the app, such as a blog, product page, or promotion.
In-App Navigation (Direct Deep Linking)
Send users directly to specific screens within the app, like a product page, cart, account section, or custom content block.
Page | Key | Value |
Cart | cart | |
Wishlist | wishlist | |
Account/Profile Page | accounts | |
Notification History | notifications | |
Search Page | search | |
Product Page | product | product id |
Category/Collection page | category | your-collection-id |
Dynamic Page | page | your-page-id |
Custom Content Block | customBlock | your-block-id & Custom Block Type:full_screen |
External Website | eUrl |
Use full URLs when deep linking doesn’t work or when directing to public pages.
Fields: type: url, value: your-website-url
Product Page: https://yourstore.com/products/nola-tee
Collection Page: https://yourstore.com/collections/women-dresses
Cart Page:https://yourstore.com/cart
Account Page: https://yourstore.com/account
Login Page:https://yourstore.com/login
Search Page:https://yourstore.com/search?q=summer+dresses
Enabled – Notifications will play a sound.
Disabled – Notifications will be silent.
This behaviour depends on the receiver’s mobile device notification settings.
How to: Use the dropdowns to set the message expiration time. You can choose a number and a unit (minutes, hours, days, or weeks).
When to use: This is for time-sensitive messages. If a user's device is offline, the message will be delivered only if it hasn't expired. This prevents the delivery of outdated notifications.
After you have configured any of these options, you can click Review to proceed. You can also click Save as draft to save your work without sending the message.
Automated push notifications can be sent using Firebase Cloud Messaging by triggering a Cloud Function whenever a tracked event occurs.