We've eliminated the manual API key configuration and replaced it with a simple, streamlined process that takes just a few minutes to complete.
Key Benefit: The automation reduces setup time from hours to just 5-10 minutes, with automatic verification and configuration.
Before starting the setup process, ensure you have the following:
• A Google Developer Account with access to Google Play Console
• Admin permissions on your Google Play Developer account
• Access to the Superfans dashboard
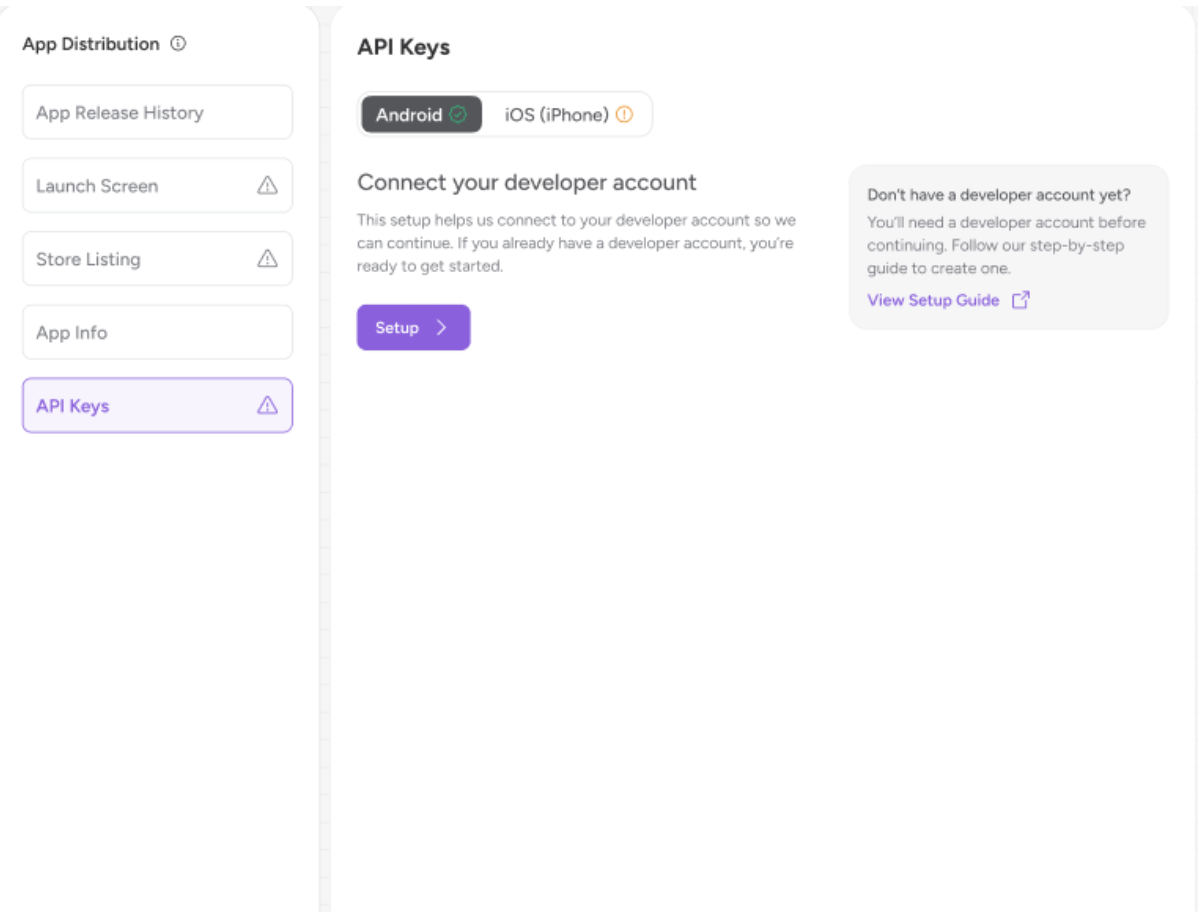
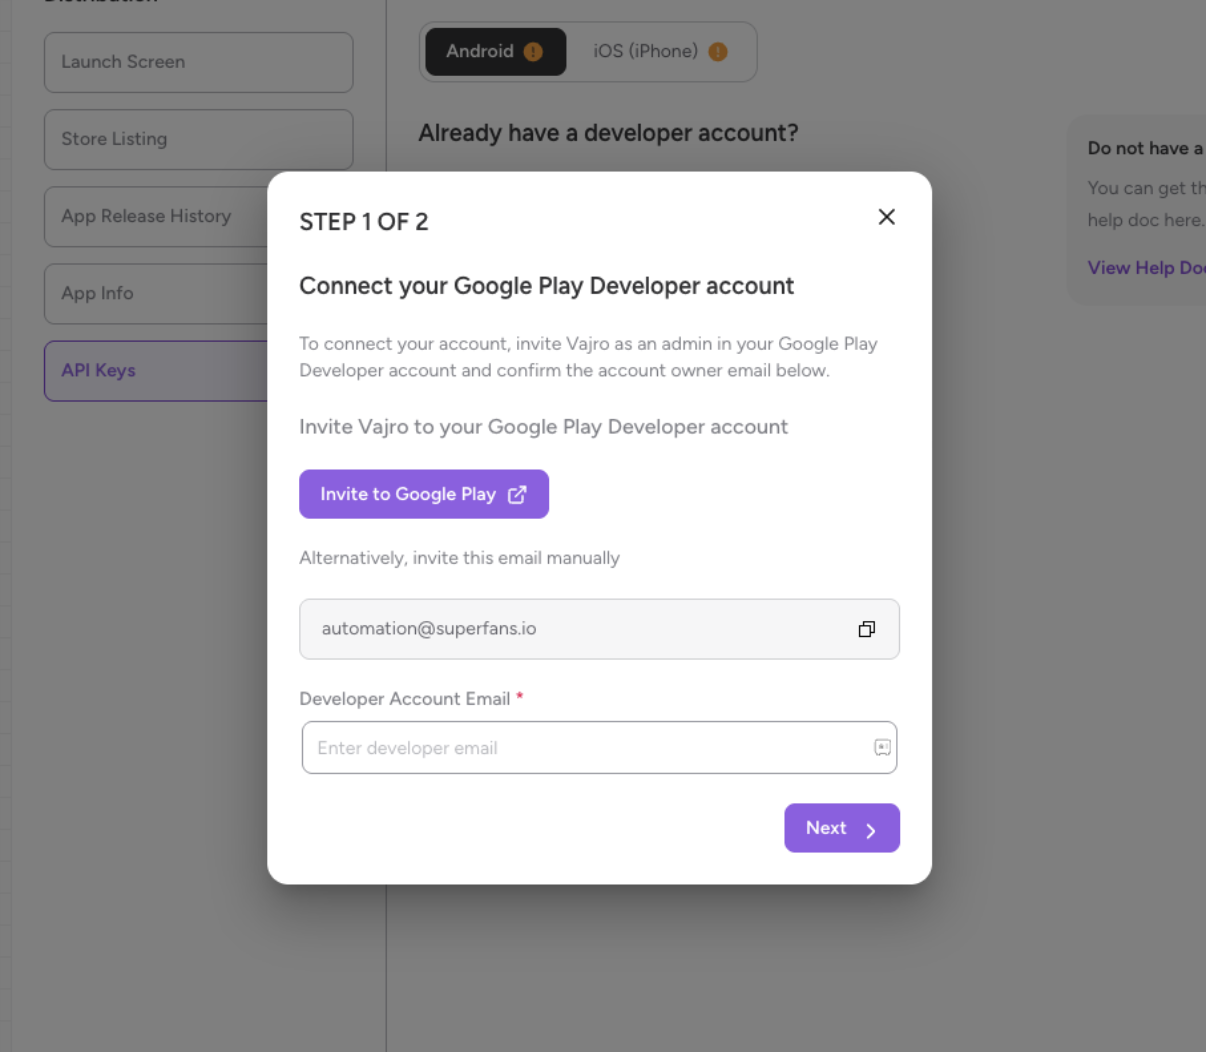
Begin by clicking the Setup CTA button in your Superfans dashboard. A modal will appear presenting you with two options for inviting the automation account.
Option A: Click the "Invite to Google Play" CTA for automatic invitation
Option B: Manually copy the automation email address and send the invitation from Google Play Console
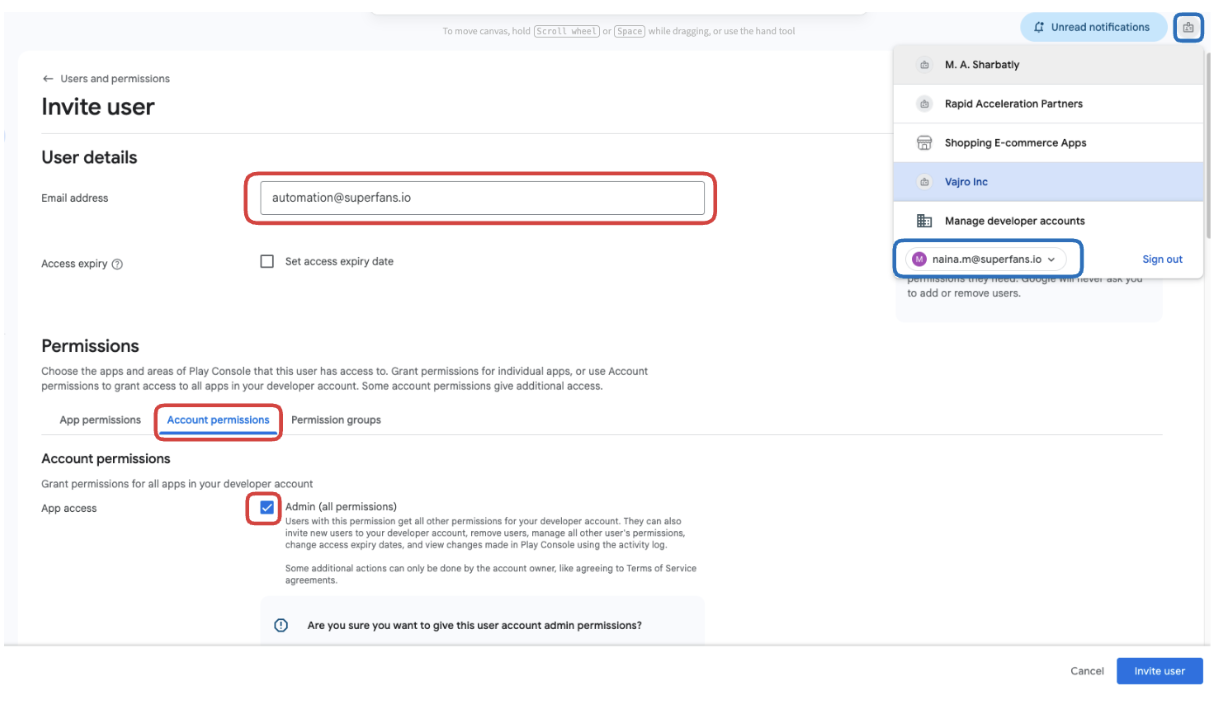
Navigate to your Google Play Console and invite the automation account with the following details:

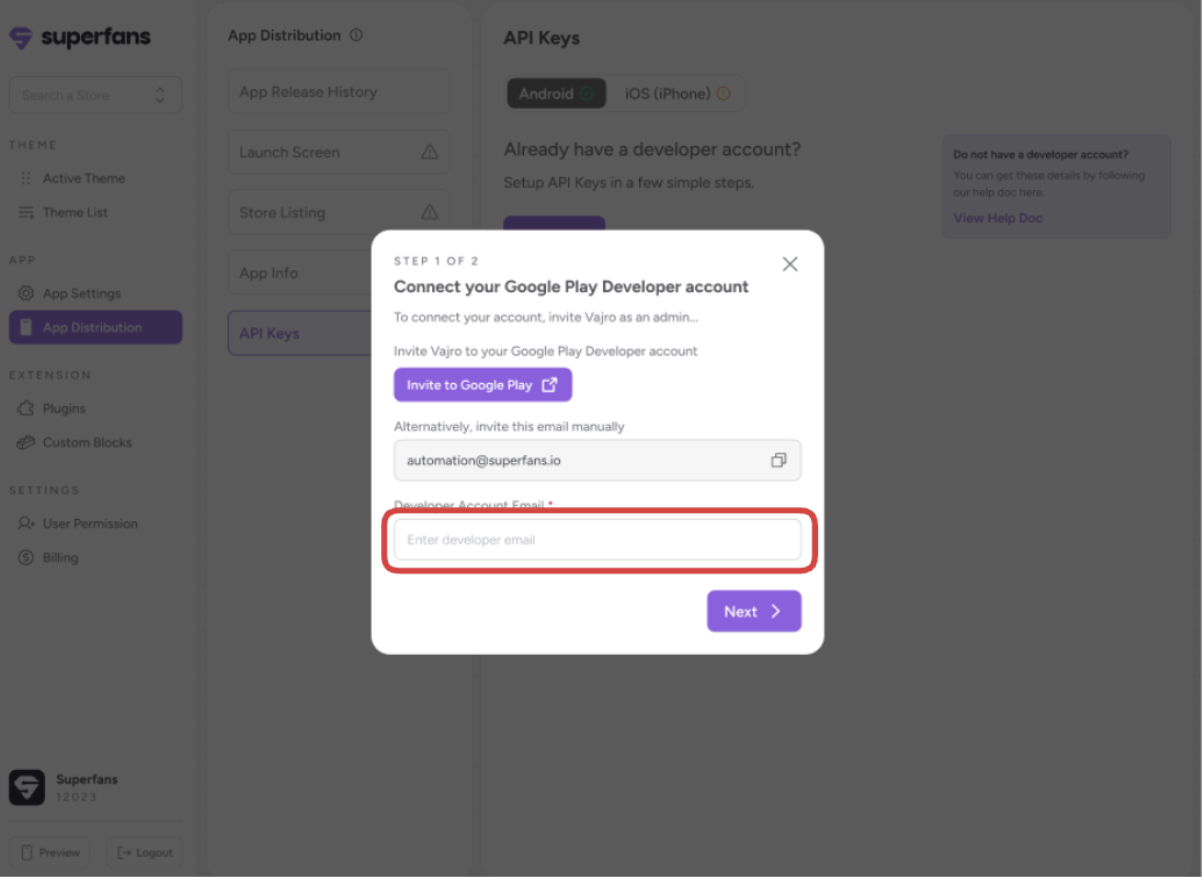
Return to the Superfans dashboard and complete the following configuration:
Locate the Developer Account Email field
Enter the email address you used to invite the automation account
Click to proceed with verification
The automation process typically takes 5-10 minutes to complete. During this time, you'll see a progress screen indicating that your account setup is in progress.

Once complete, you'll be able to:
• Select your developer account associated with the verified email
• Choose your app from the list
• For new apps: Select "New App"
• For migrations: Select the respective existing app
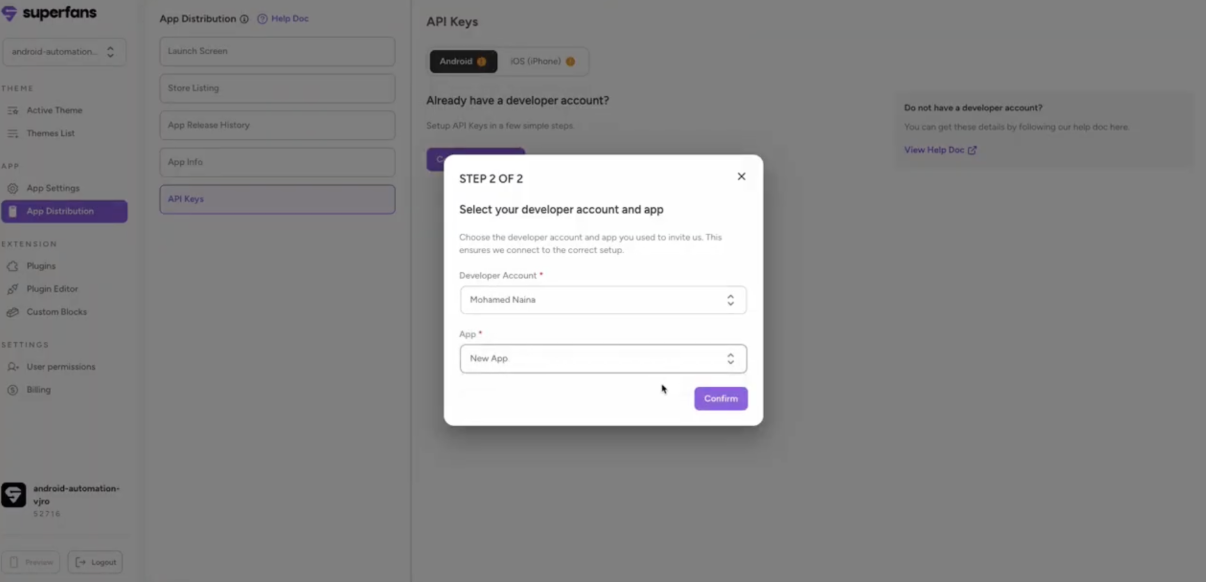
After confirmation, your Google Play account will be successfully linked to Superfans, and you can begin using the platform's full features.
Issue | Solution |
For a complete visual demonstration of the entire setup process, watch our comprehensive video walkthrough:
New Android Invite Process
New Android Invite Process.mov
This video covers all steps in detail and provides additional tips for a smooth setup experience
What is an API Key?
API keys are secure keys that allow us to publish your app on your behalf, under your own account.
Why is it important ?
When we publish your app to the Google Play Store, it must be done through your own developer accounts so that:
The app belongs to you and your brand (not us).
You stay fully compliant with Google and Apple’s rules.
Customers see your company name as the app owner, which builds trust.
To make this smooth, we ask for your API keys.
What are JKS files?
The JKS file is your app’s unique digital signature that ensures ownership and security.
How to get the JKS files?
Connect with your previous app builder and they should be able to give you the JKS file.
Can I make my apps live without API Keys?
No. API keys are important without which the apps can’t go live.