Product Badges in Superfans allow you to highlight key information directly on product images using short text labels. These badges appear prominently on Home pages and Collection pages, helping customers quickly identify special products while browsing your app.
Product Badges are small, customizable text labels displayed on top of product images. They are designed to draw attention to specific products or product attributes without requiring customers to open the product detail page.
Examples of common badges:
New Arrival
Best Seller
Limited Stock
Trending
Flat 20% Off
Badges are purely visual and informational, making them lightweight, fast-loading, and effective across mobile devices.
Once enabled, Product Badges will be visible on:
Home Page product grids/ product sliders
Collection Page
Recently viewed product grid of PDP
1. Improved Product Visibility
Badges instantly catch the user’s eye and help important products stand out in crowded product lists.
2. Faster Purchase Decisions
Customers can quickly identify offers, popularity, or urgency (e.g., Limited Stock) without extra clicks.
3. Higher Engagement & Conversion
Highlighting promotions or bestsellers increases tap-through rates from listing pages, which can positively impact conversions.
4. No-Code Configuration
Badges can be configured directly from the Superfans platform without requiring any app update or developer involvement.
5. Consistent Branding
You can use consistent badge text across collections to maintain a clean and professional look throughout your app.
There are 2 steps in setting up Product Badges in Superfans
Creating the product badges
Configuring the badges on the theme
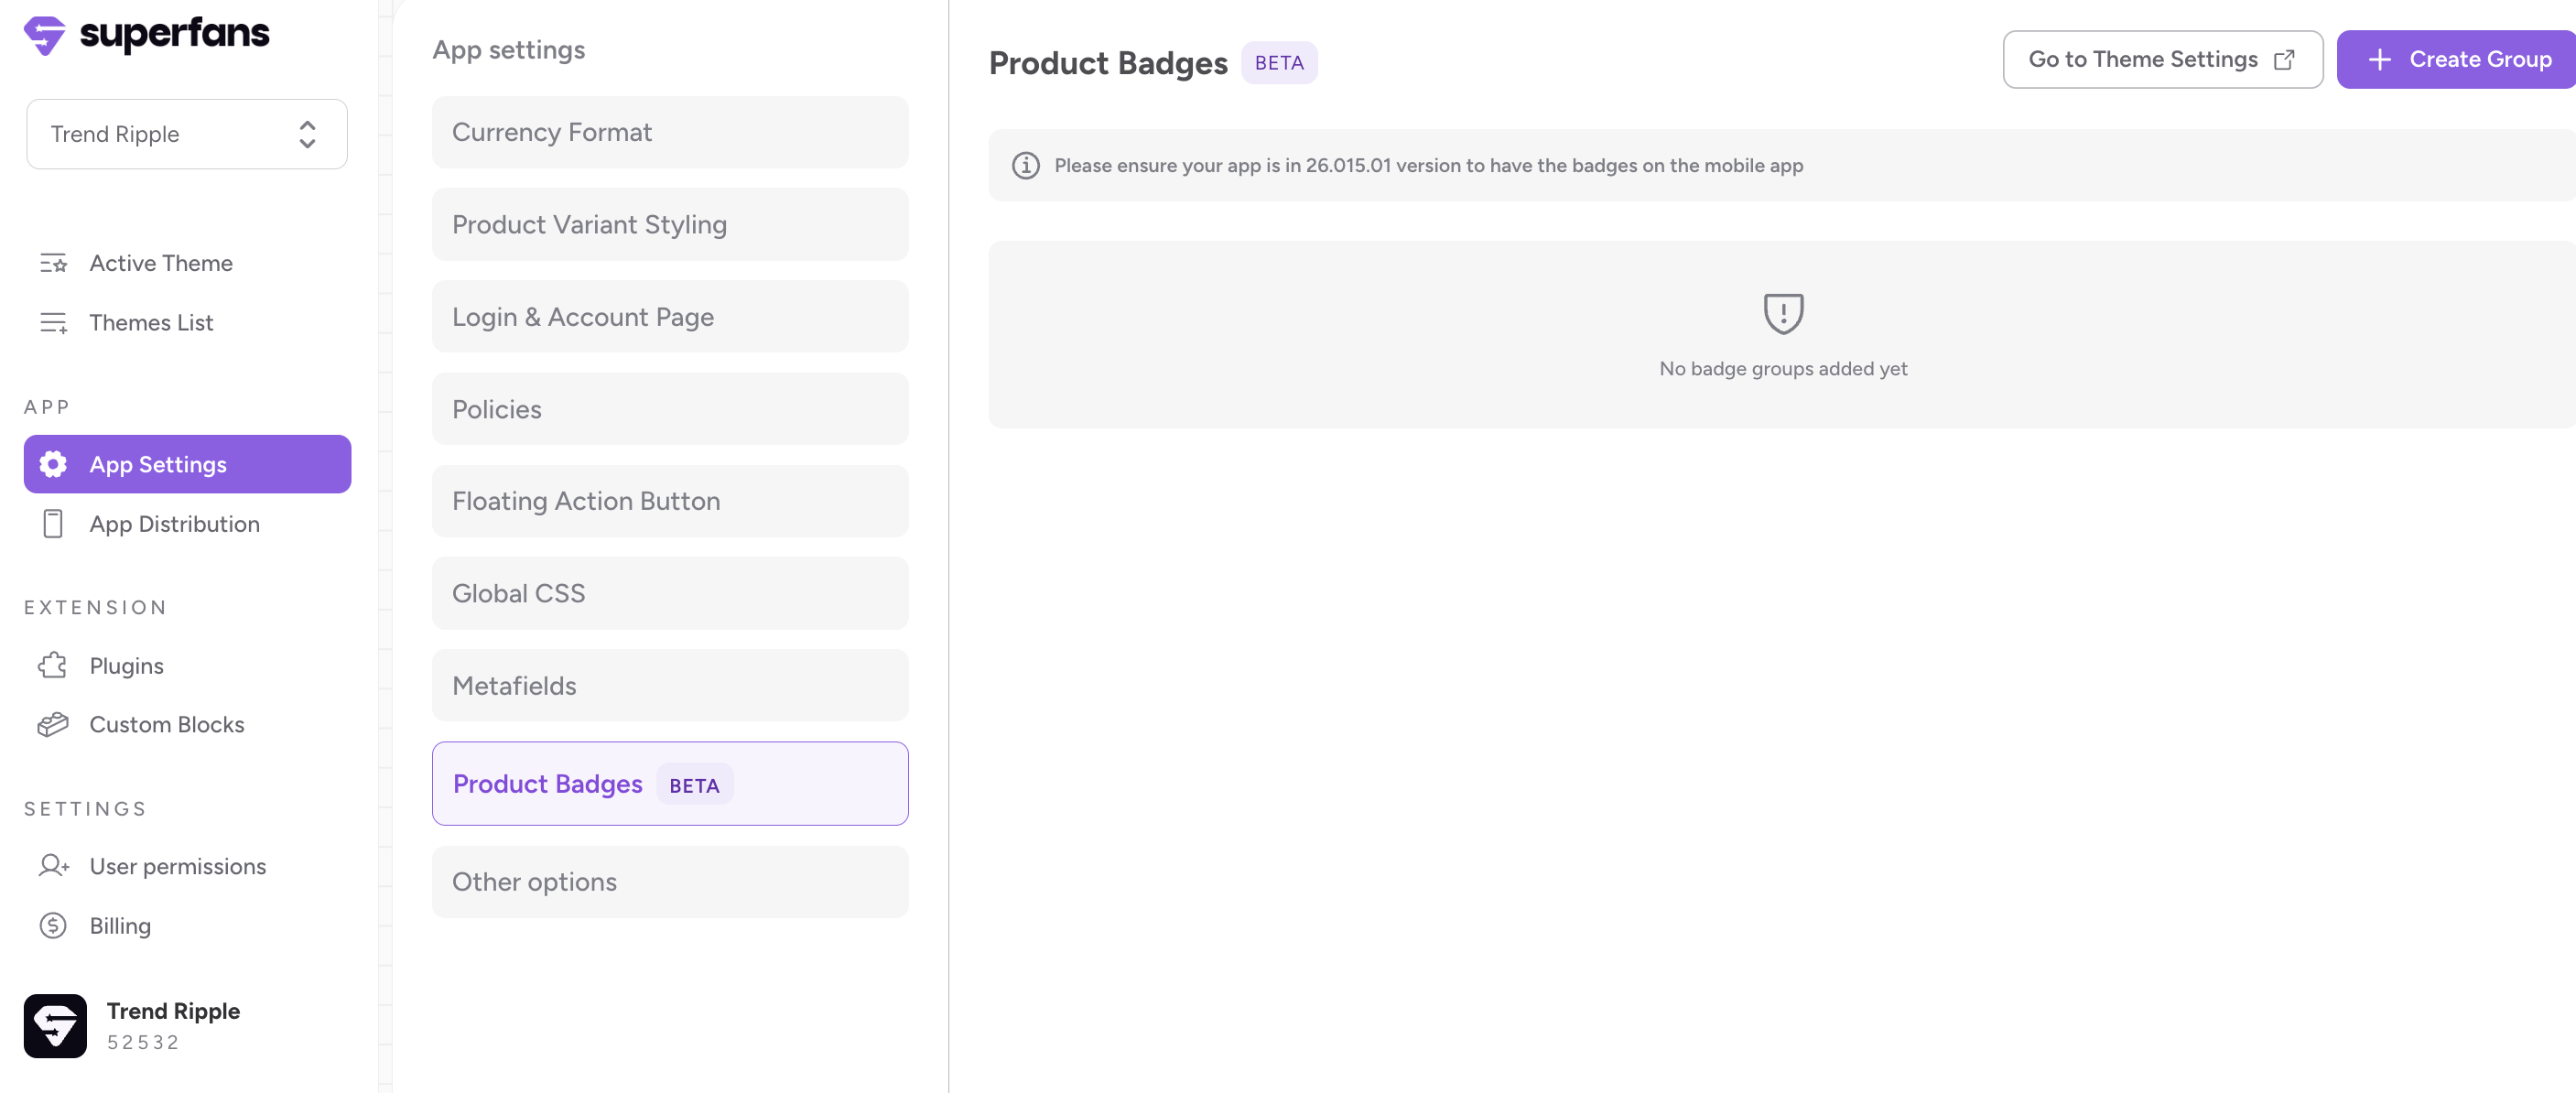
Step 1 : Navigate to the Product Badges Section in the Dashboard.
App Settings → Product Badges
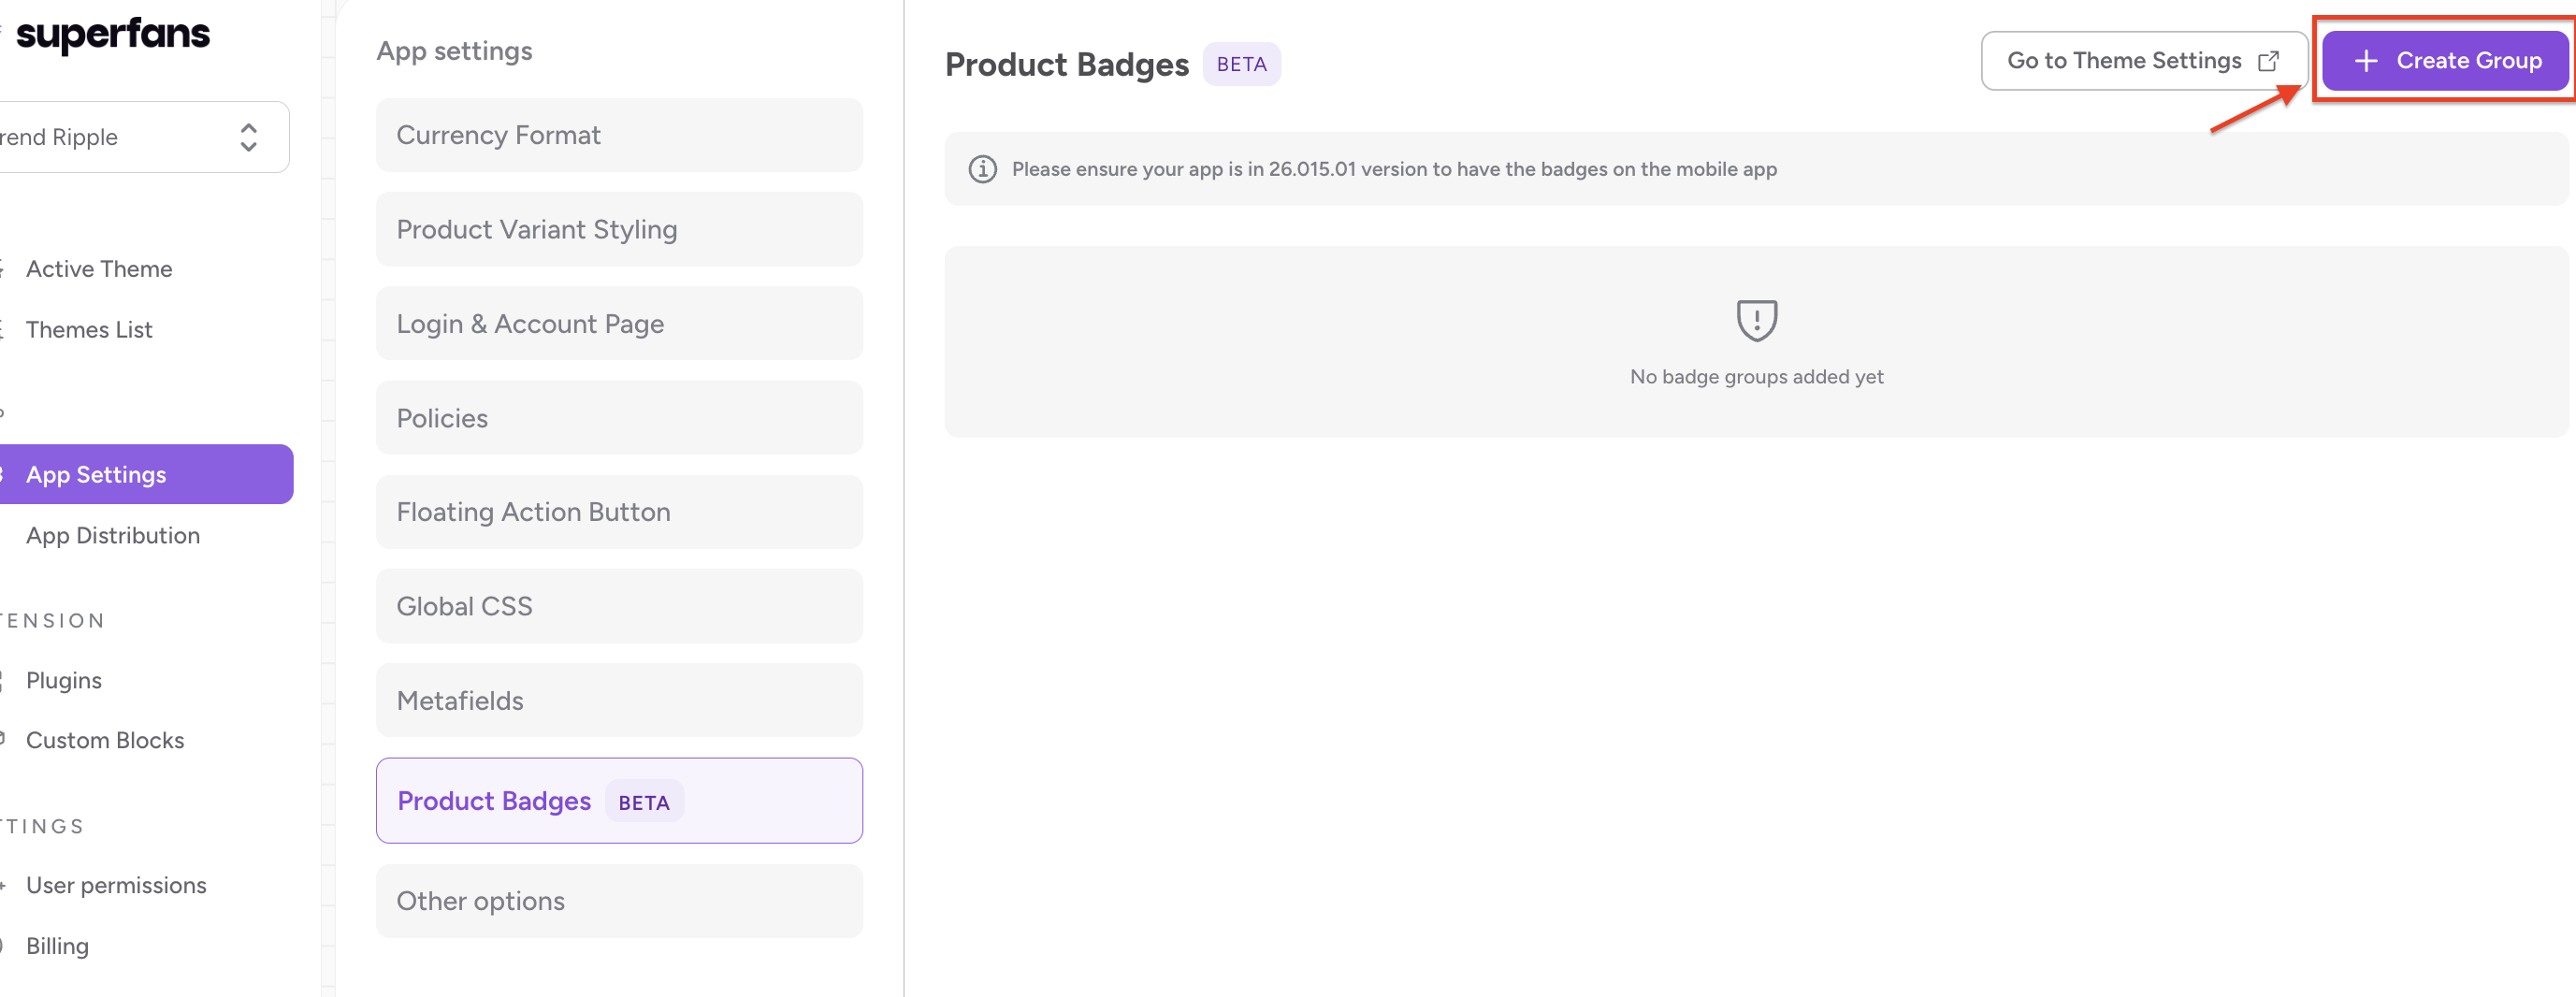
Step 2 : Click on “Create Group” CTA to create the Product Badge Group.
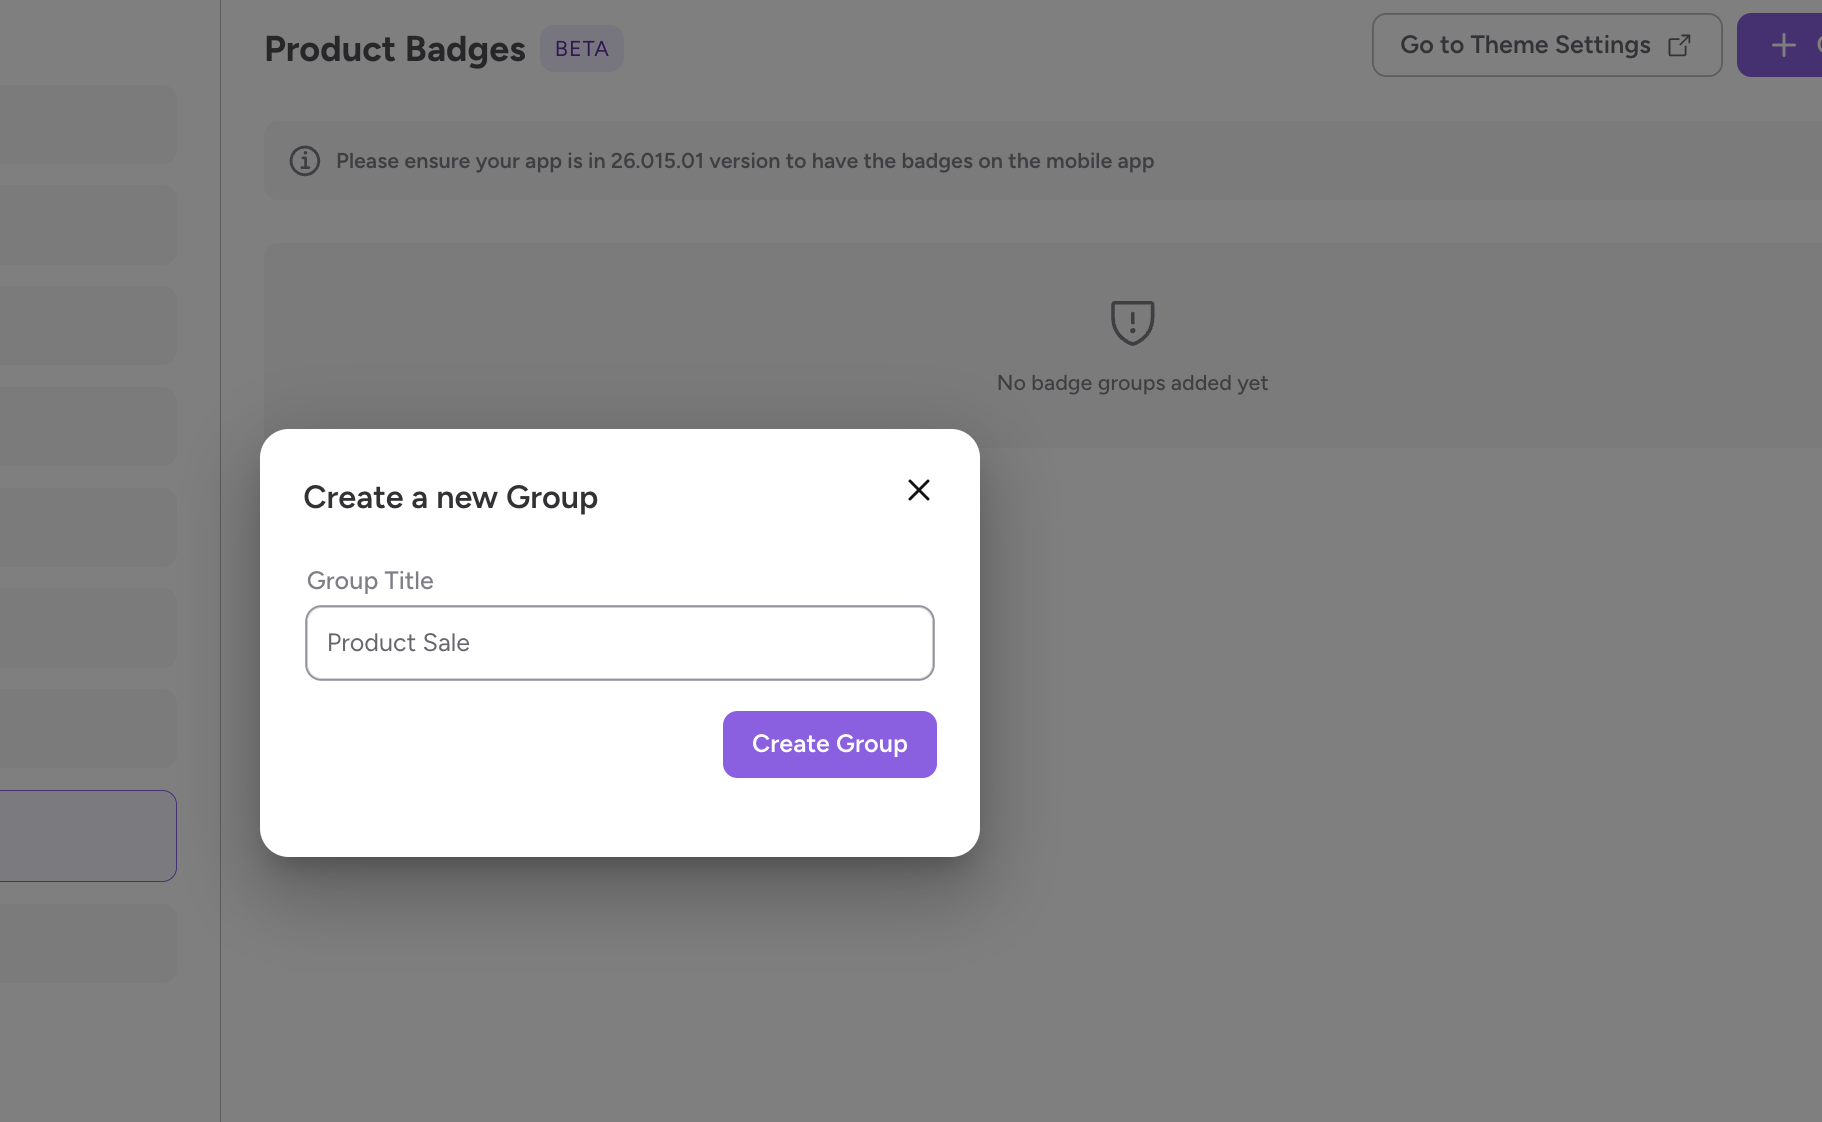
Step 3 : Provide the name for the Product Badge Group and click on Create Group CTA. (Group will be created)
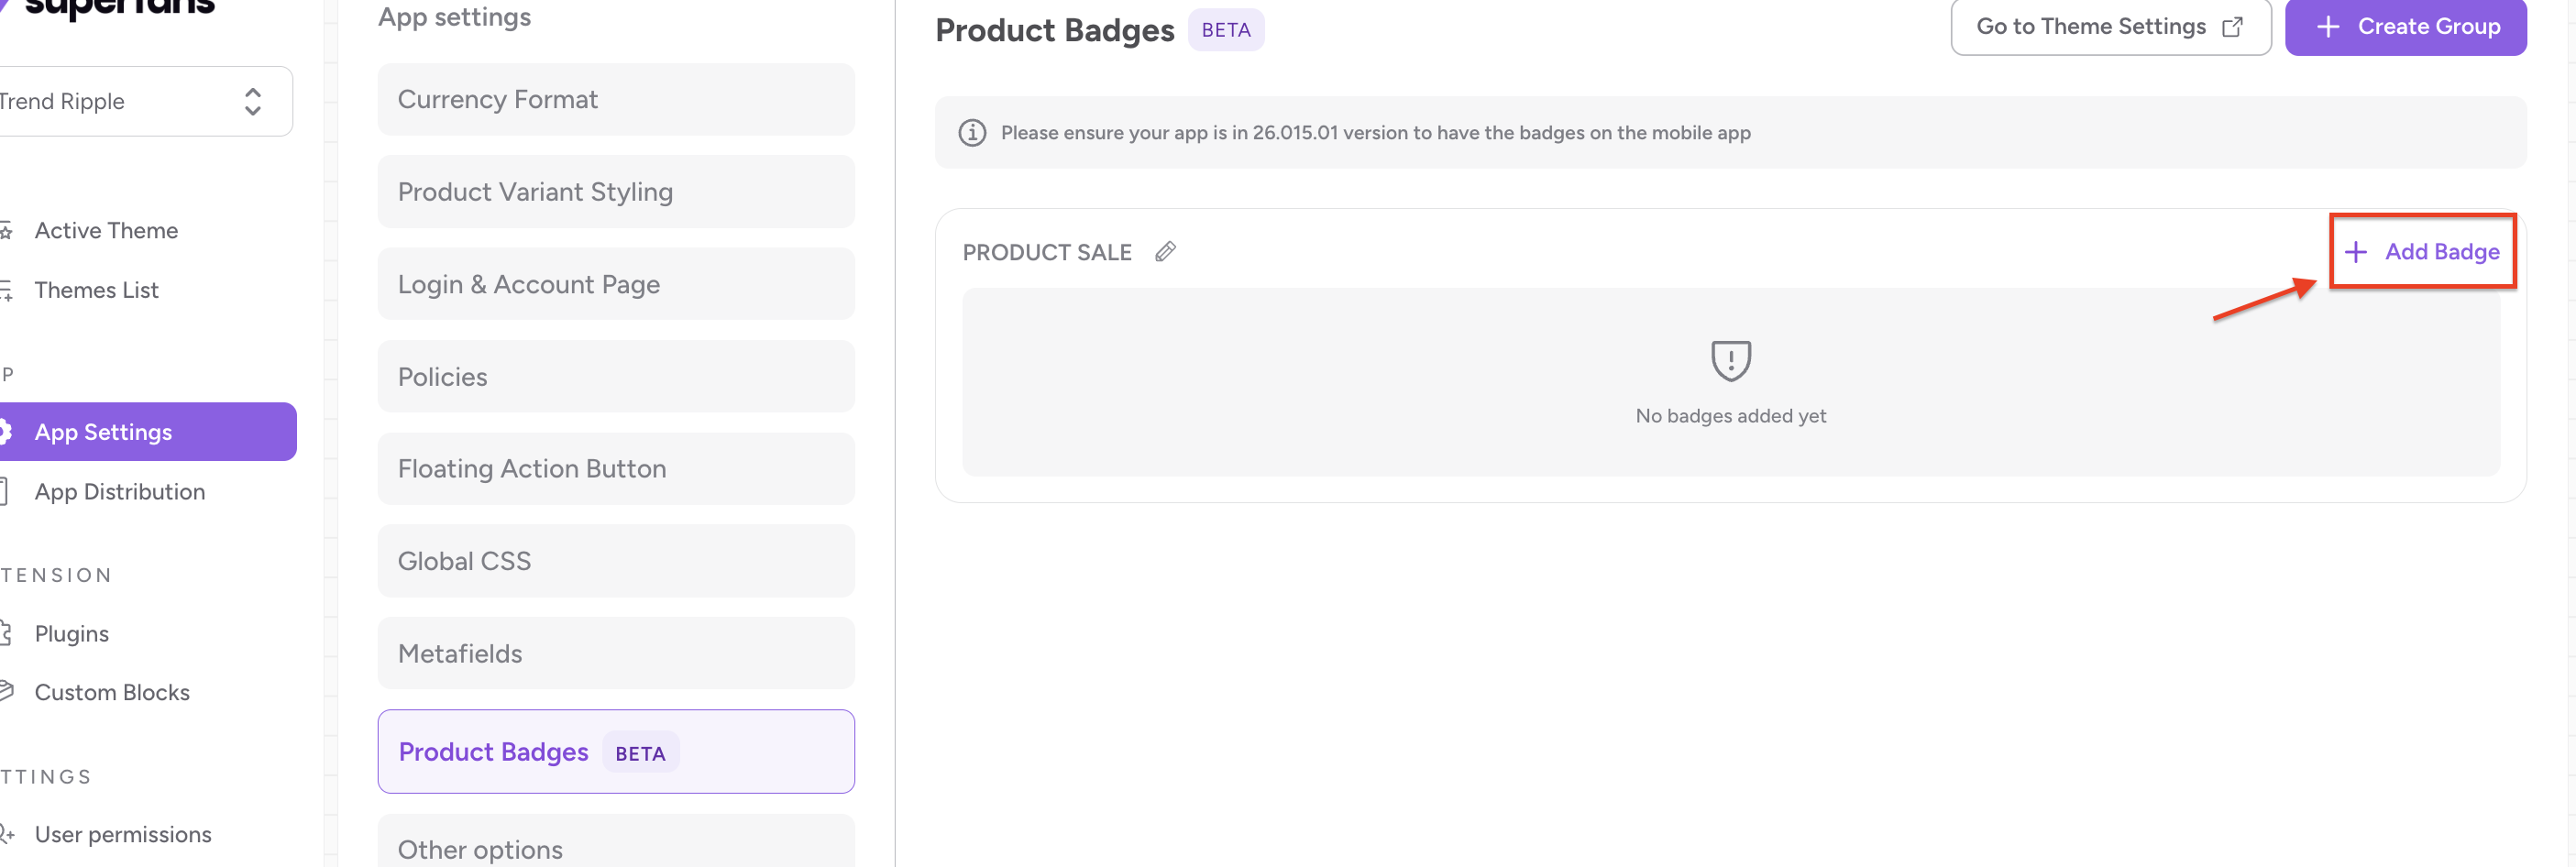
Step 4 : Once a group is created, click on “Add Badge” CTA to create the product Badge.
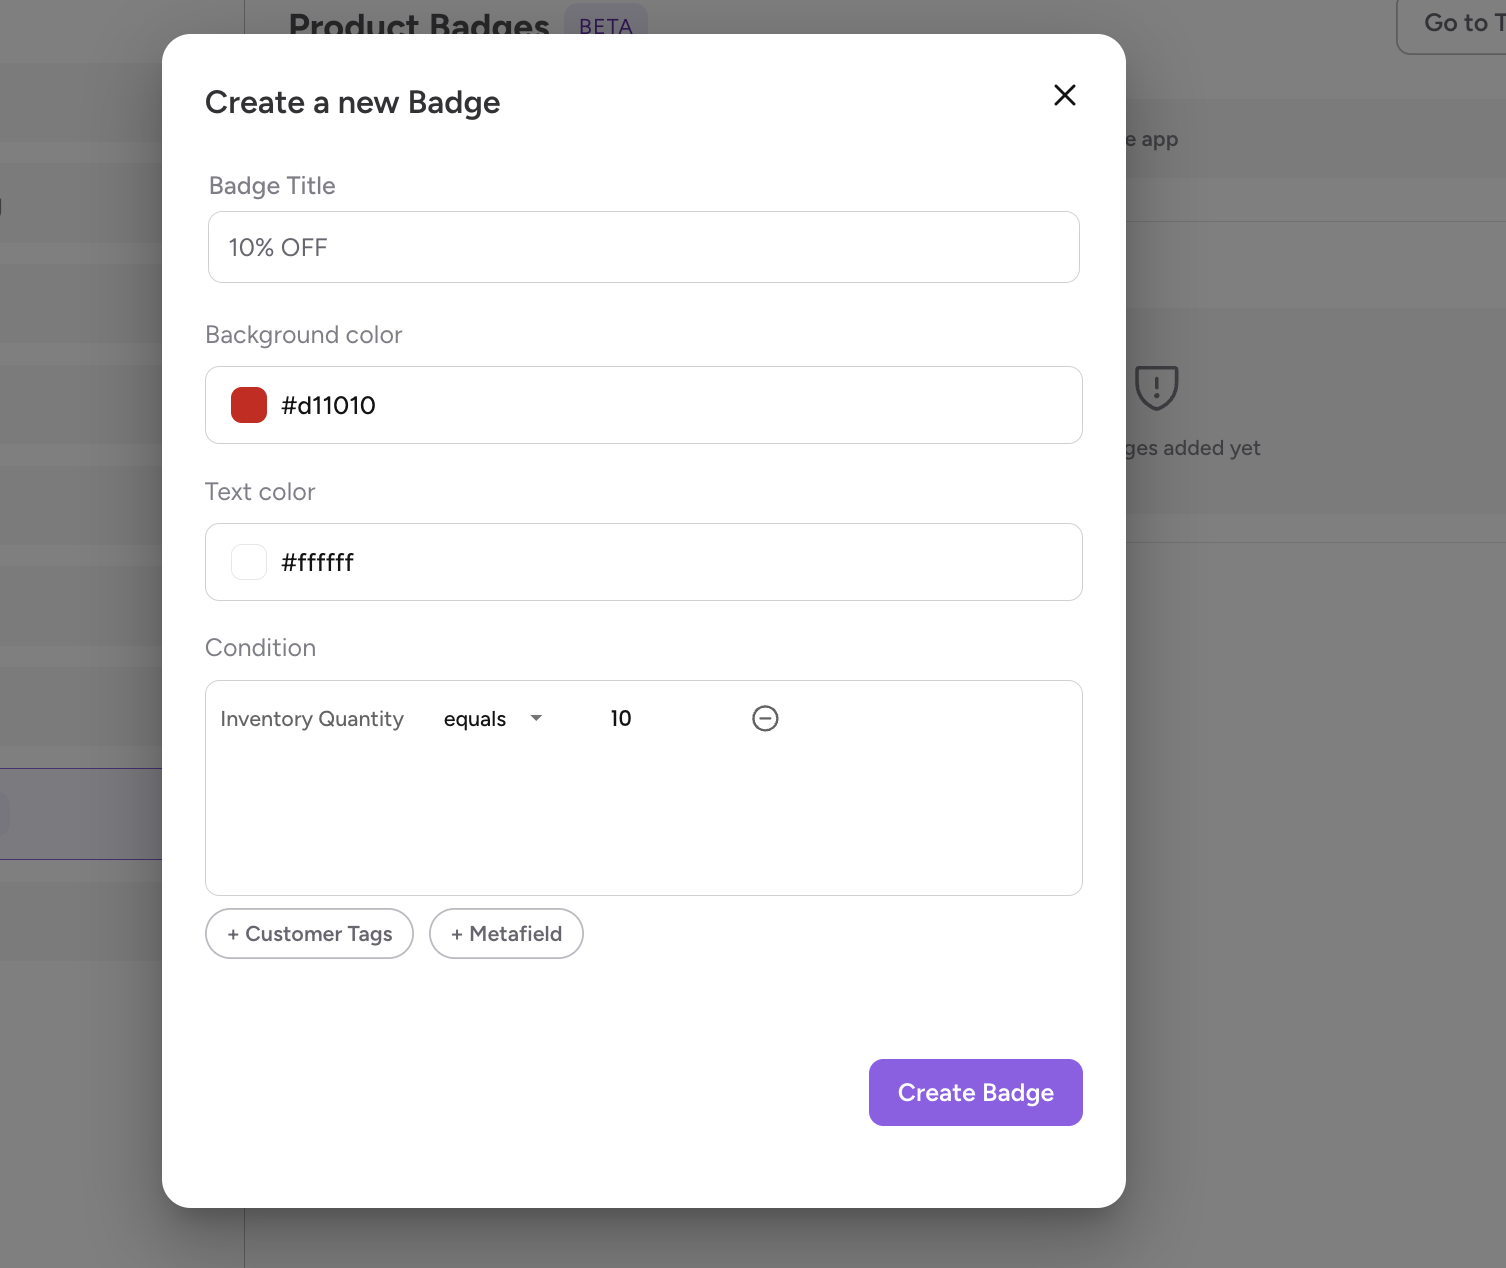
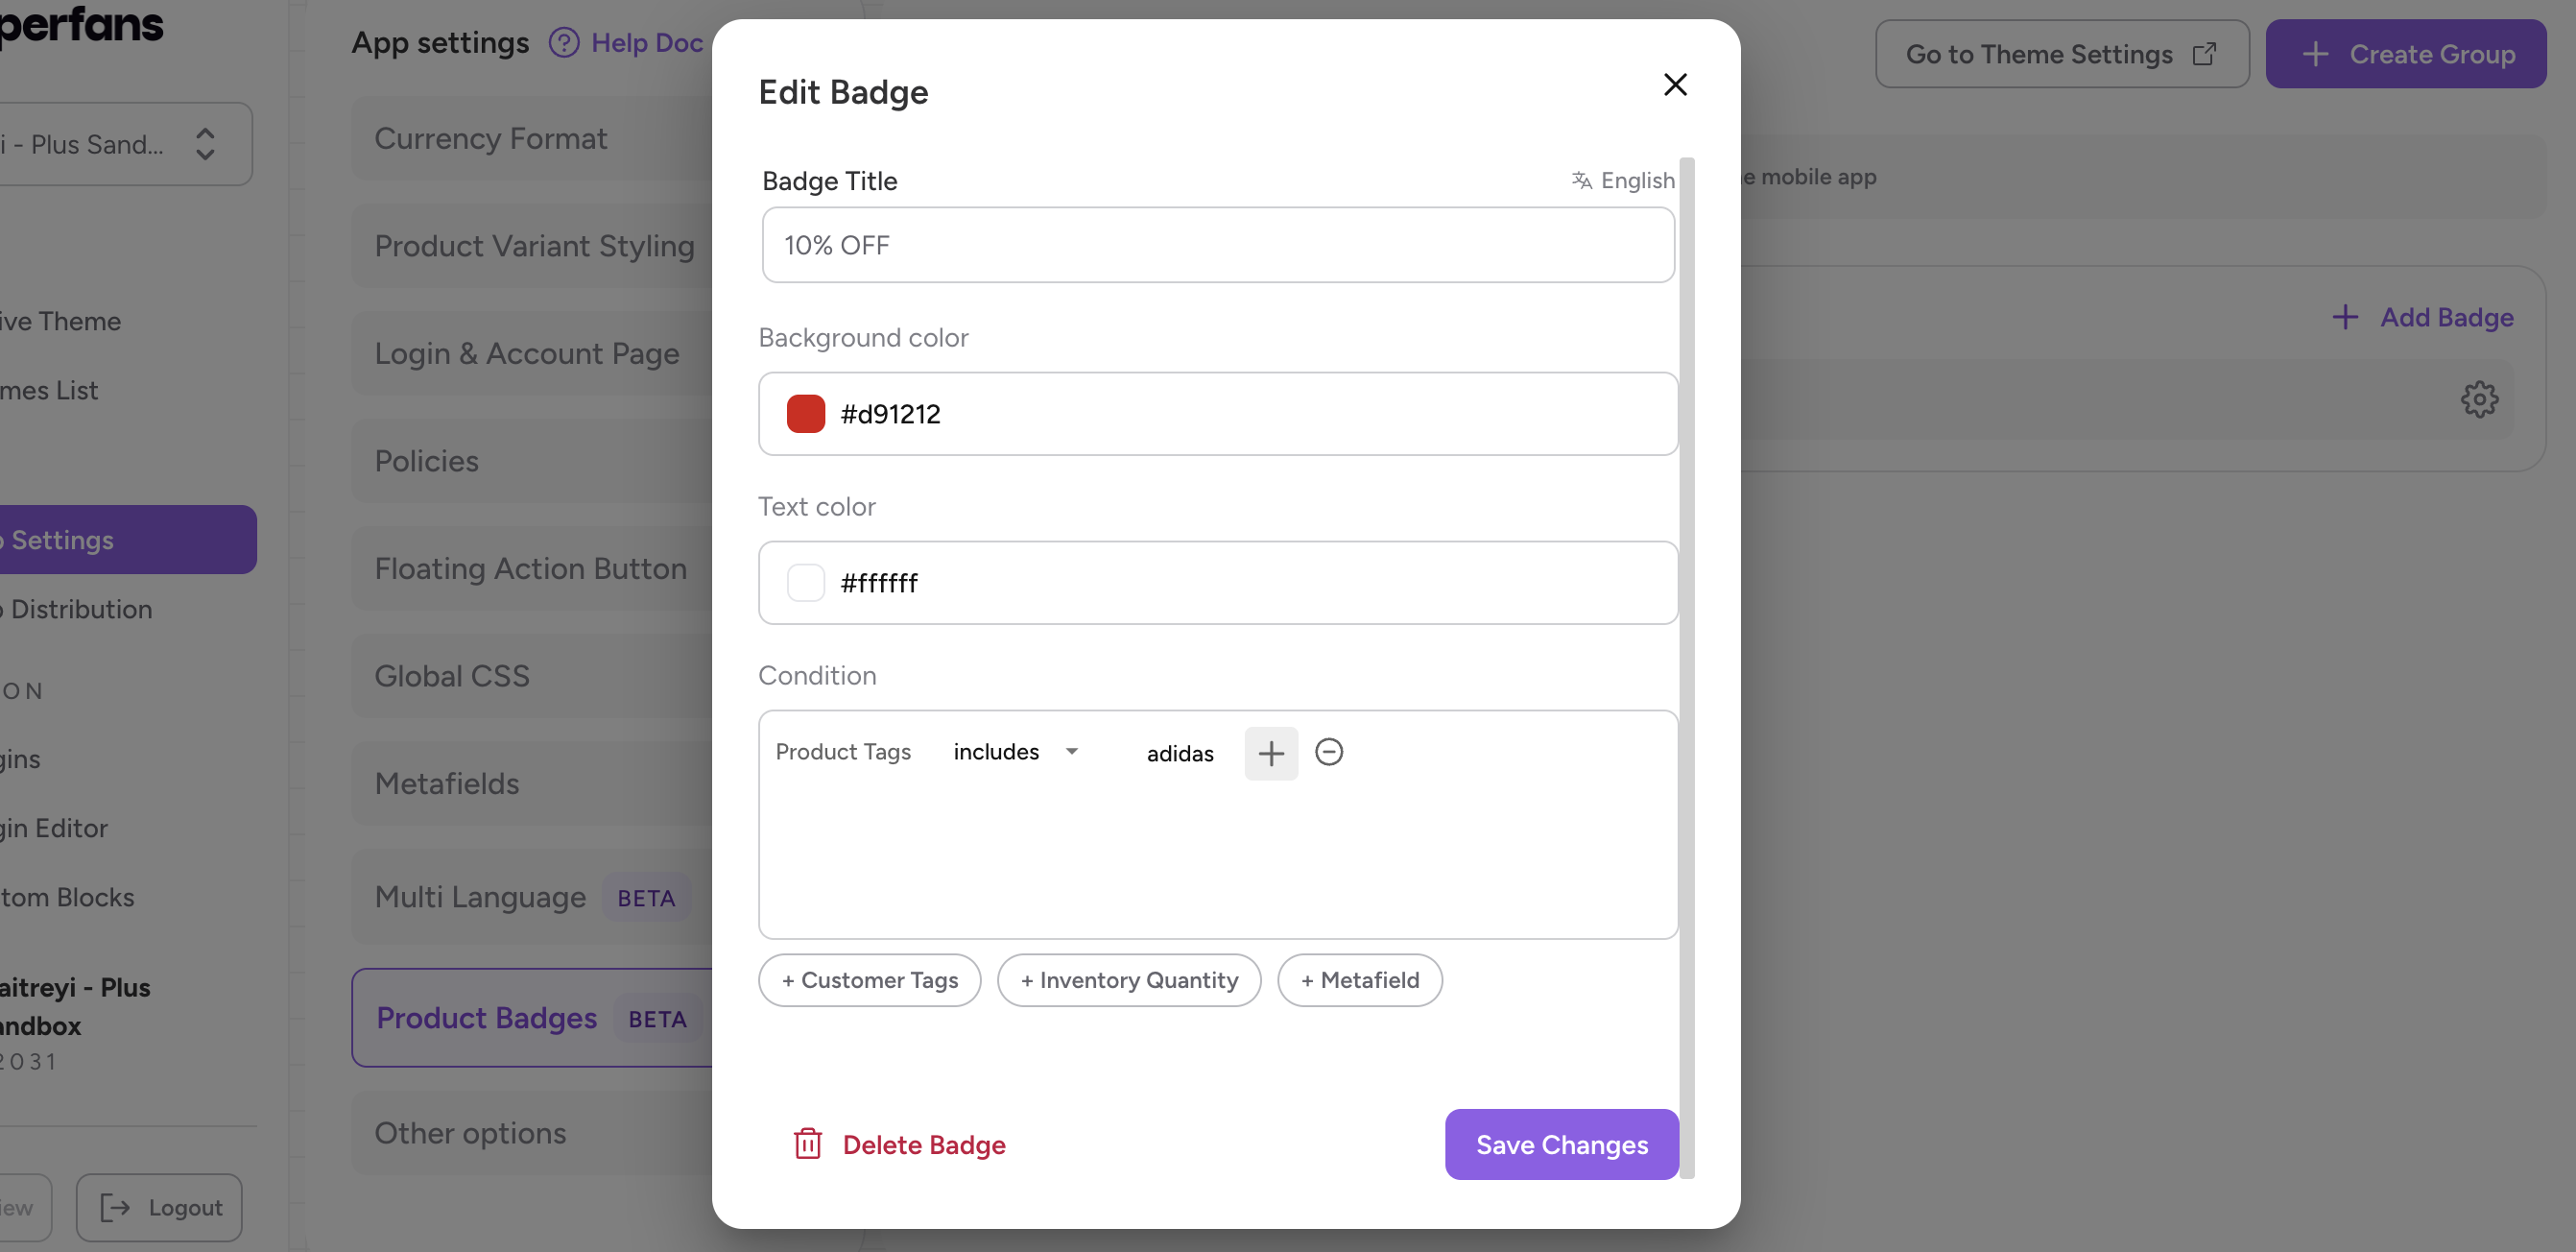
Step 5 : Provide the following details for the badge and click on “Create Badge”.
Badge Title → This is the text that appears on the product images.
Background Color → The background colour of the badge.
Text Color → The color of the title that appears in the badge.
Condition → The filter / conditions that can be applied to the badge to personalise the experience for end users.
Conditions available to set up Product Badges
Inventory Quantity → You can create a badge and make it appear for specific products based on its inventory quantity.
The below is the badge which is configured for products whose inventory quantity equals 10. (There are other conditions for inventory quantities say greater than, less than and does not equal).
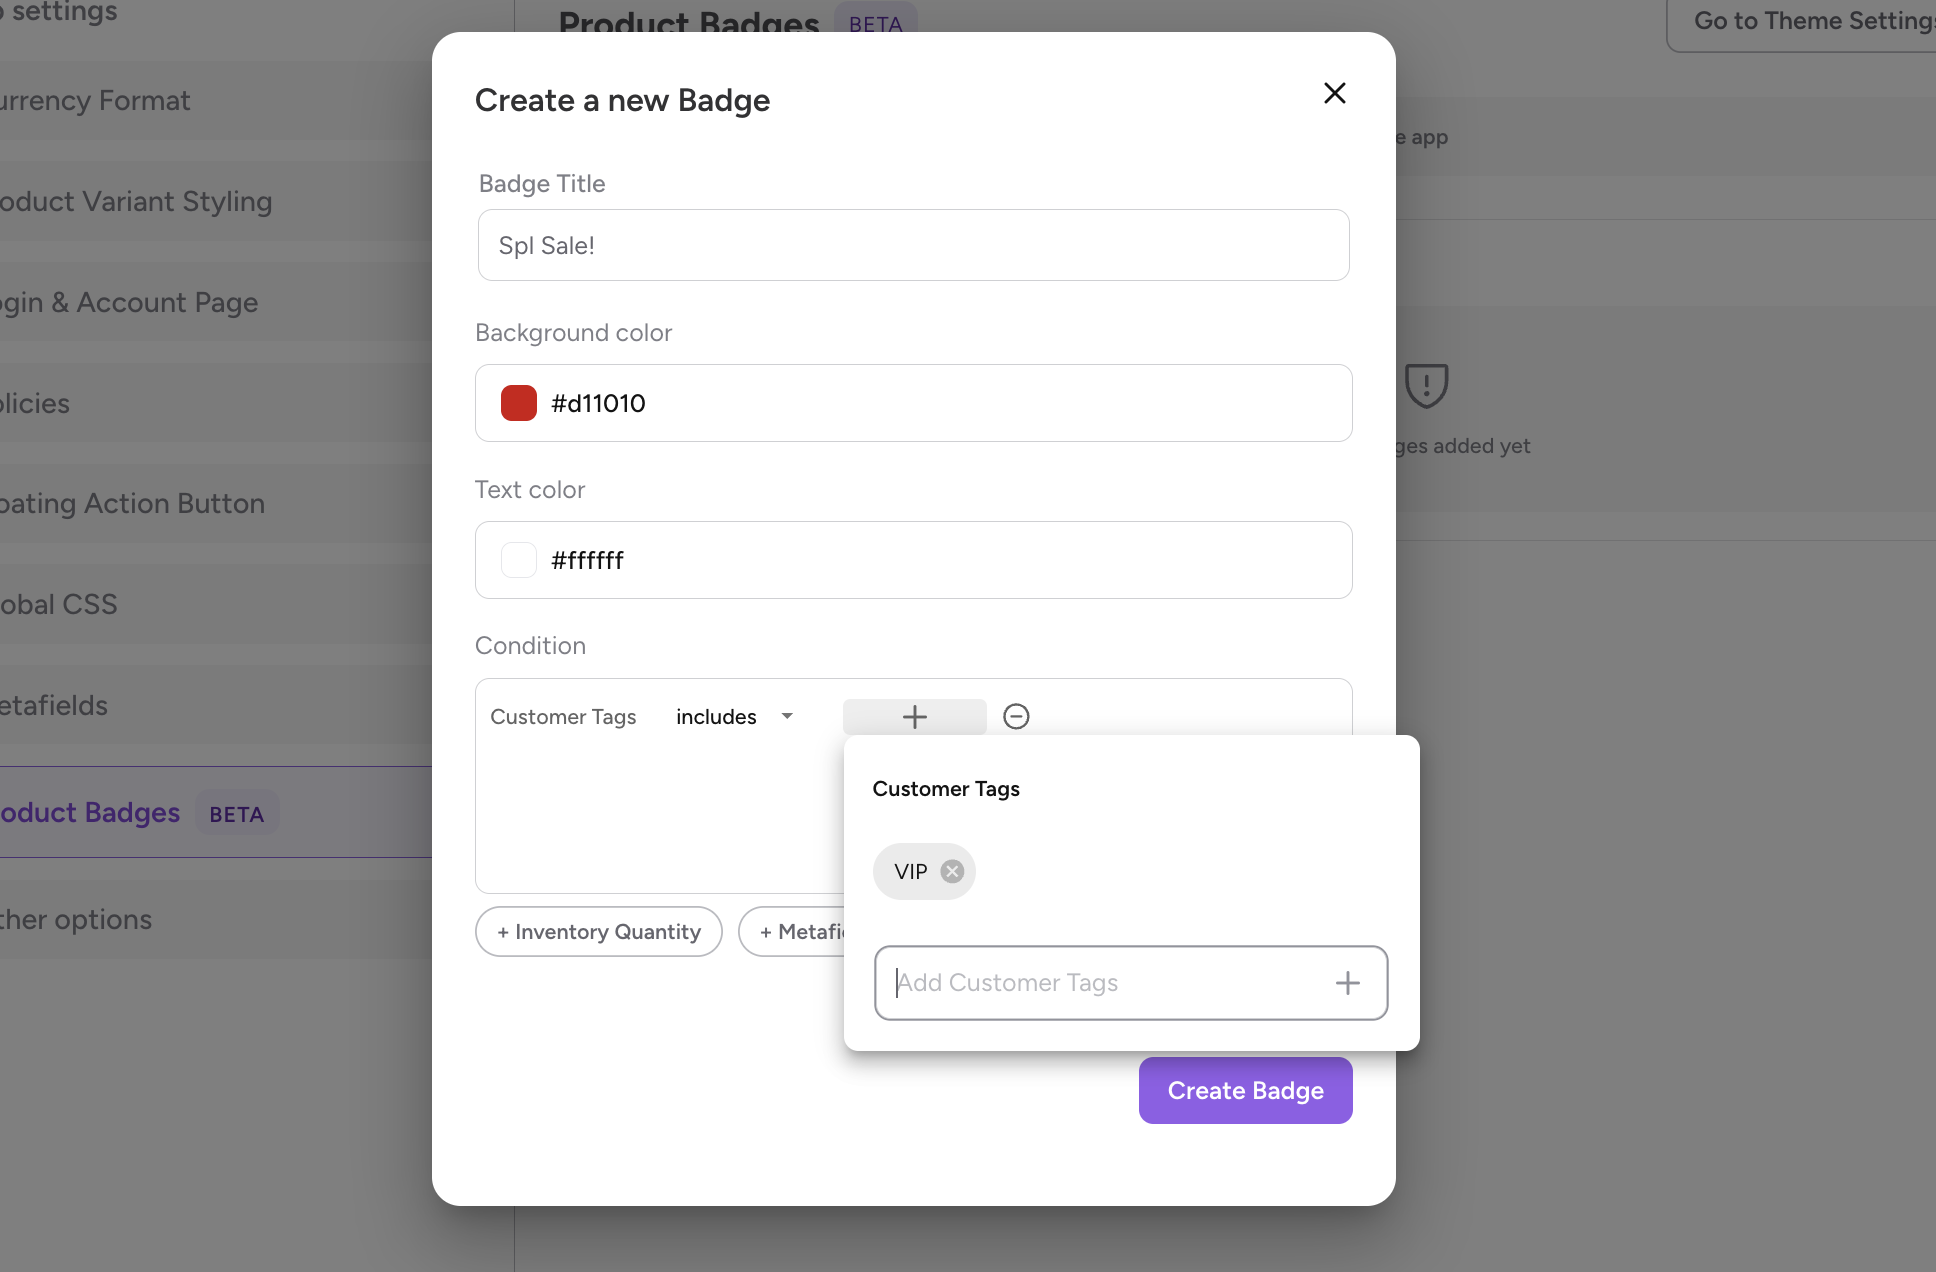
Customer Tags → This condition enables the customers to make the product badge display for selective users of the app based on customer tags.
The below is the badge configured such a way that, only VIP users can see the product badge on the app.
(for multiple tags, add all the tag names with comma)
Product Metafield → This condition enables the customers to make the product badge display on specific products based on the product metafields added to the products.
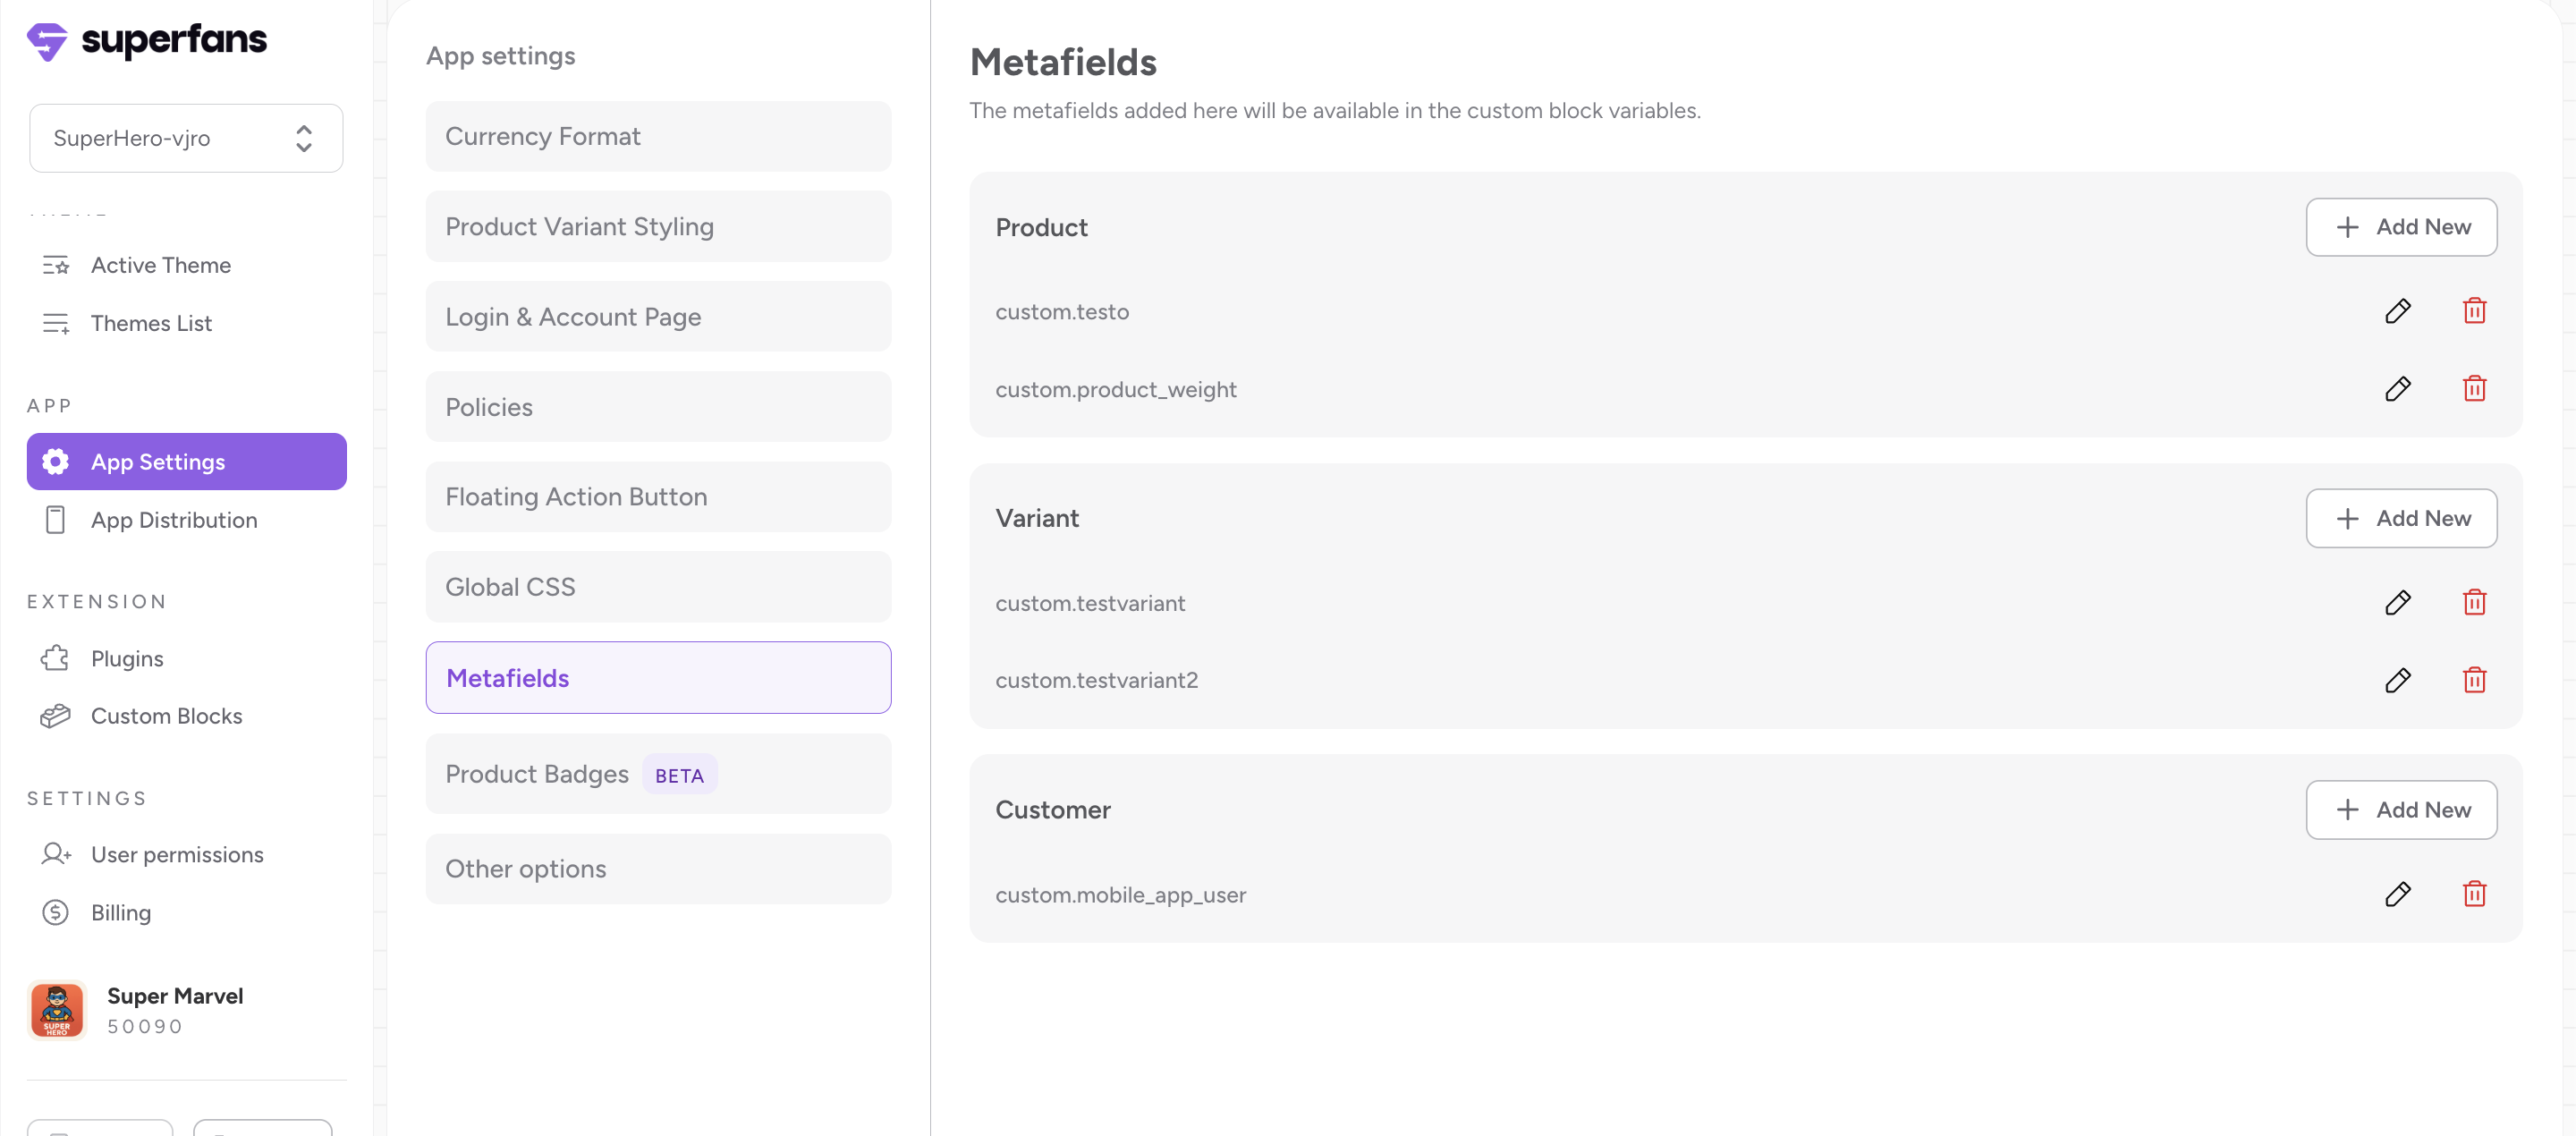
Note: To do this, you’ll have to make sure, the metafield is declared in the Metafields section of App Settings.

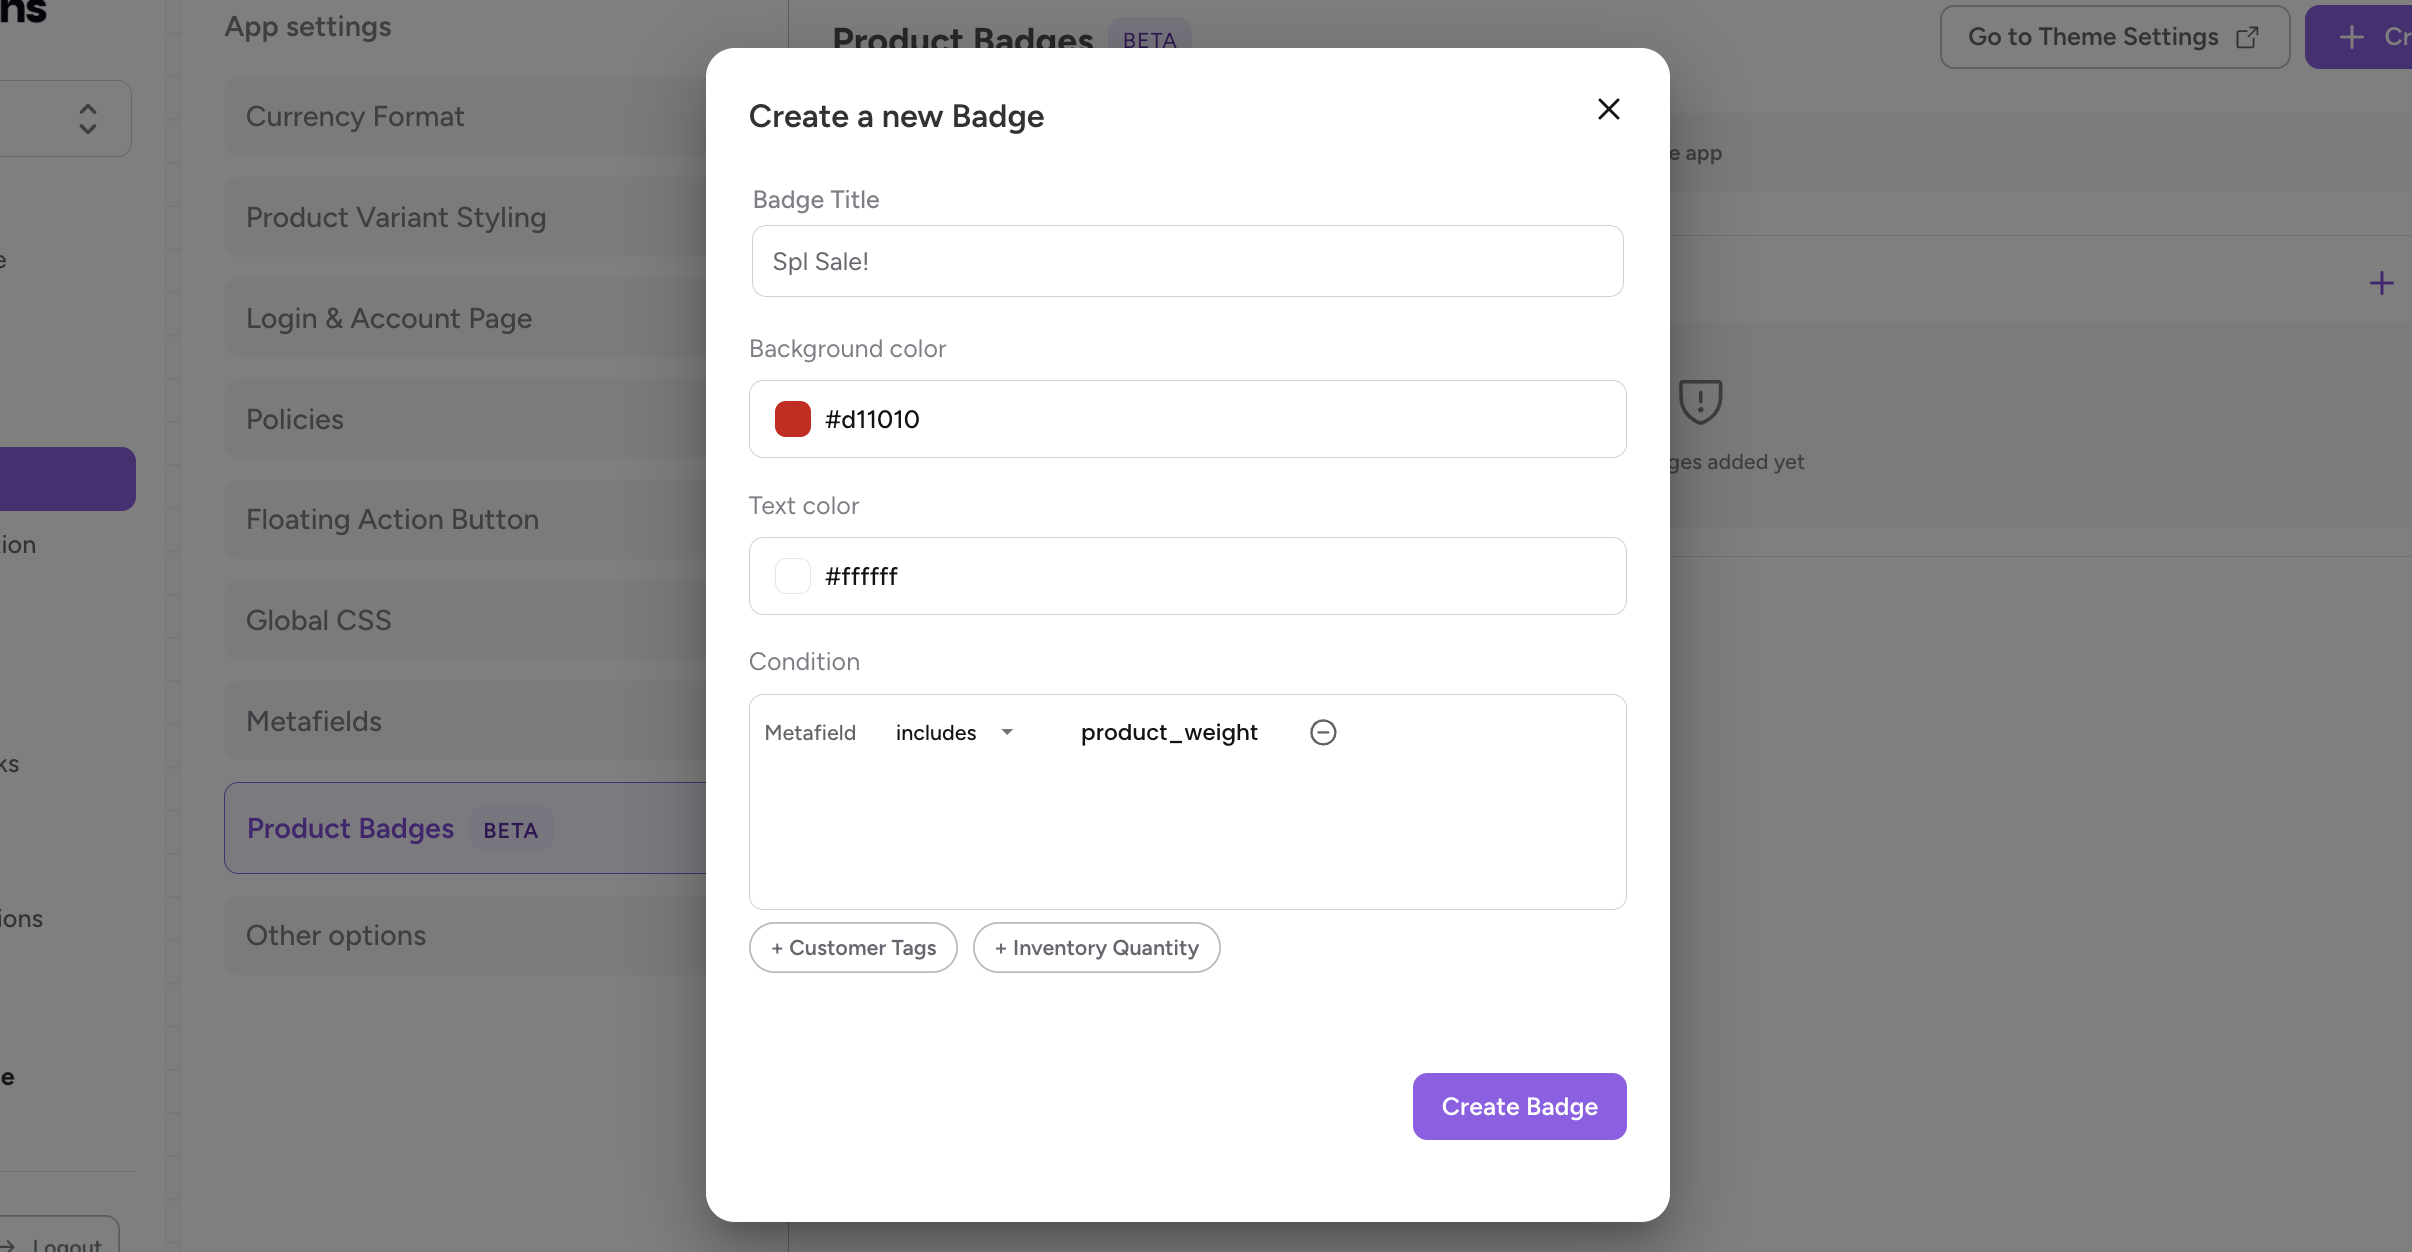
Make sure product_weight is declared in Metafields section.
Product Tags→ This condition enables the customers to make the product badge display on specific products based on the product tags added to the products on Shopify.
Notes:
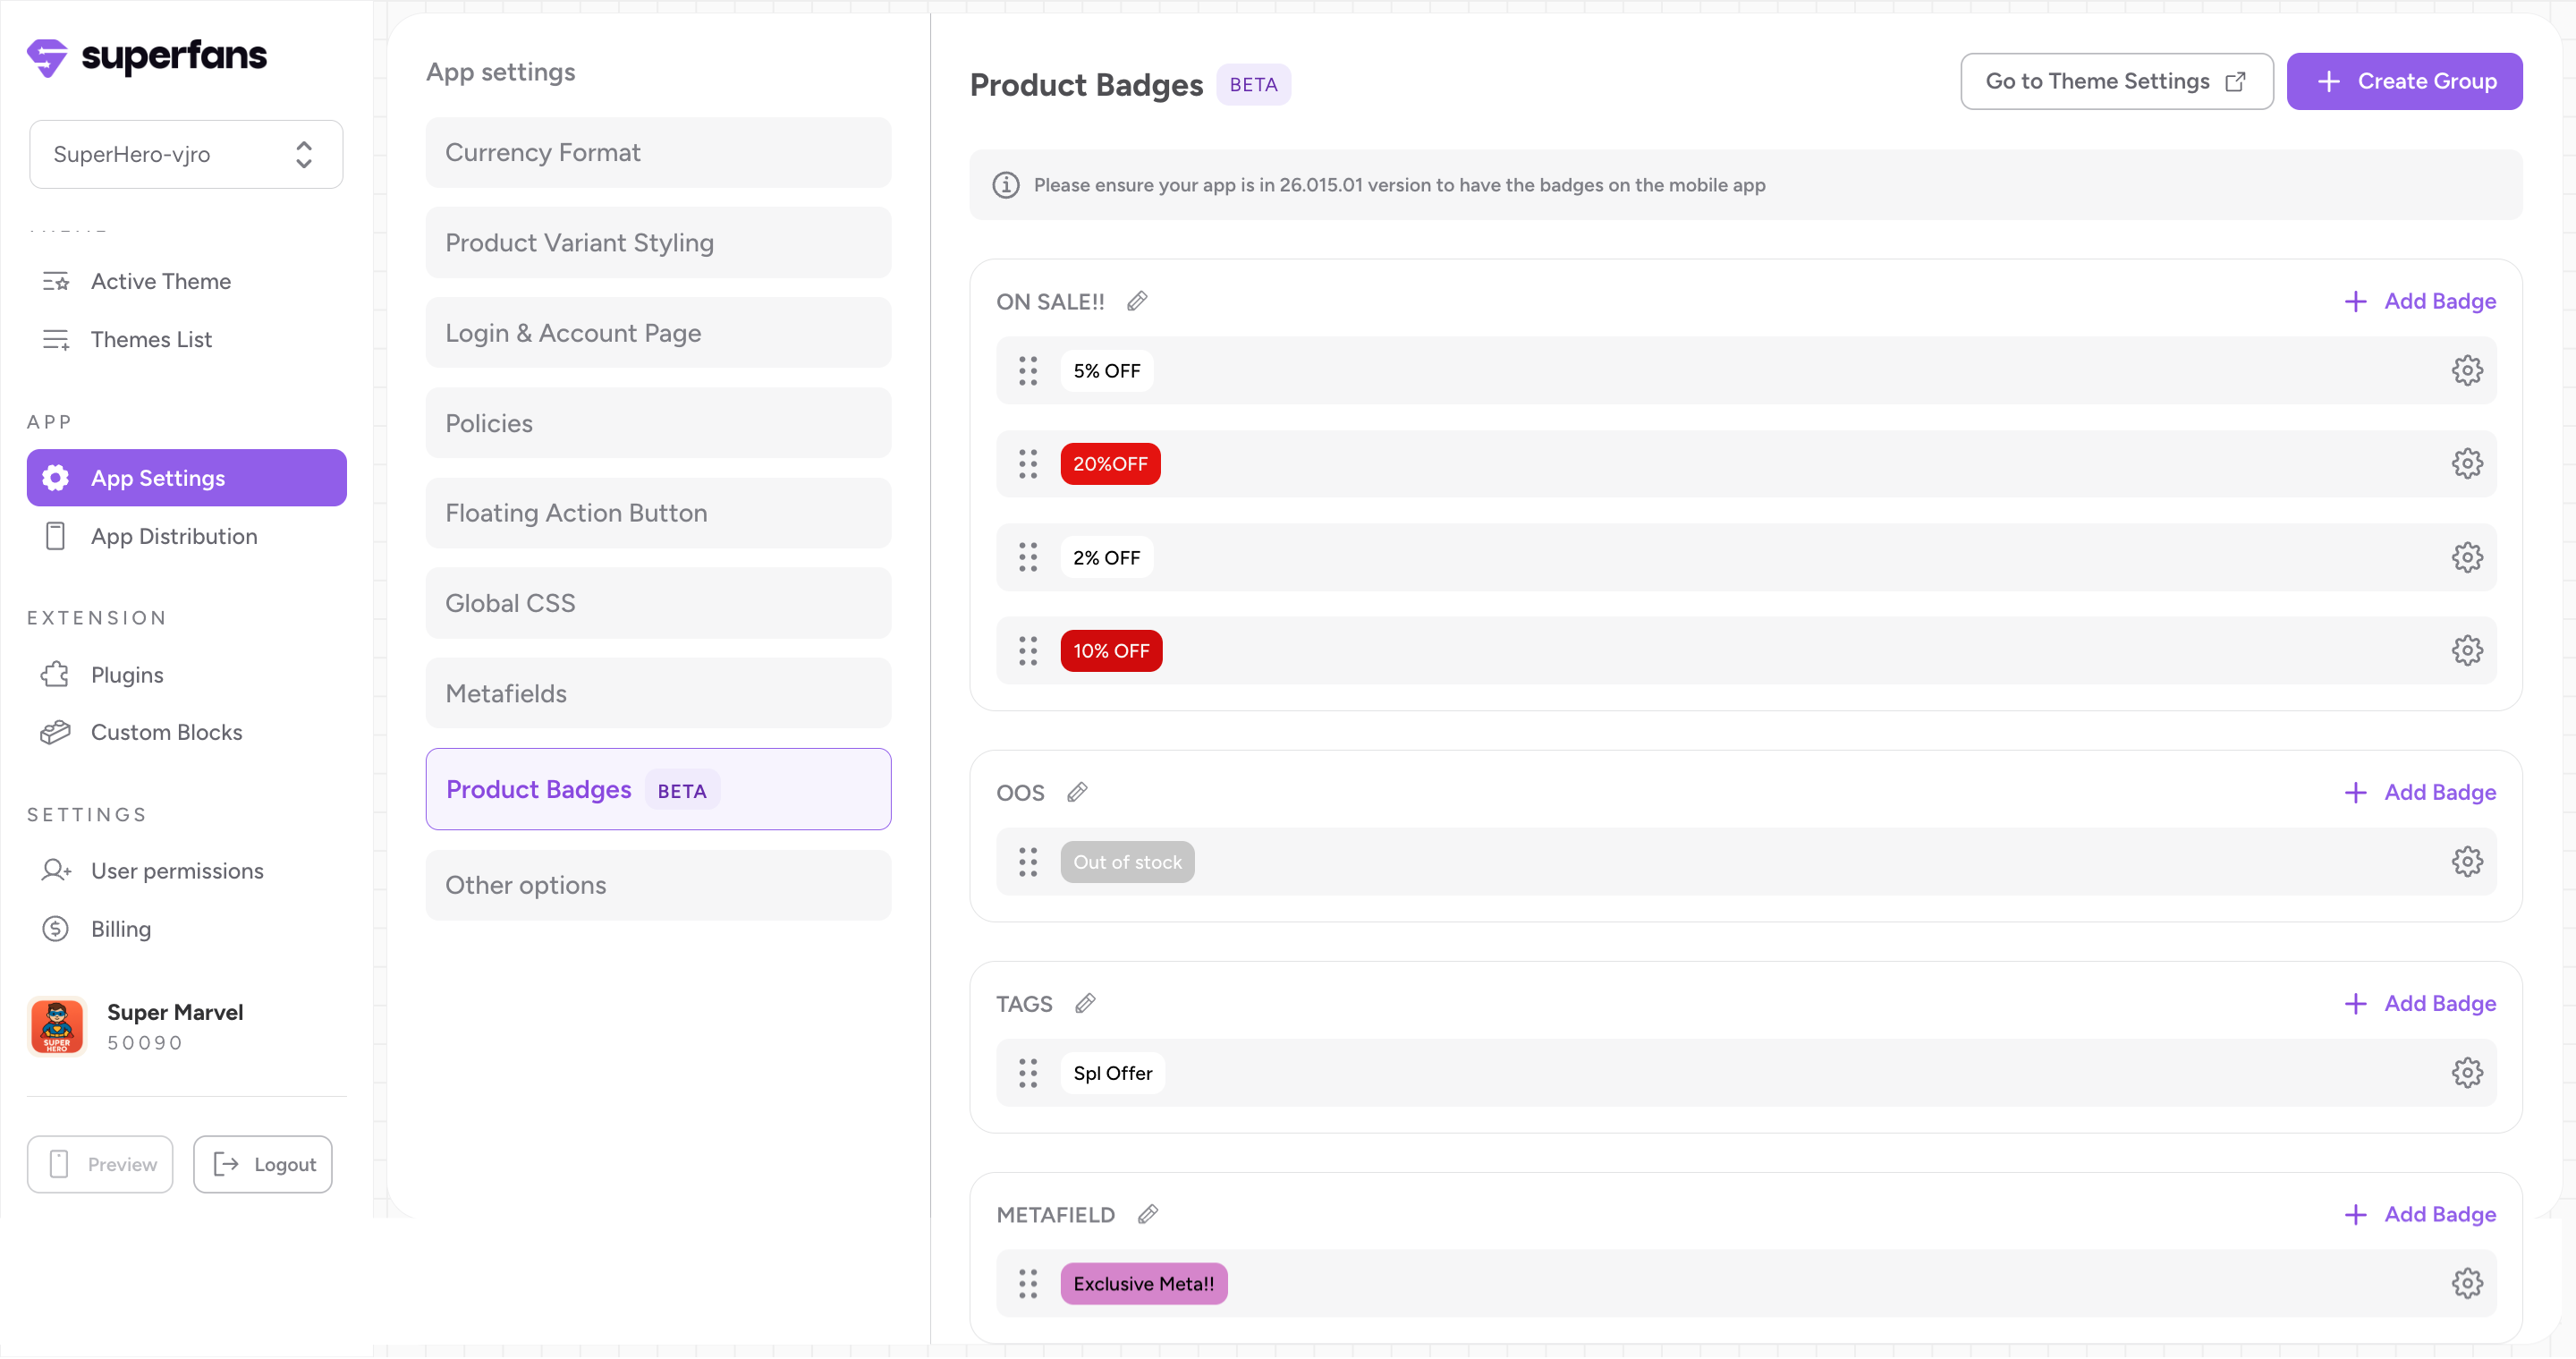
You can create as many product badges as required in a single group. There is no limit to the number of badges.
You can create multiple product badges groups so that you can configure each group on the product images of the grid.
When more than one badge condition applies to a product, Superfans will show only one badge. In cases of overlap (e.g., quantity >5 and quantity >10), the system prioritizes the badge that was created first.
Here is a sample screenshot of multiple product groups with multiple badges.
Now that, you have created the badges, its time to configure them. Follow the steps below.
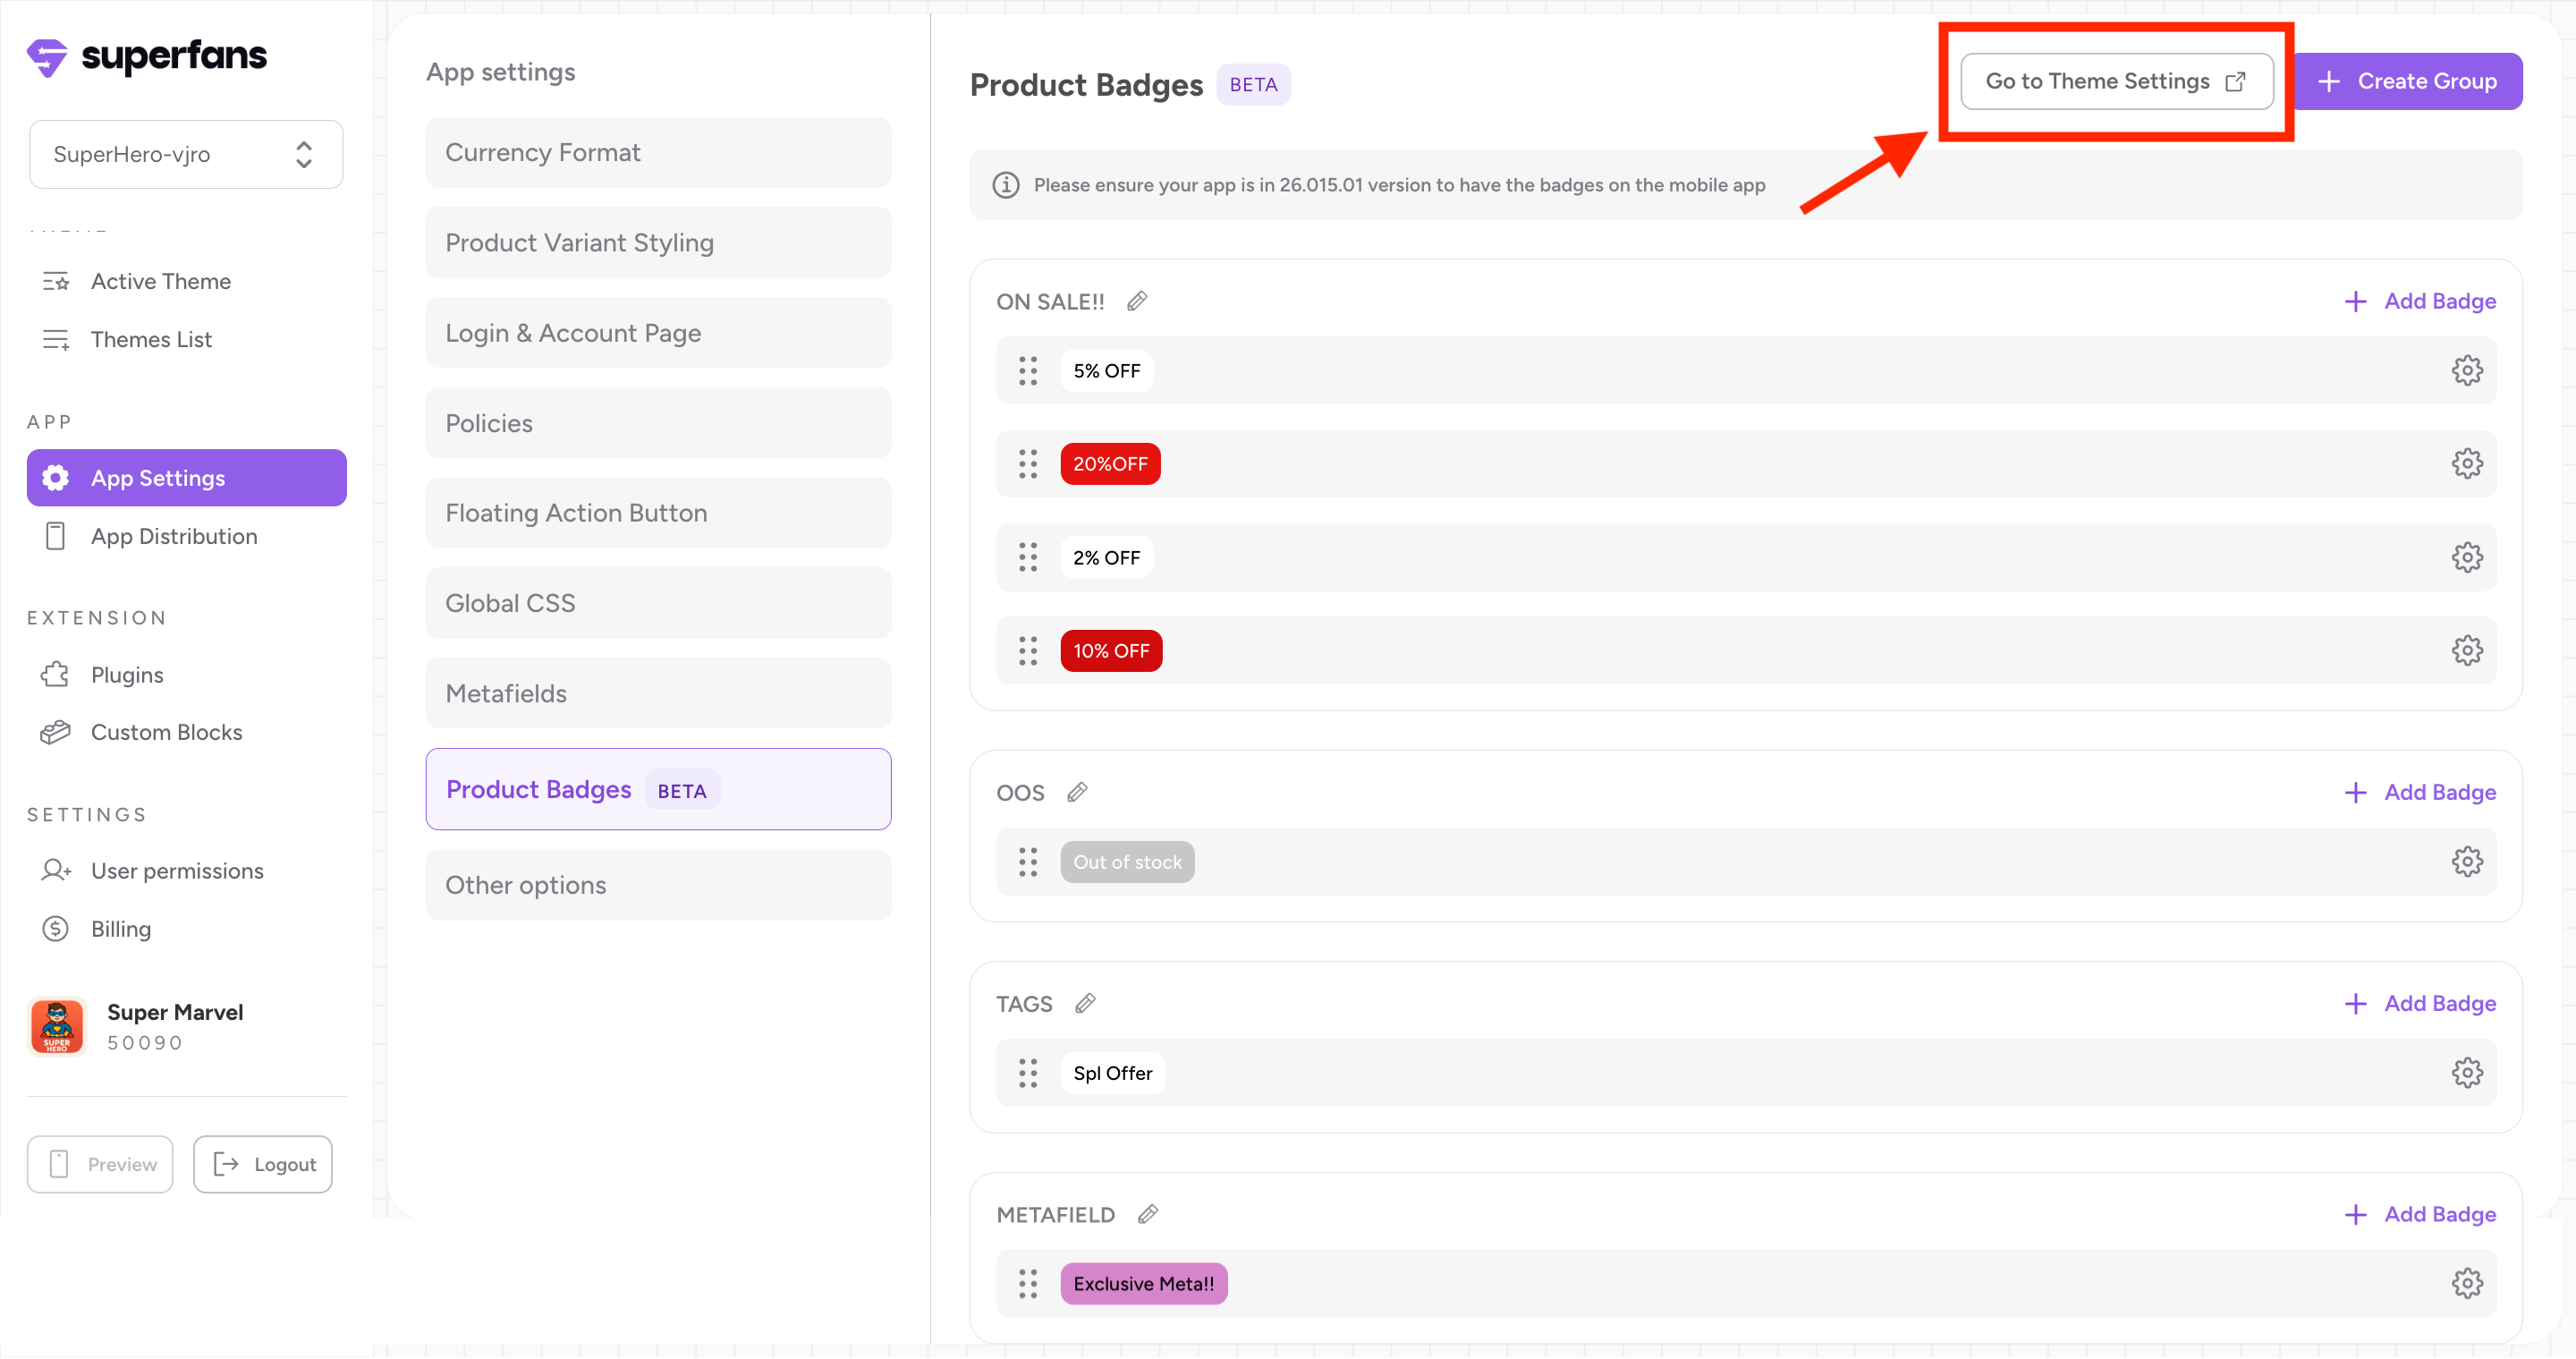
Step 1 : Navigate to the current active theme by clicking the “Go to Theme Settings” CTA on top.
Step 2 : Navigate to the Product Block Theme settings by clicking the “Theme Settings” just above the navigation breadcrumbs.
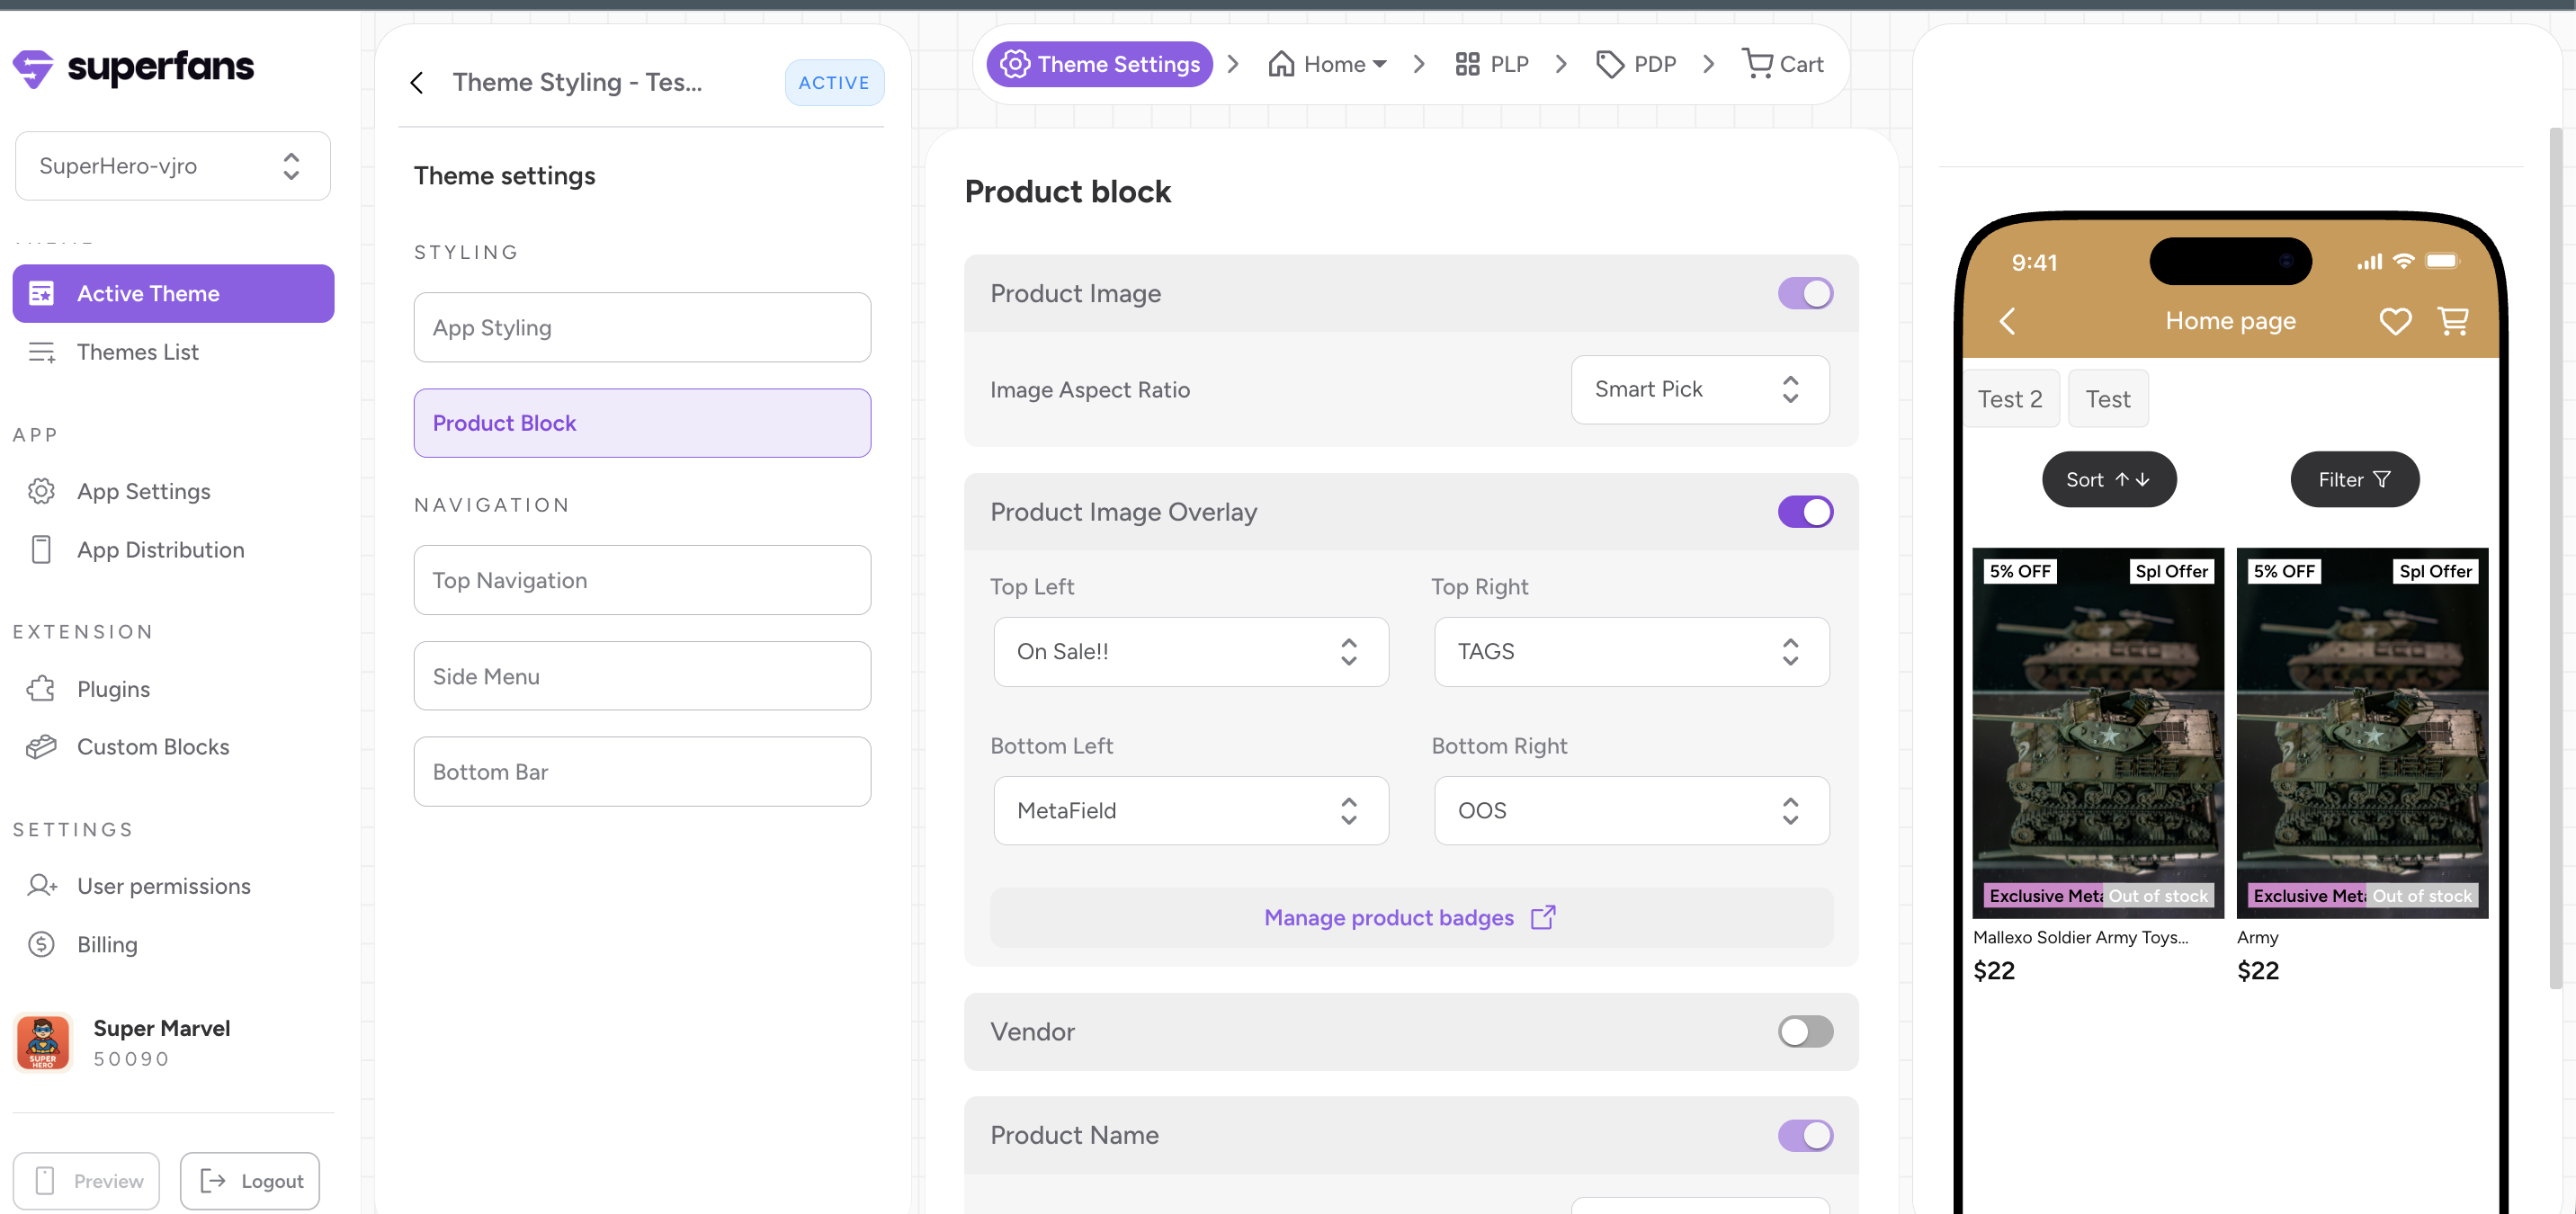
Step 3 : Toggle the Product Image Overlay to configure the badges on the product grid images.
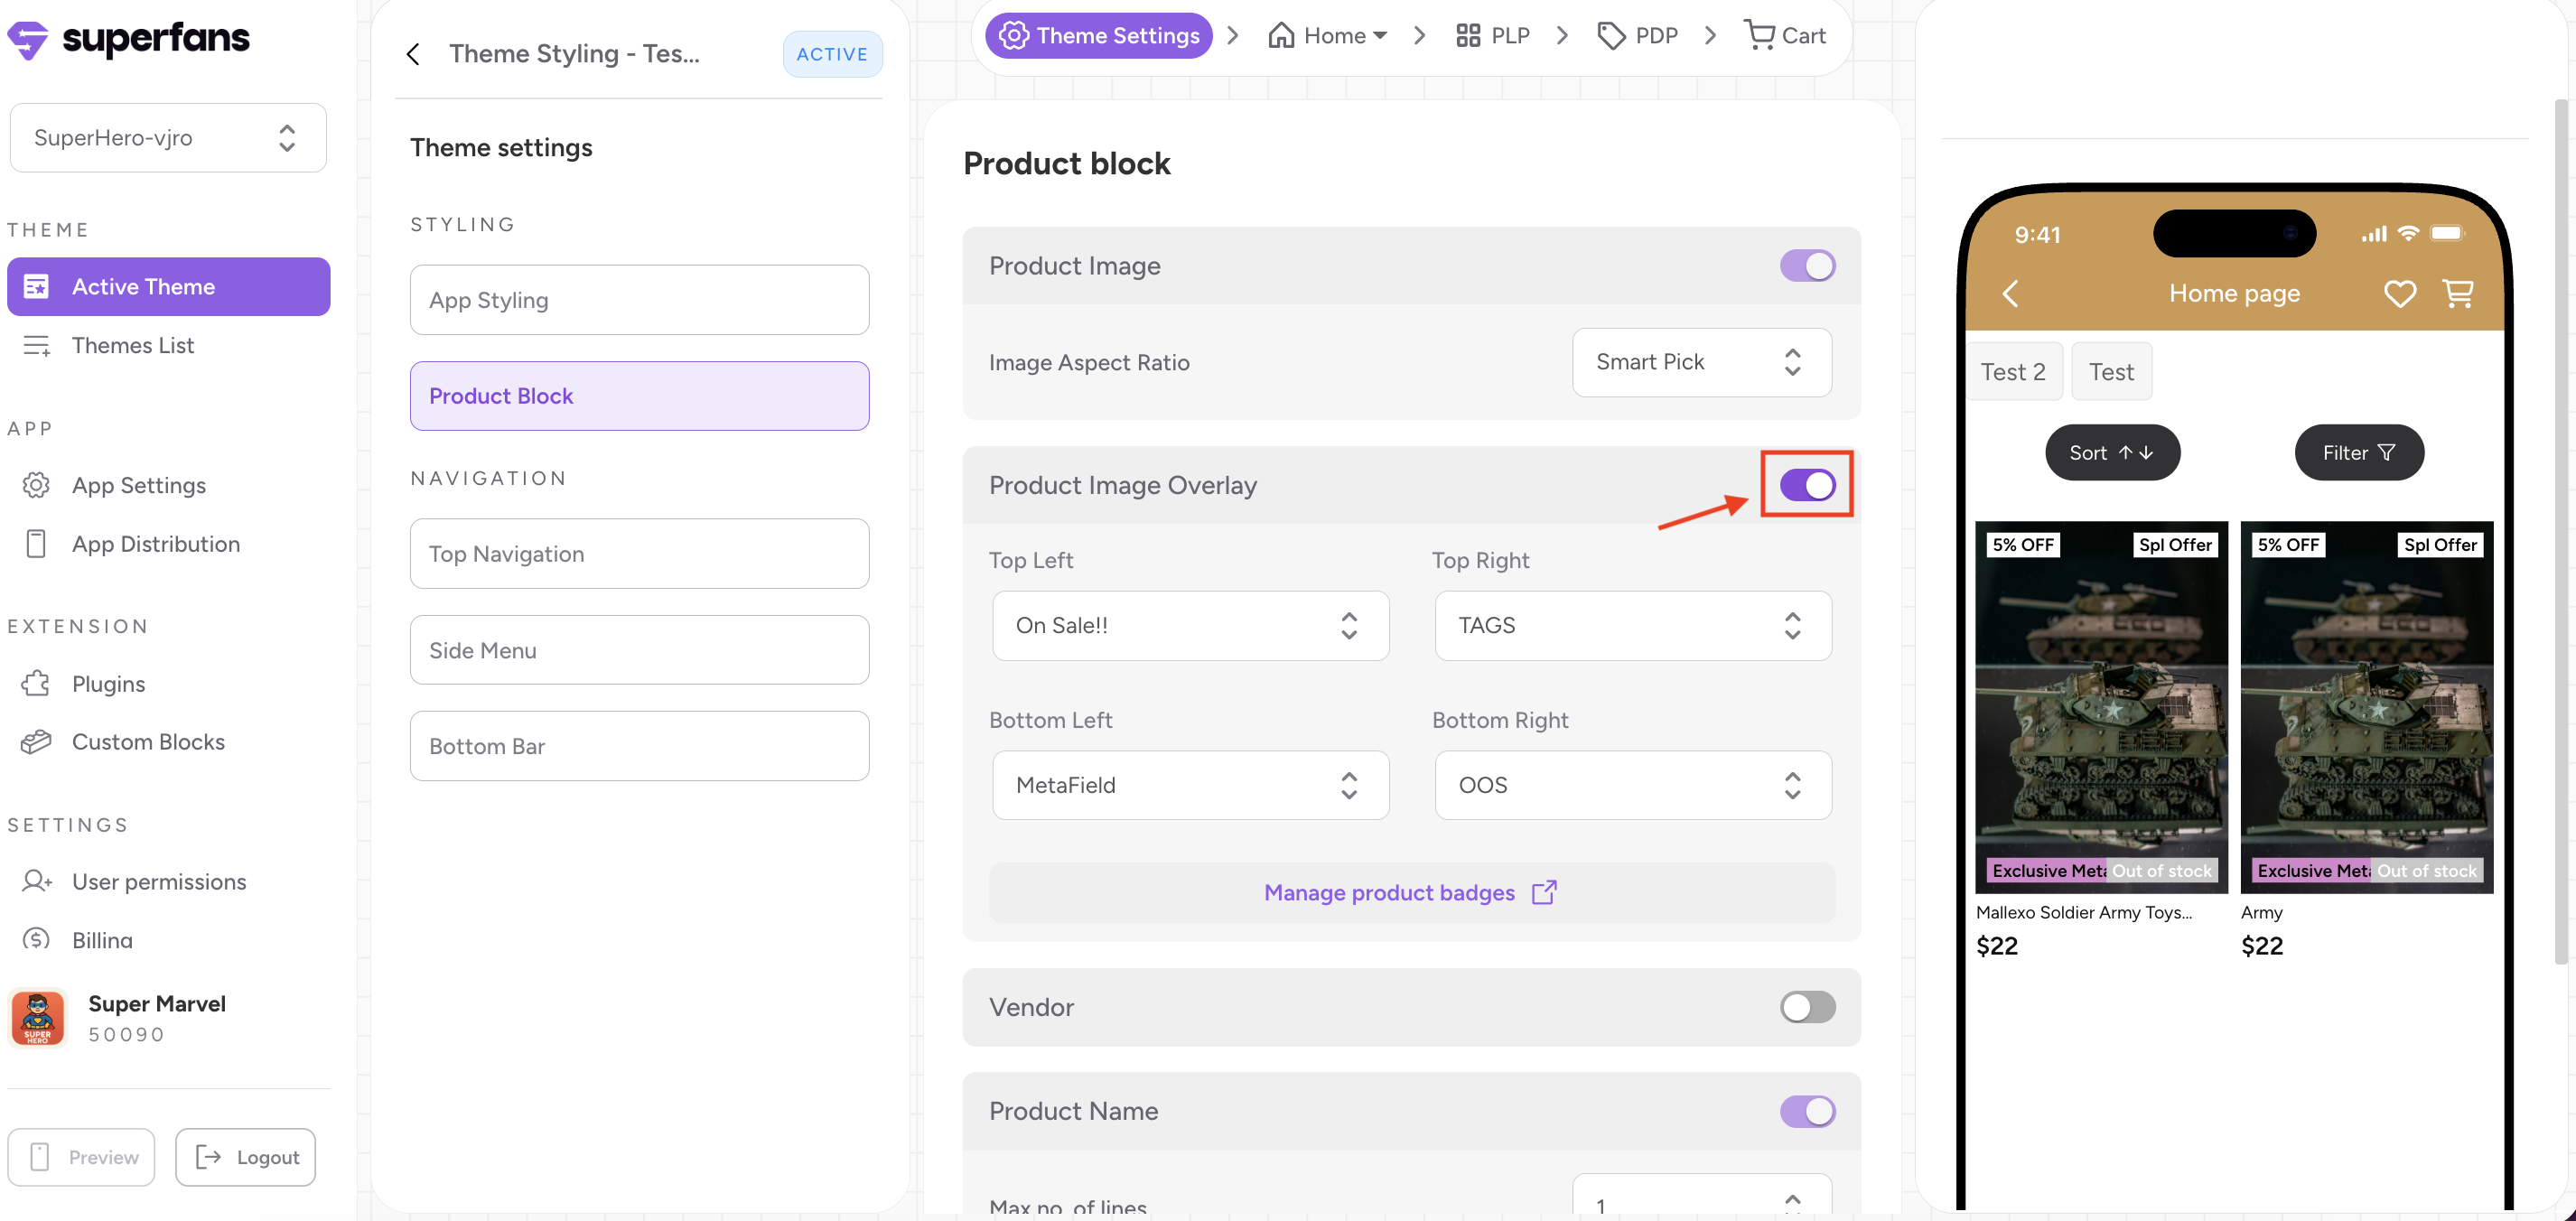
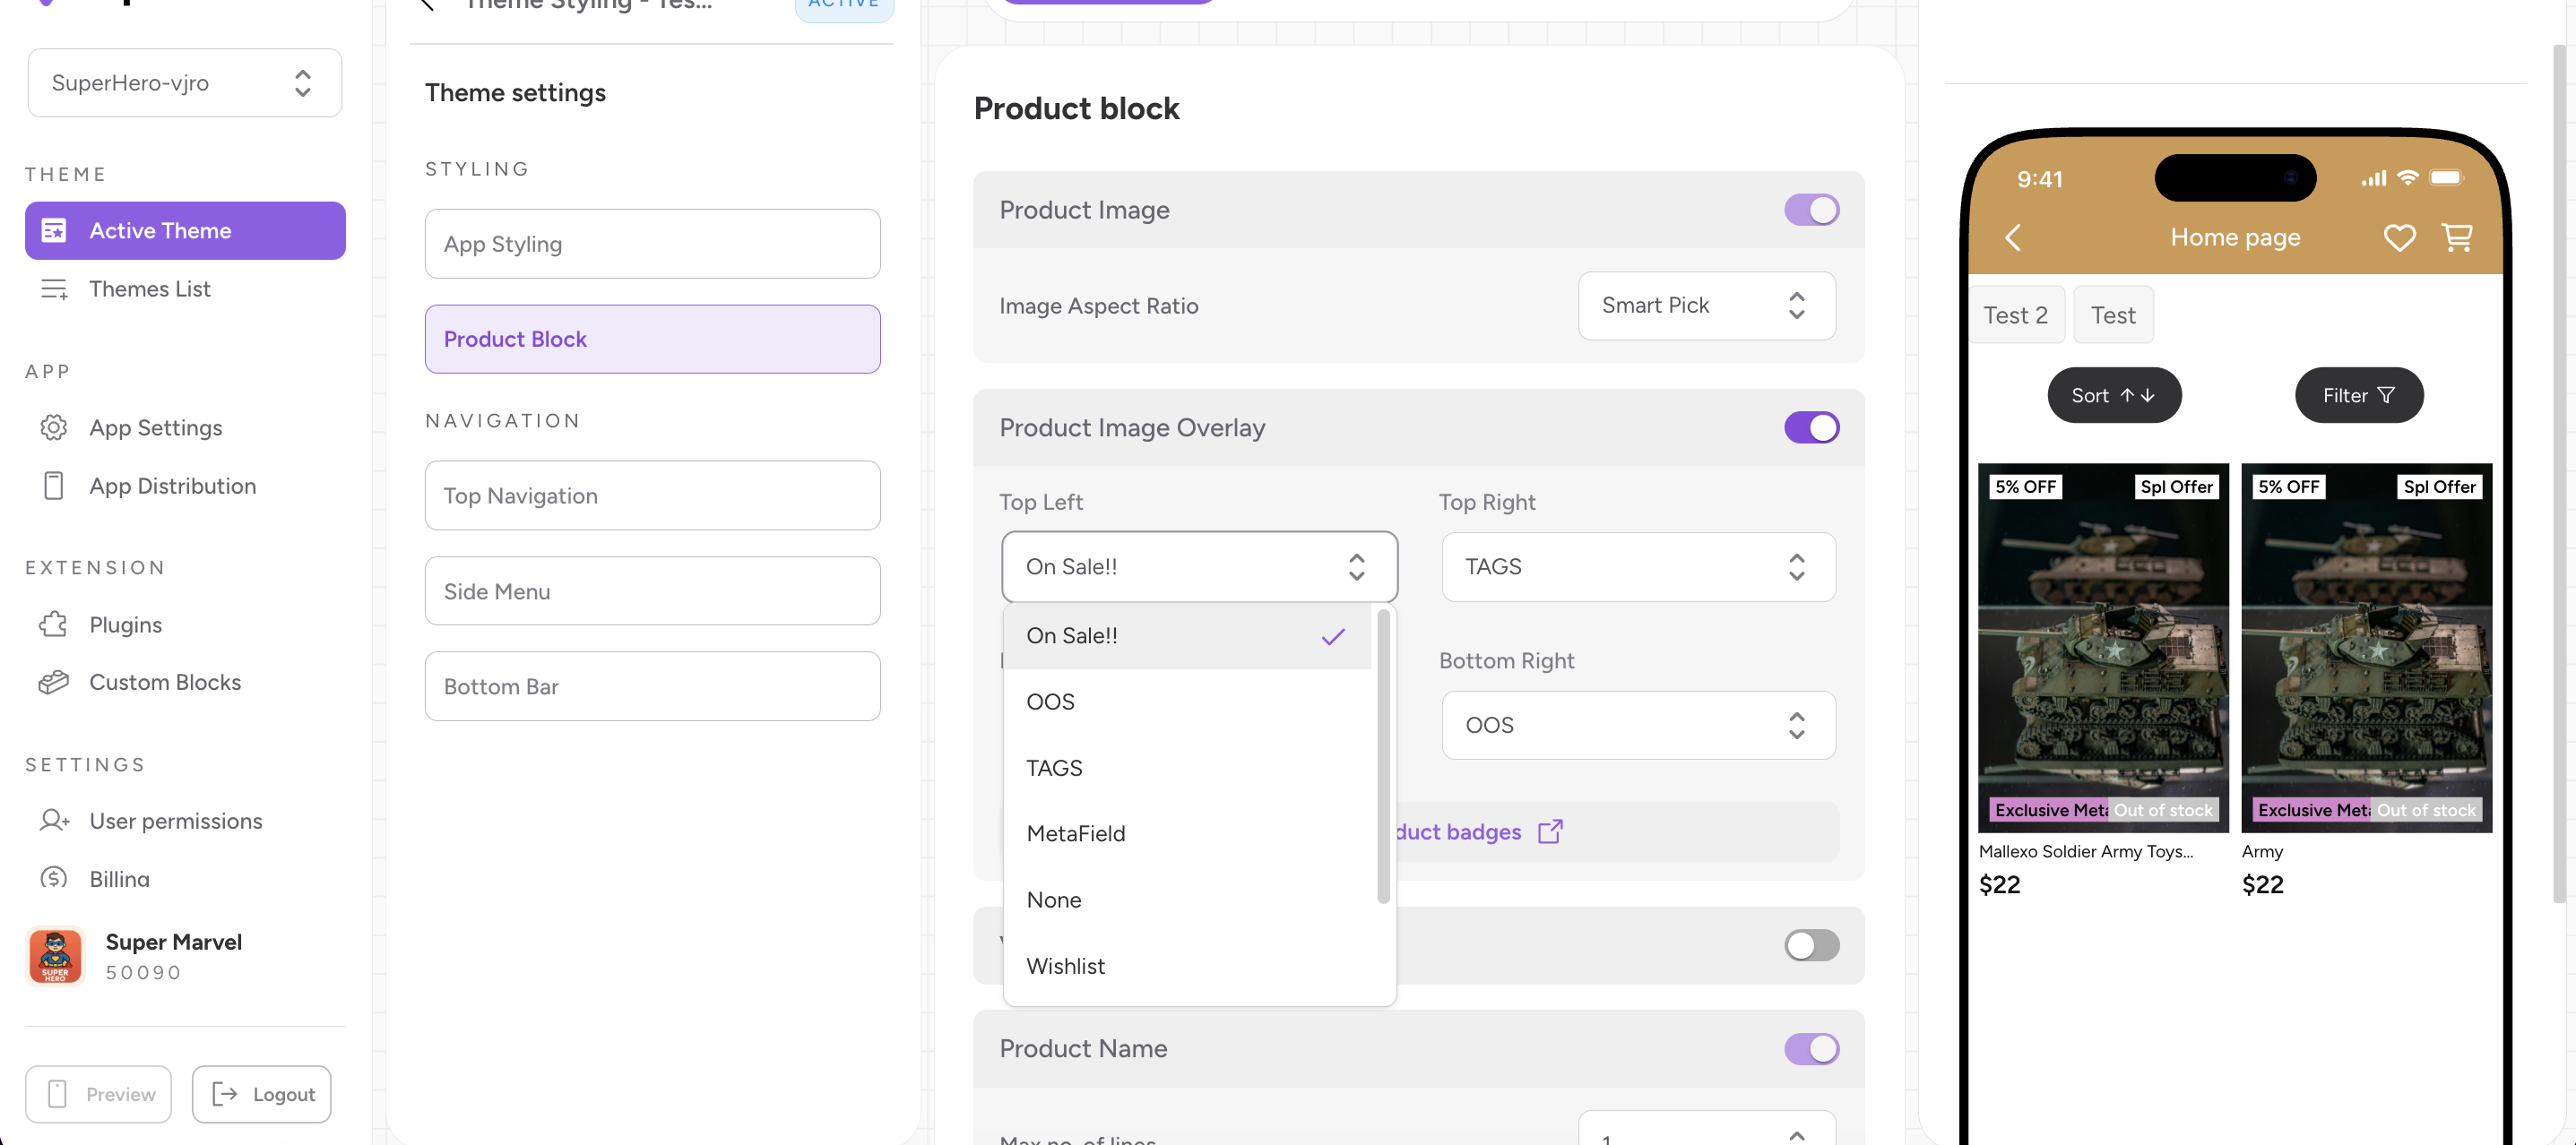
Step 4 : You can configure the badges on the 4 corners of the image say top left, top right, bottom left and bottom right. Select the product badge group you want to configure for each of these positions from the dropdown containing the Product Badge Group name.
Now that the changes are saved automatically, you can look at the preview on the dashboard and also on the app.
Important Note: Make sure your app is in the 26.015.01 version for the badges to appear on the mobile app. (If not, roll out an app update)
Avoid overusing badges; too many can reduce their impact.
Use urgency-driven badges (Limited Stock, Only Today) sparingly.
Keep text concise and easy to read on small screens. Preferable text length is 6 characters.