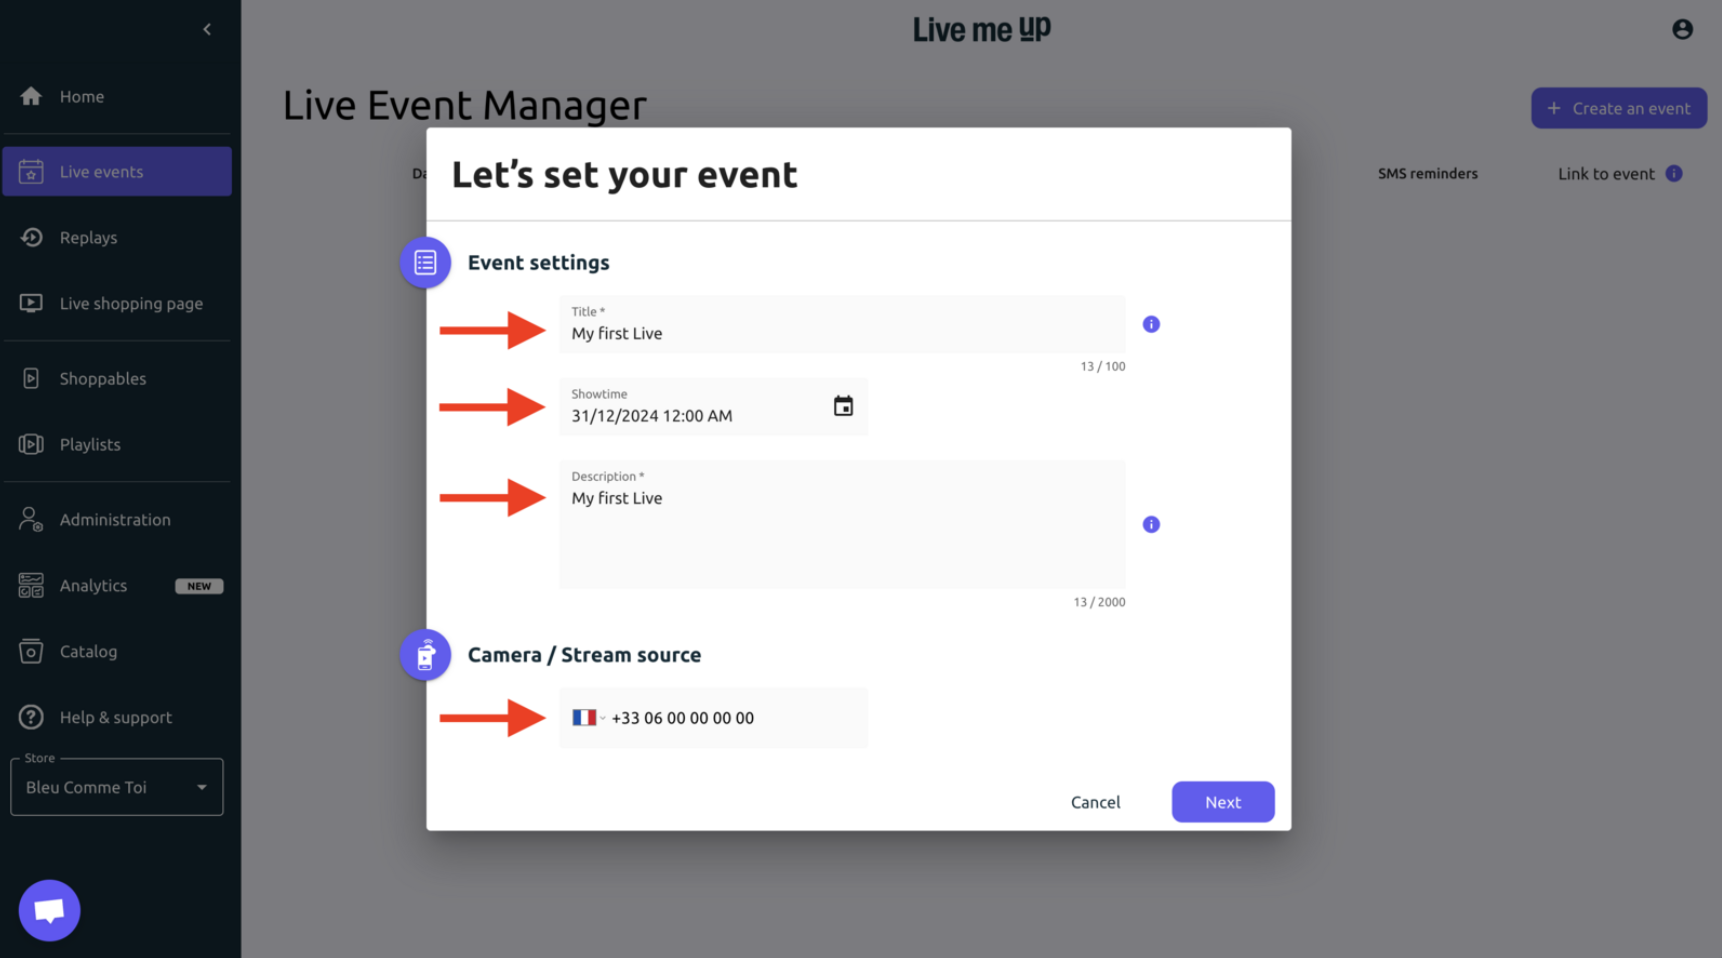
Step 1: In the Liveme Up Dashboard, go to the "Live Events" section on the left menu and click the "+ Create an event"

Step 2: Add a title, a showtime, a description and the smartphone number as your primary streaming source.
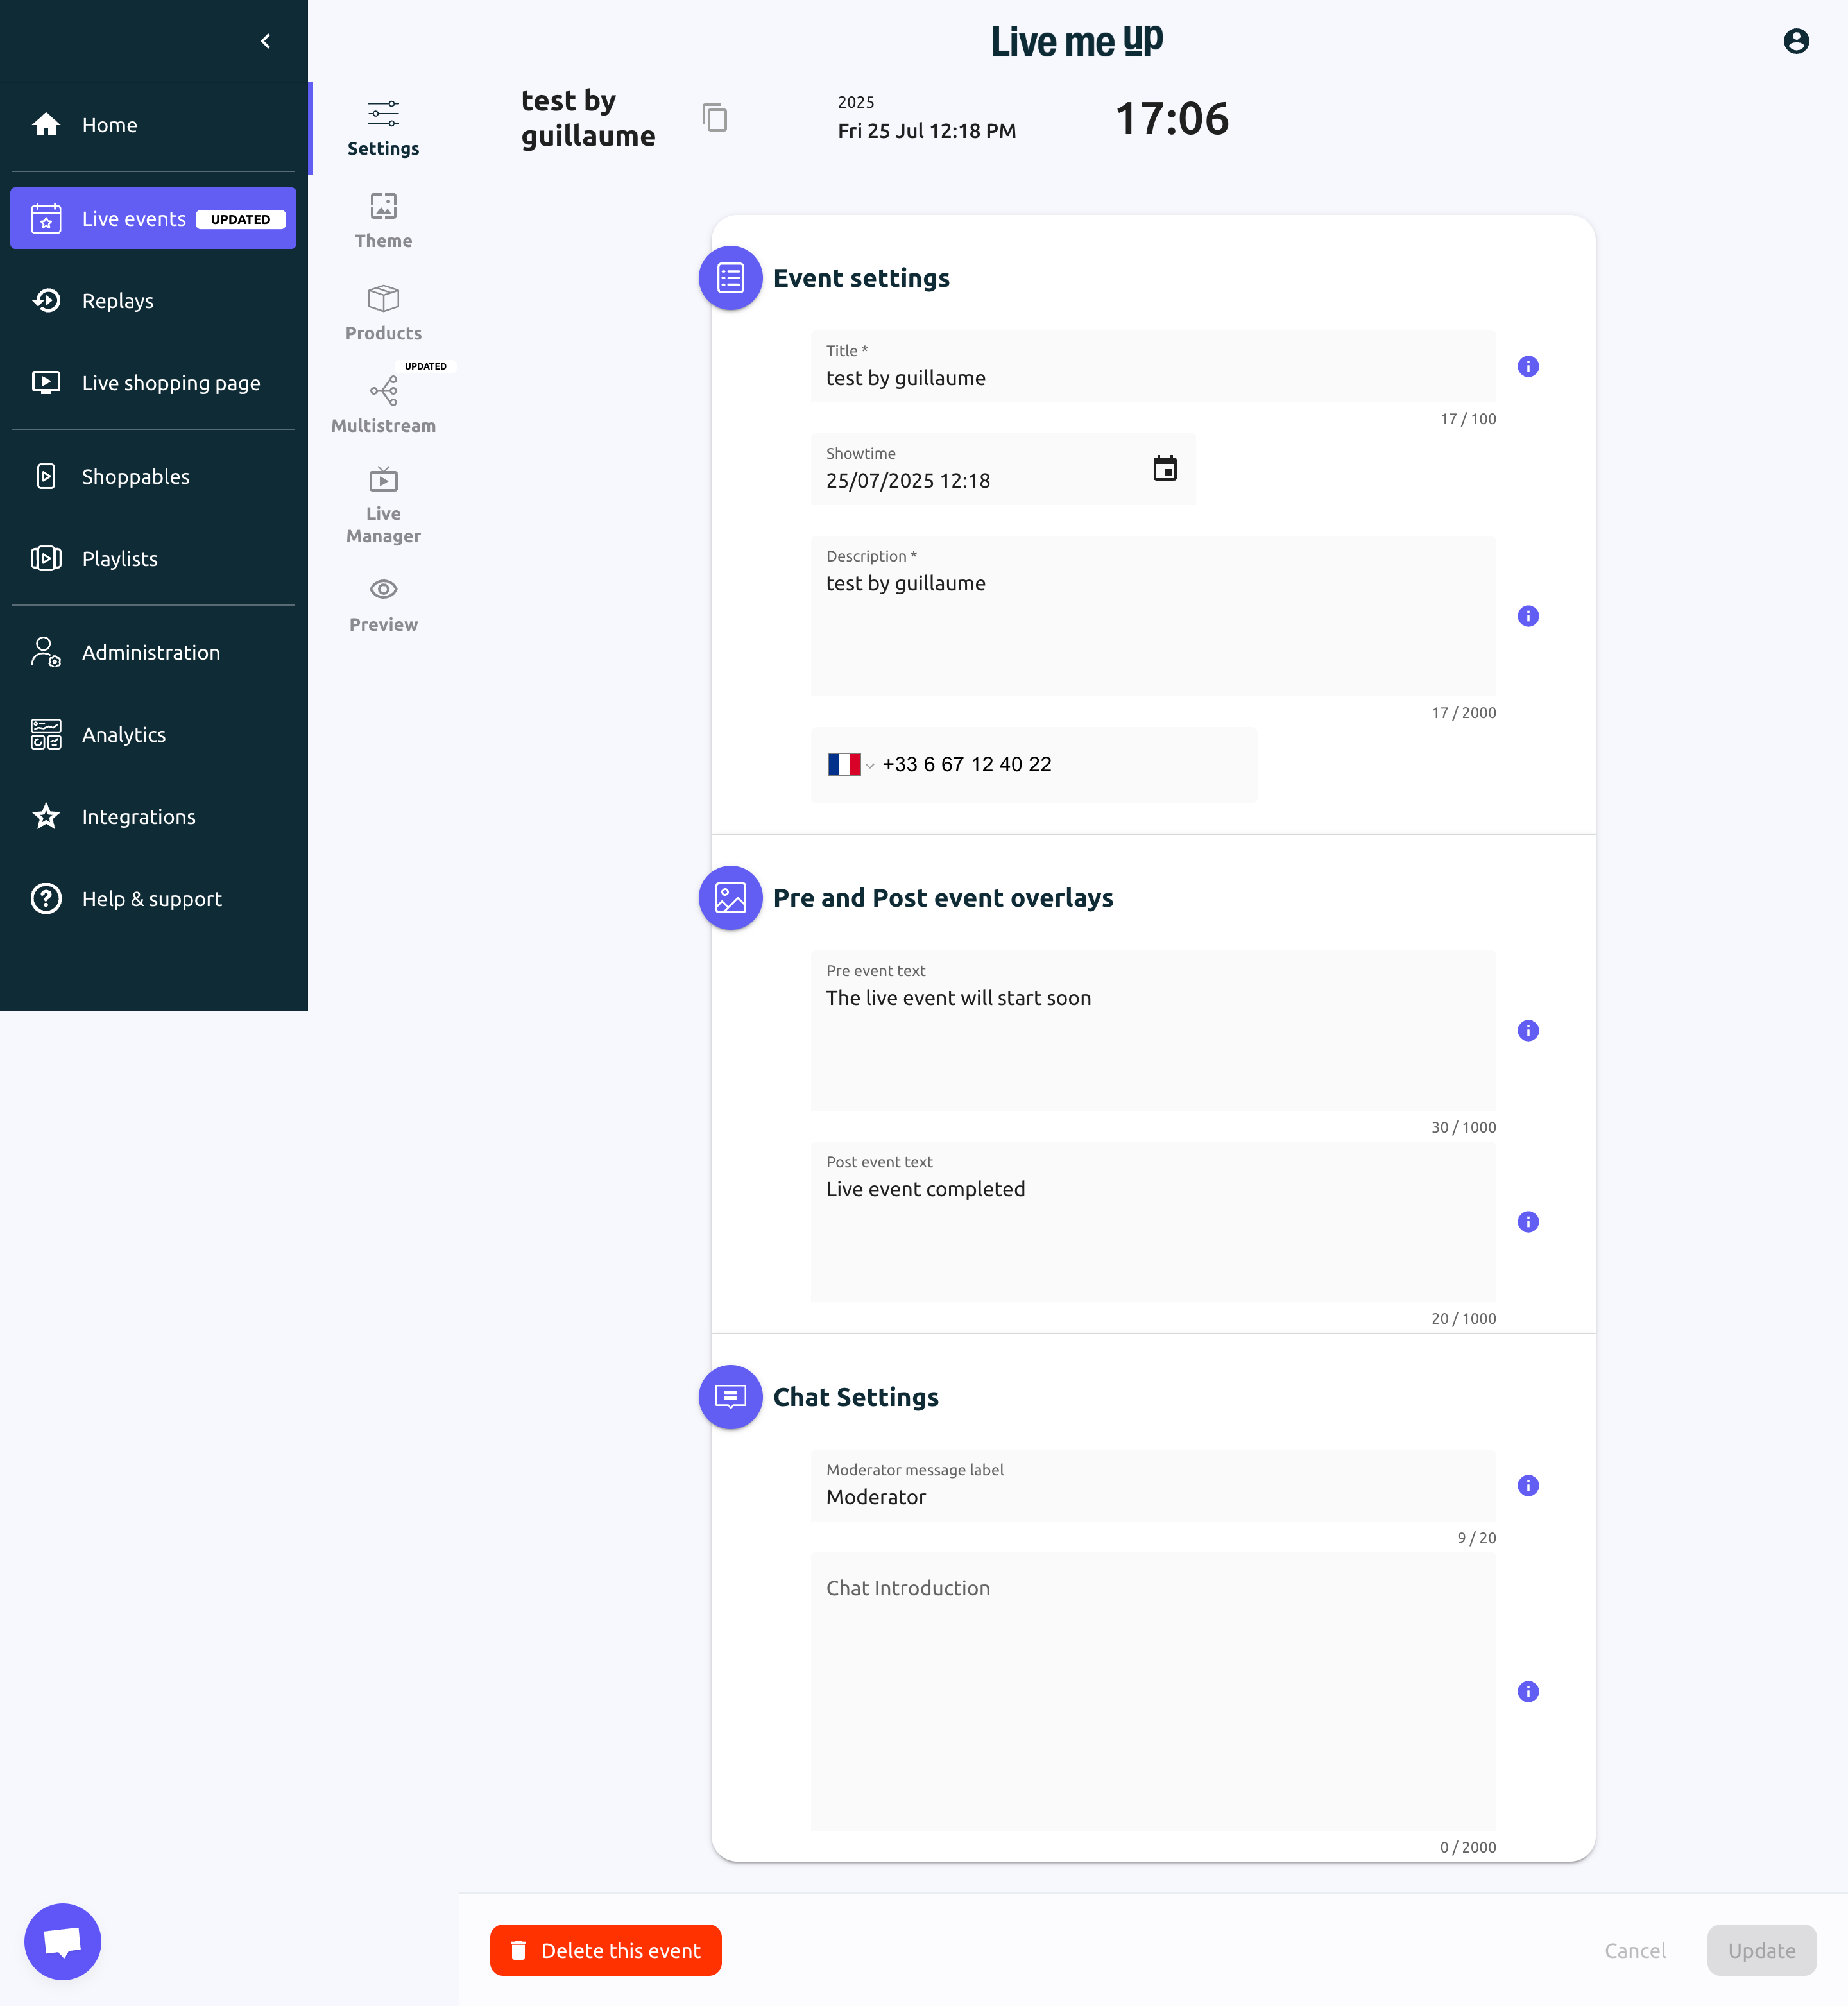
Step 3: Update Planned Event Messages
Pre-event text (e.g., “The live event will start soon”) informs viewers before the stream.
Post-event text (e.g., “Live event completed”) confirms the broadcast has ended.
Ensure all messages match your event’s tone.
Step 4: Update Chat Settings
Set a Moderator label (default: “Moderator”) to identify staff in chat.
Optionally, add a short chat introduction or chat rules.
Step 5: Once all changes are made, click Update to save or Cancel to discard changes.
To copy the live event link, simply locate the desired event in the "Live Event Manager" click the copy icon in the Link to Event column. Share the copied link instantly via email, SMS, newsletter, or your smartphone’s social apps.

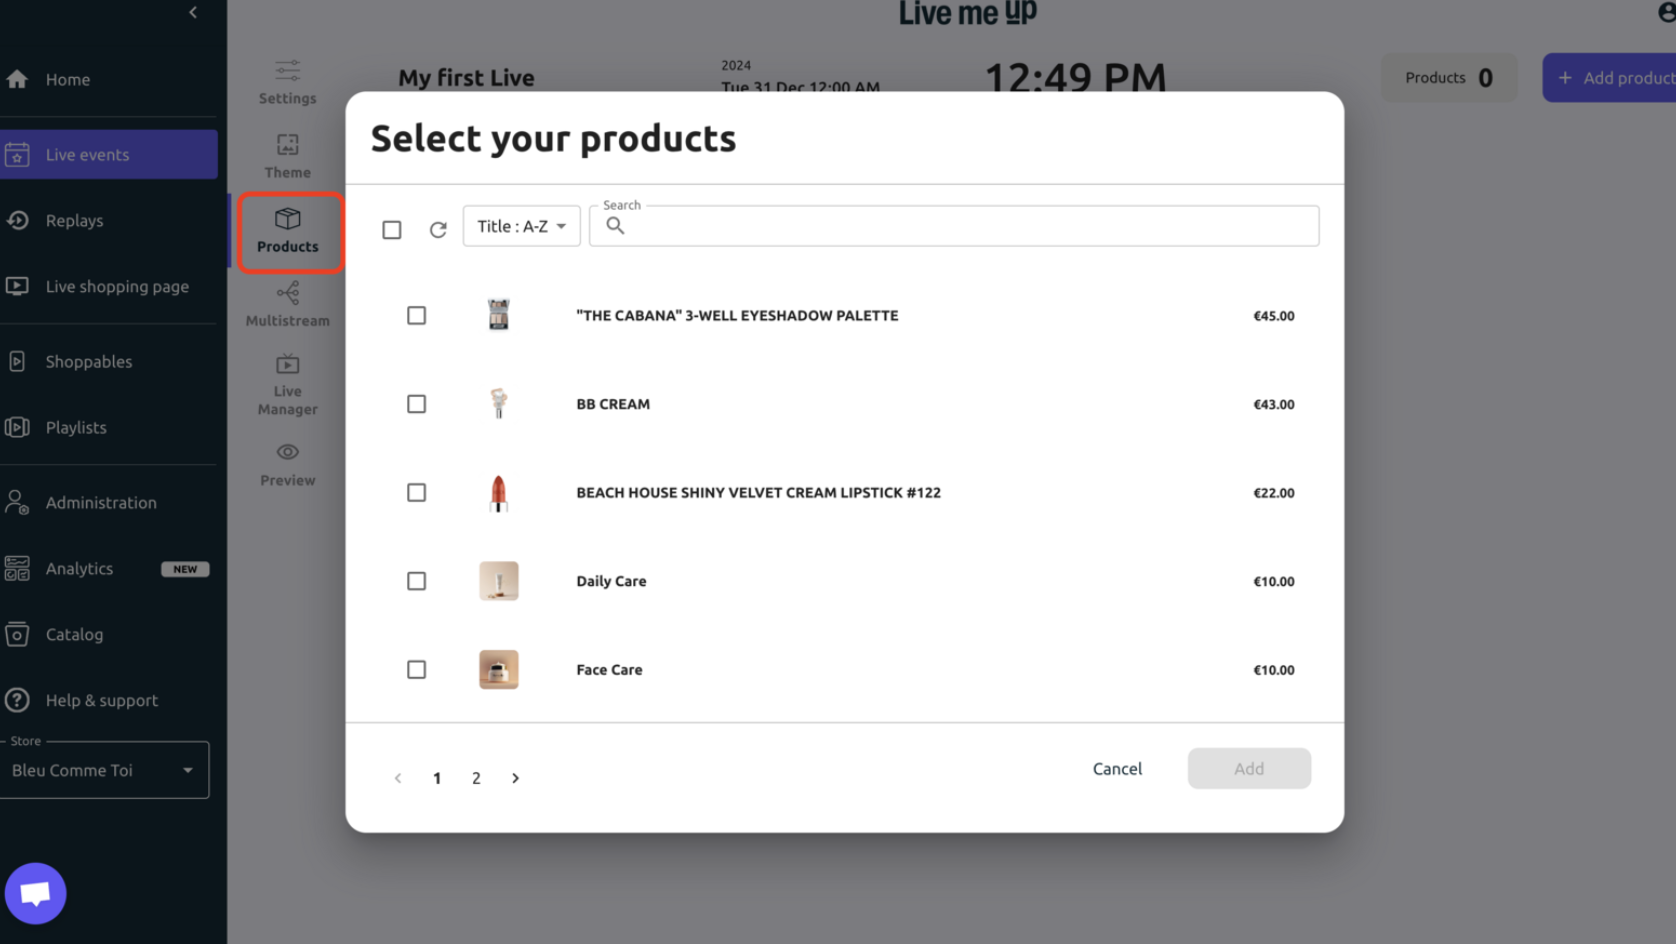
Under the Live Events tab, go to the Products section and add up to 200 items from your Shopify catalog.
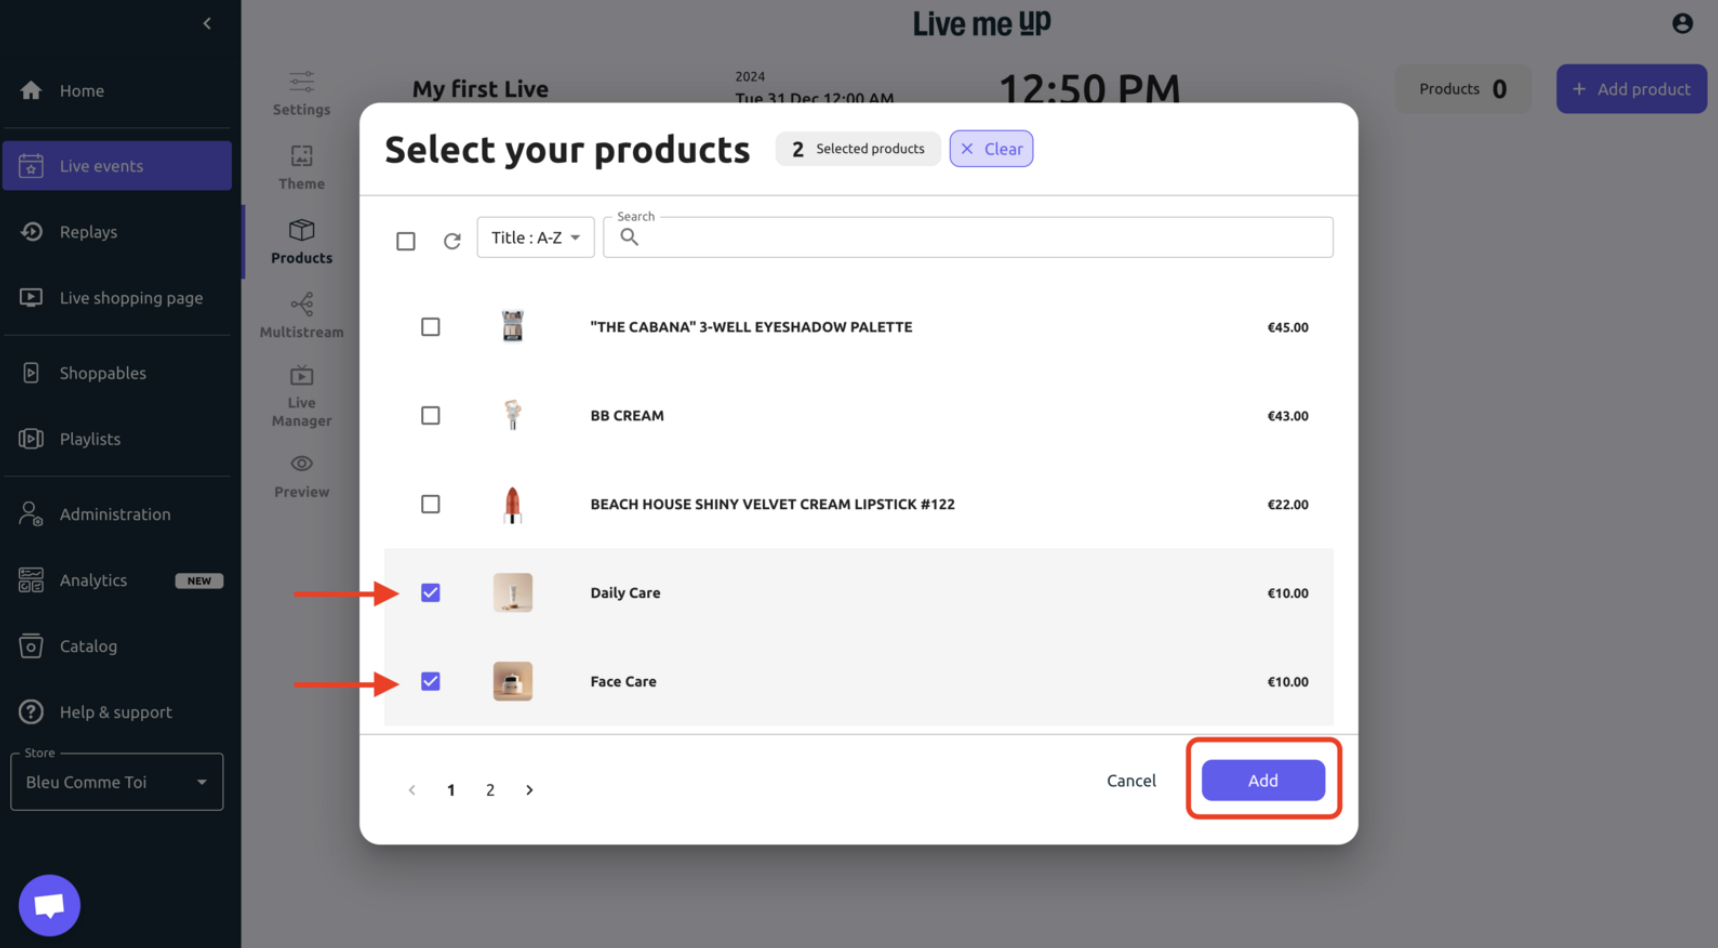
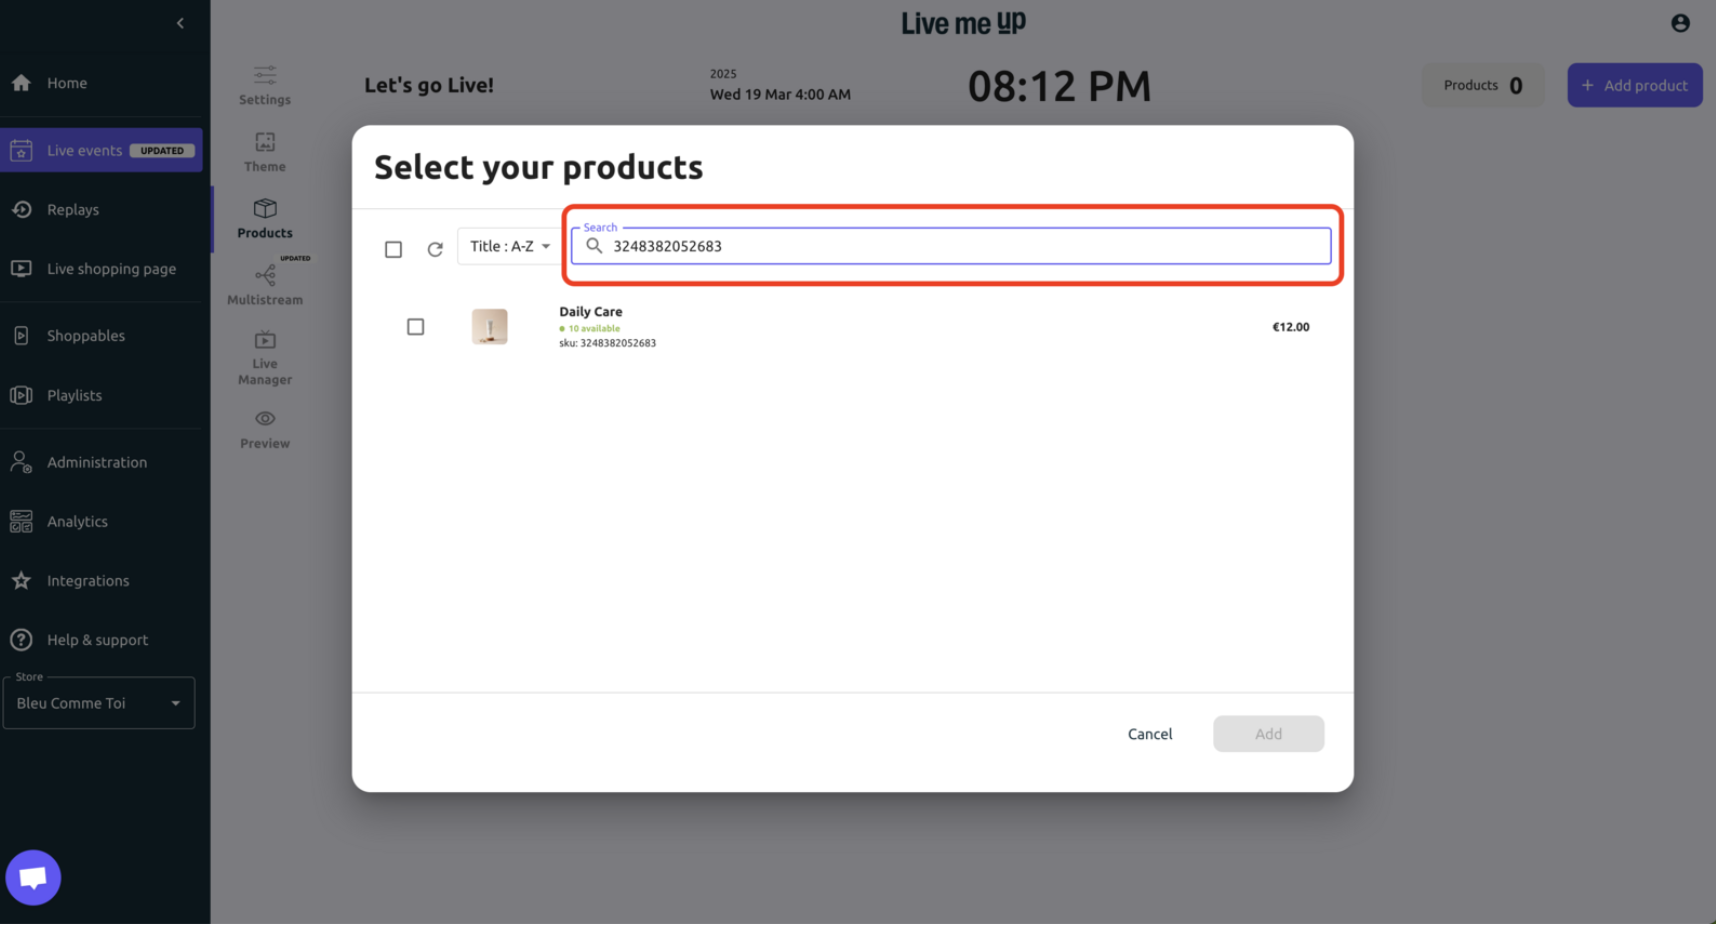
Select the products you want to add to your Live event and confirm with "ADD".

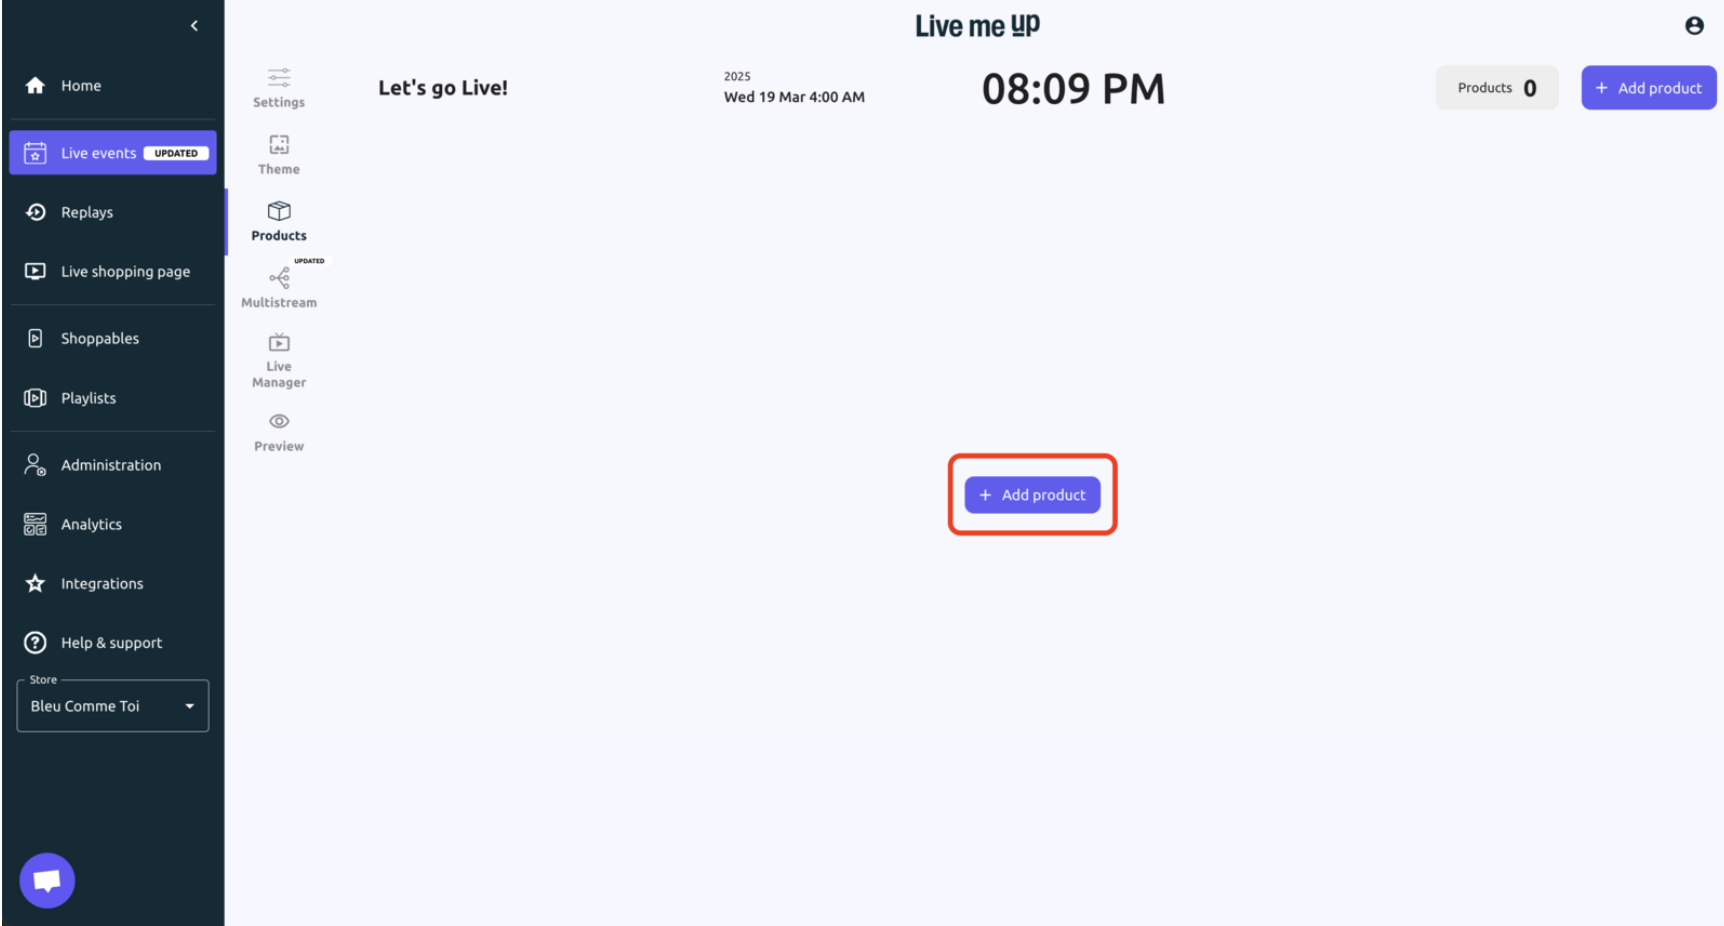
Step 1: Tap “+ Add Product” in the Live Manager. During your livestream, open the Live Manager and click the + Product button to add a new item to your live.
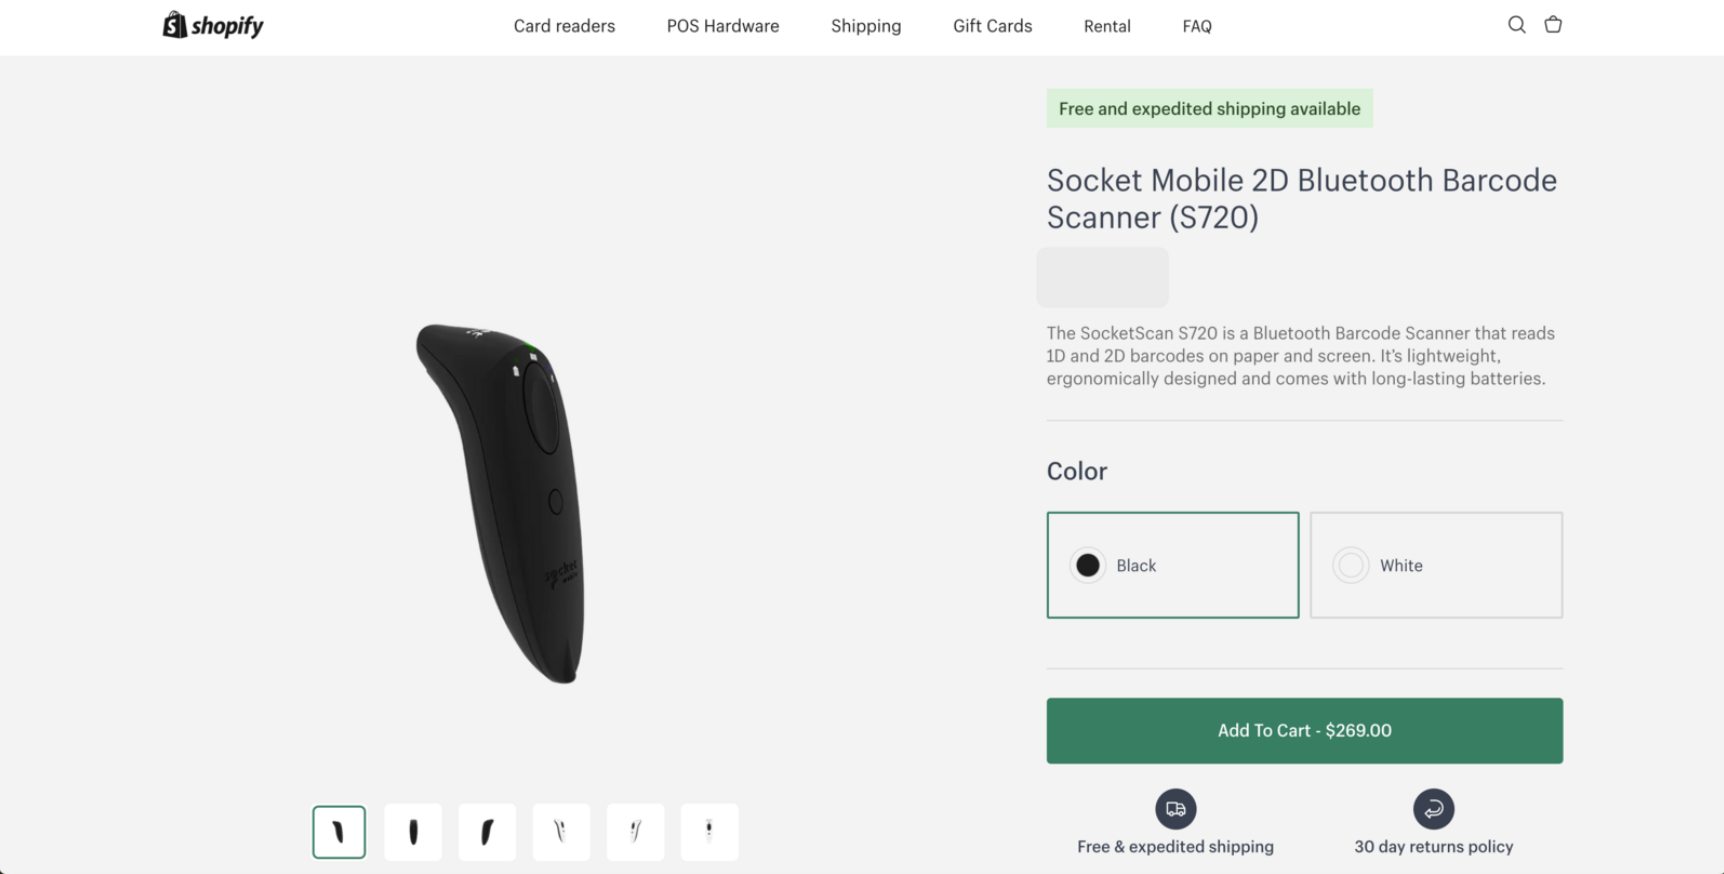
Step 2: Scan Your Product with Shopify POS. Use your Shopify POS barcode scanner to instantly pull up the product, no need to search manually. Fast, efficient, and ready to go live.
Step 3: Your product is added to your Livestream.
Step 1: Access Theme Settings
Navigate to Live events on the left menu.
Select the Theme tab to start customizing your event.
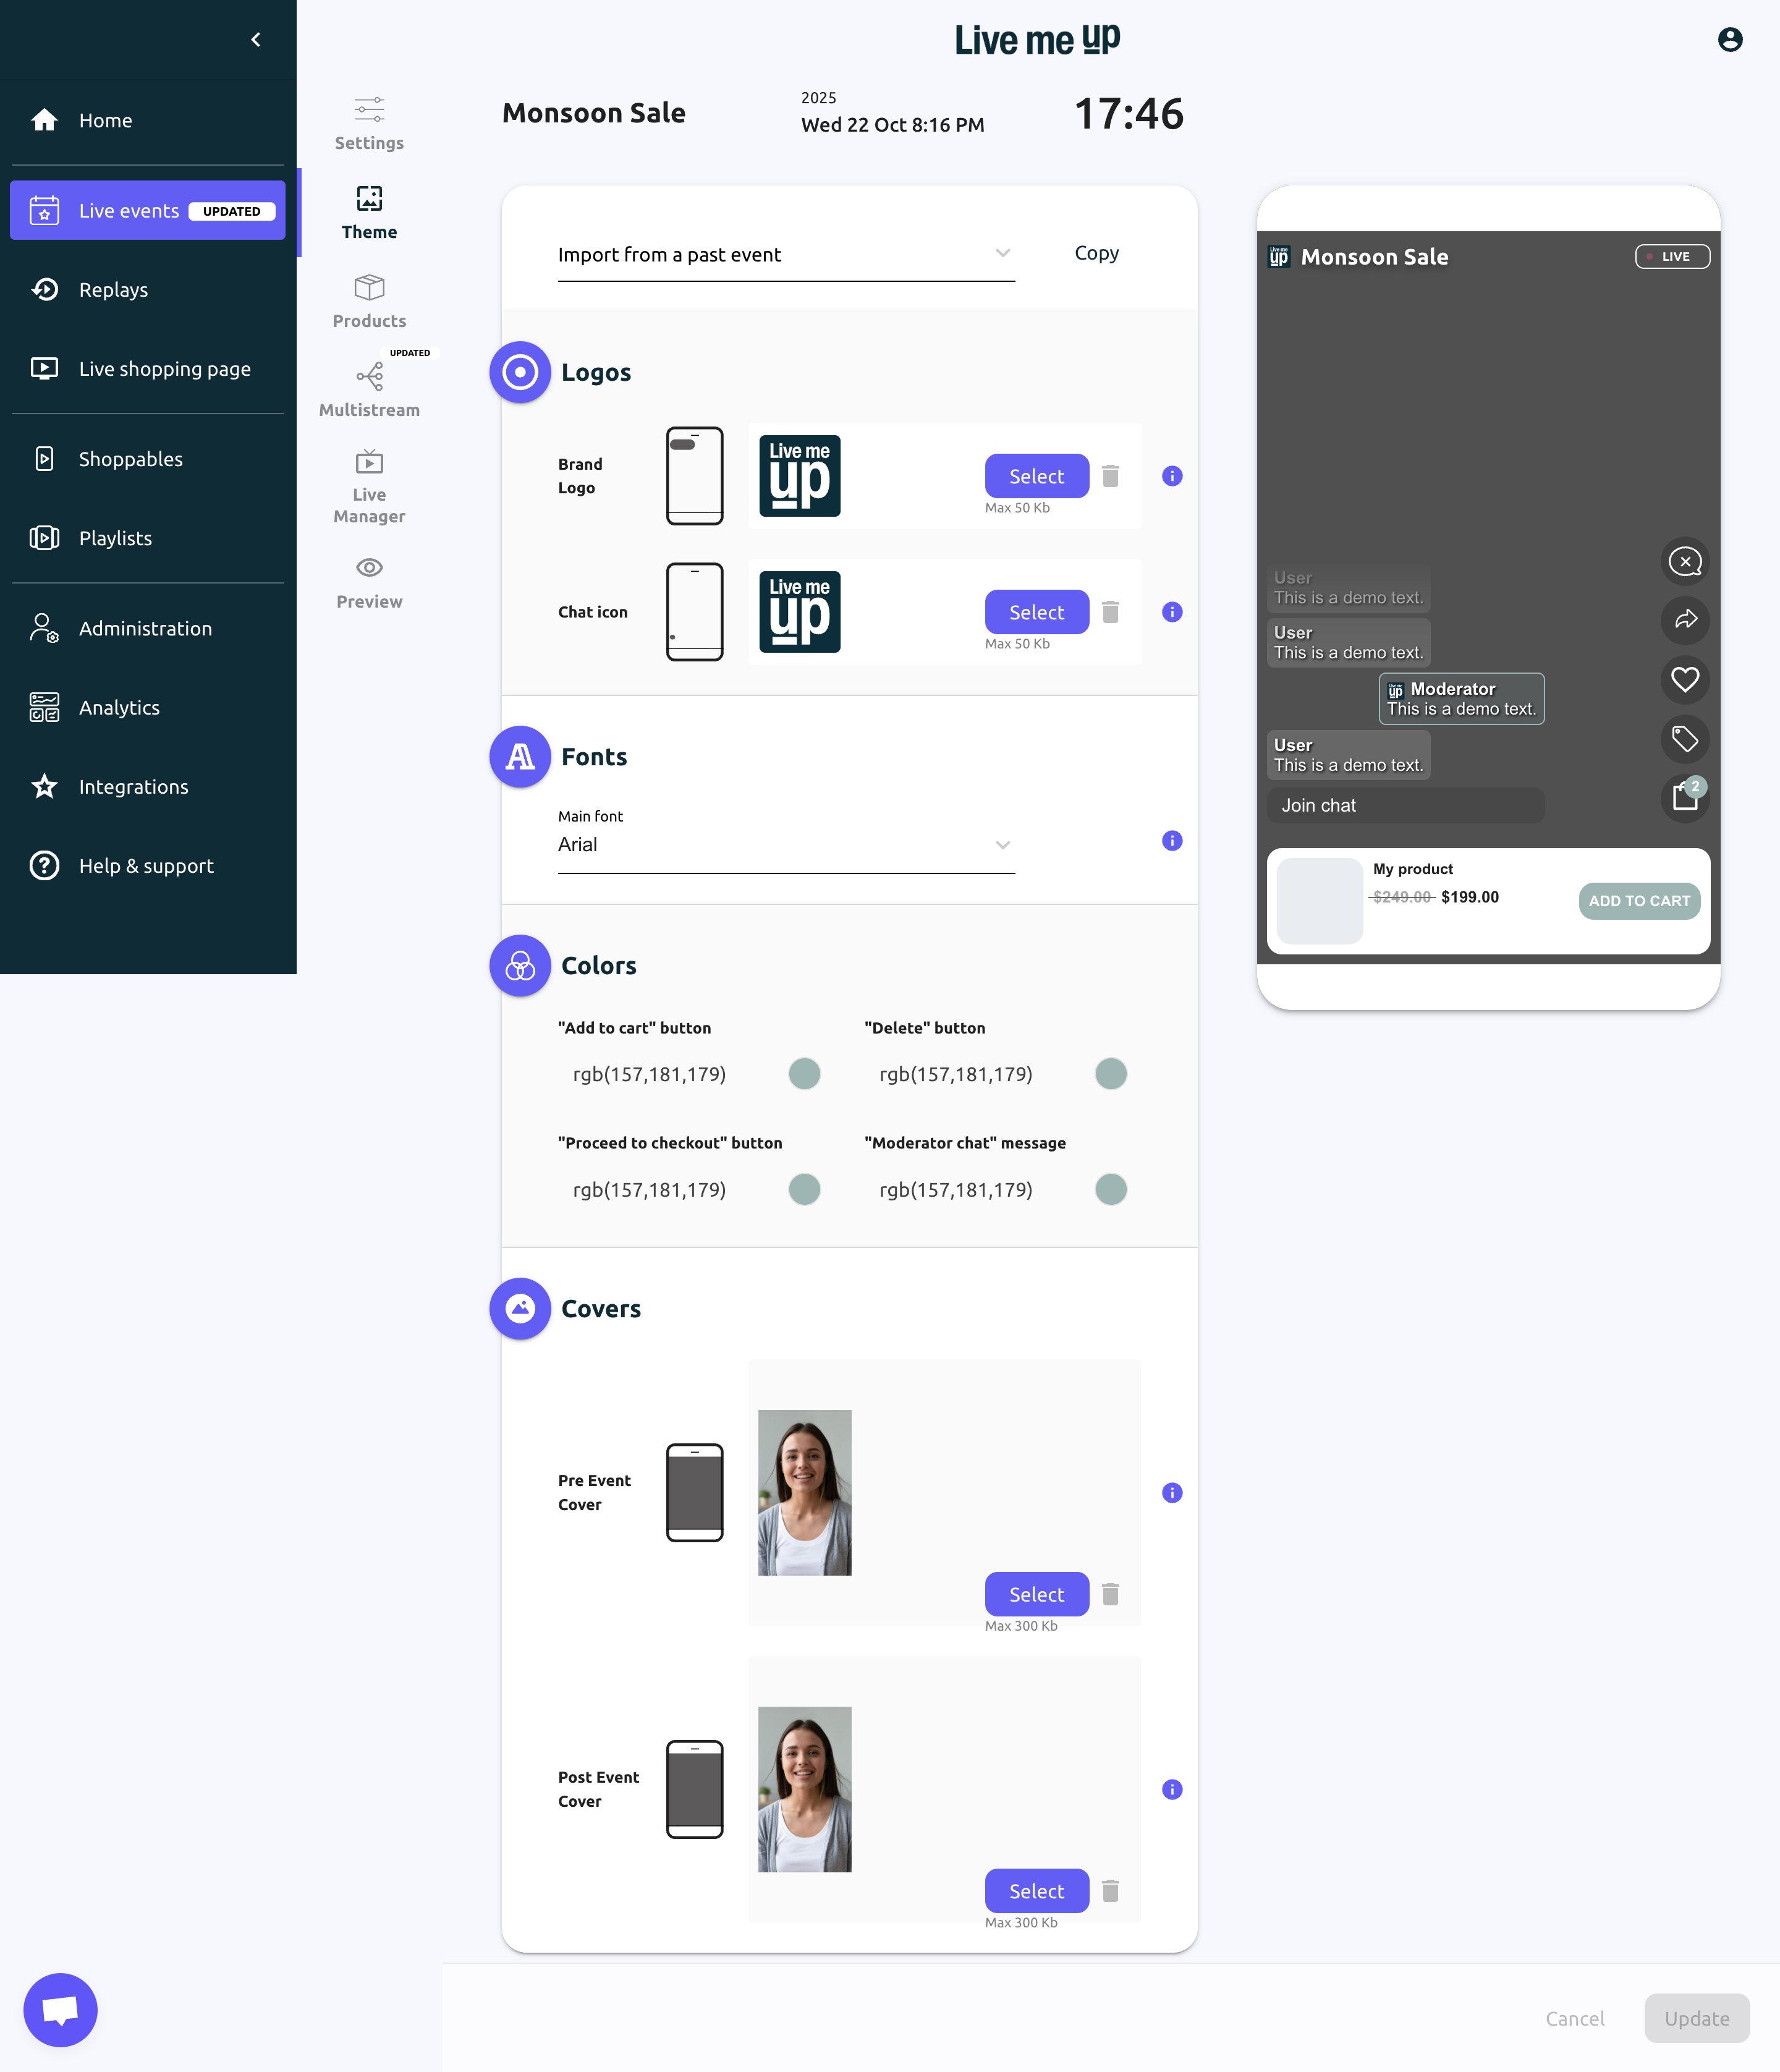
Step 2: Add Logo
Upload Brand Logo (max 50 KB) and Chat Icon (max 10 KB).
Step 3: Update Event Theme
Fonts: Choose the main font from the dropdown (default: Arial).
Colors: Set colors for “Add to cart,” “Delete,” “Proceed to checkout” buttons, and moderator chat messages (use RGB values).
Covers: Upload Pre-event and Post-event Covers (max 300 KB each).
Preview: Check live changes using the mobile mock-up.
Step 4: Finalize Changes
Click Update to save or Cancel to discard changes.
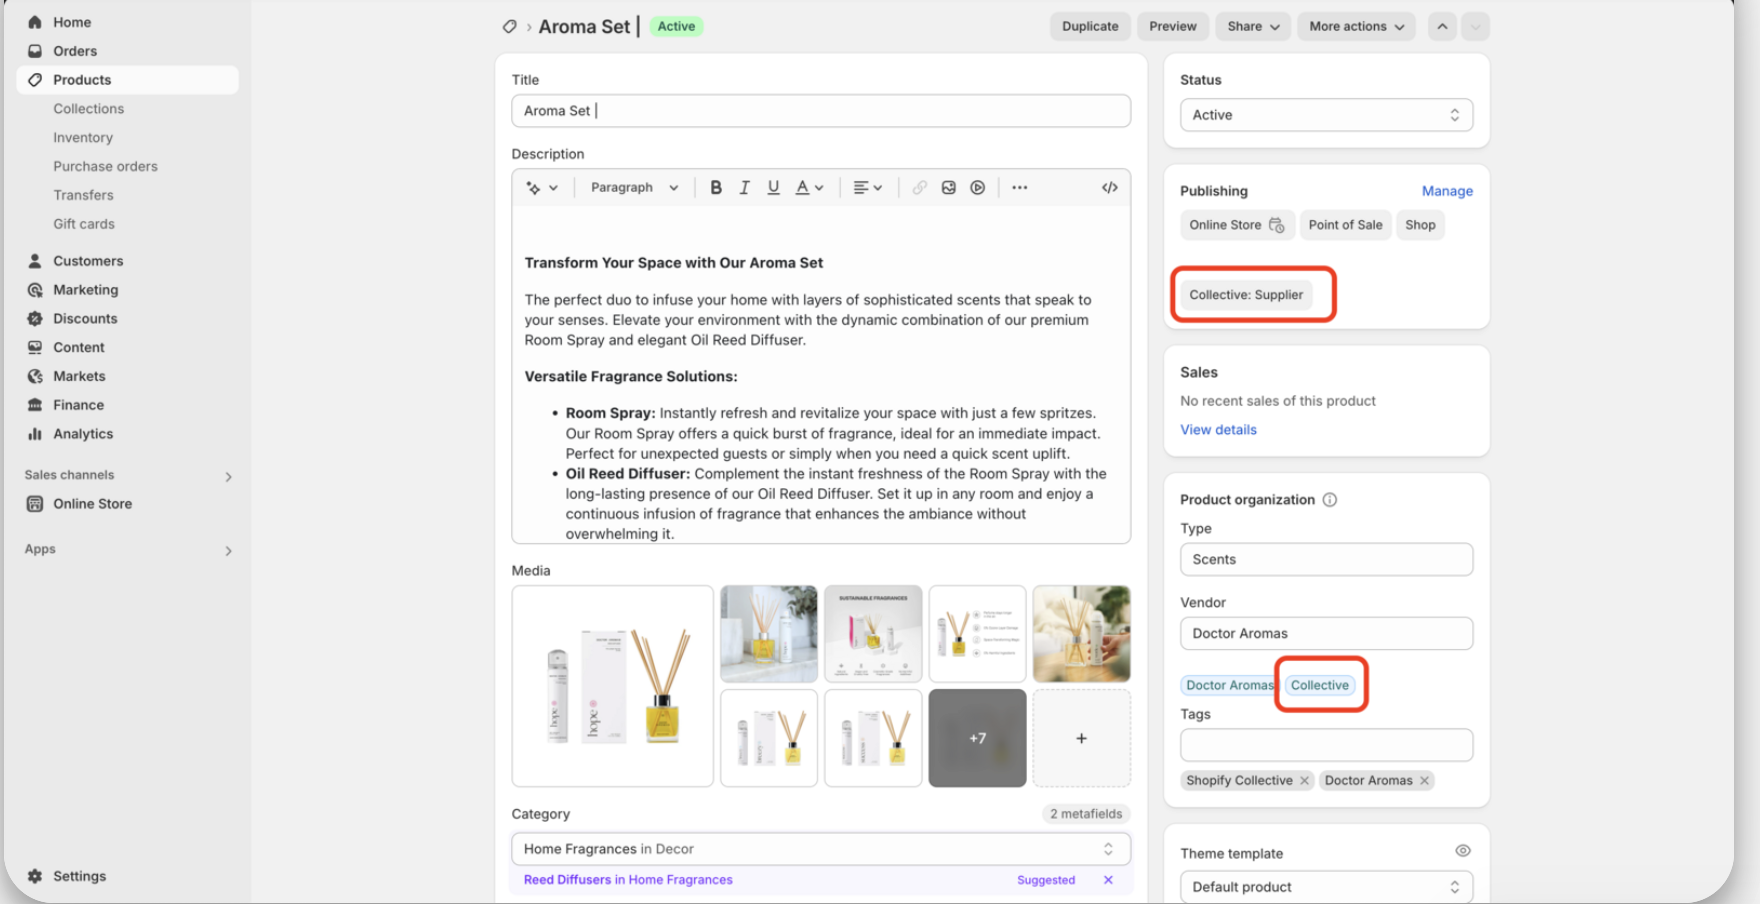
To sync, ensure Collective Supplier is enabled as a Sales Channel and the desired products are active on that channel.
Go to Live Shopping Page, find your upcoming event, and toggle Display ON to feature it on your public page. Preview using your Live Shop URL and click Update to save changes.