To publish apps on Google Play under an organization, Google requires the account to be verified to ensure legitimacy and accountability. Organization verification confirms that the entity is a real, legally registered business and that the person creating the account is authorized to act on its behalf.
During verification, Google may request:
Official business documents (e.g., certificate of incorporation, business license, tax ID).
Government-issued ID of an authorized representative.
Organization email verification to confirm domain ownership.
This process helps protect users, ensures compliance with Google Play policies, and enables the organization to access app management, monetization, and support features safely. Verification usually takes a few business days after submission of the required documents.
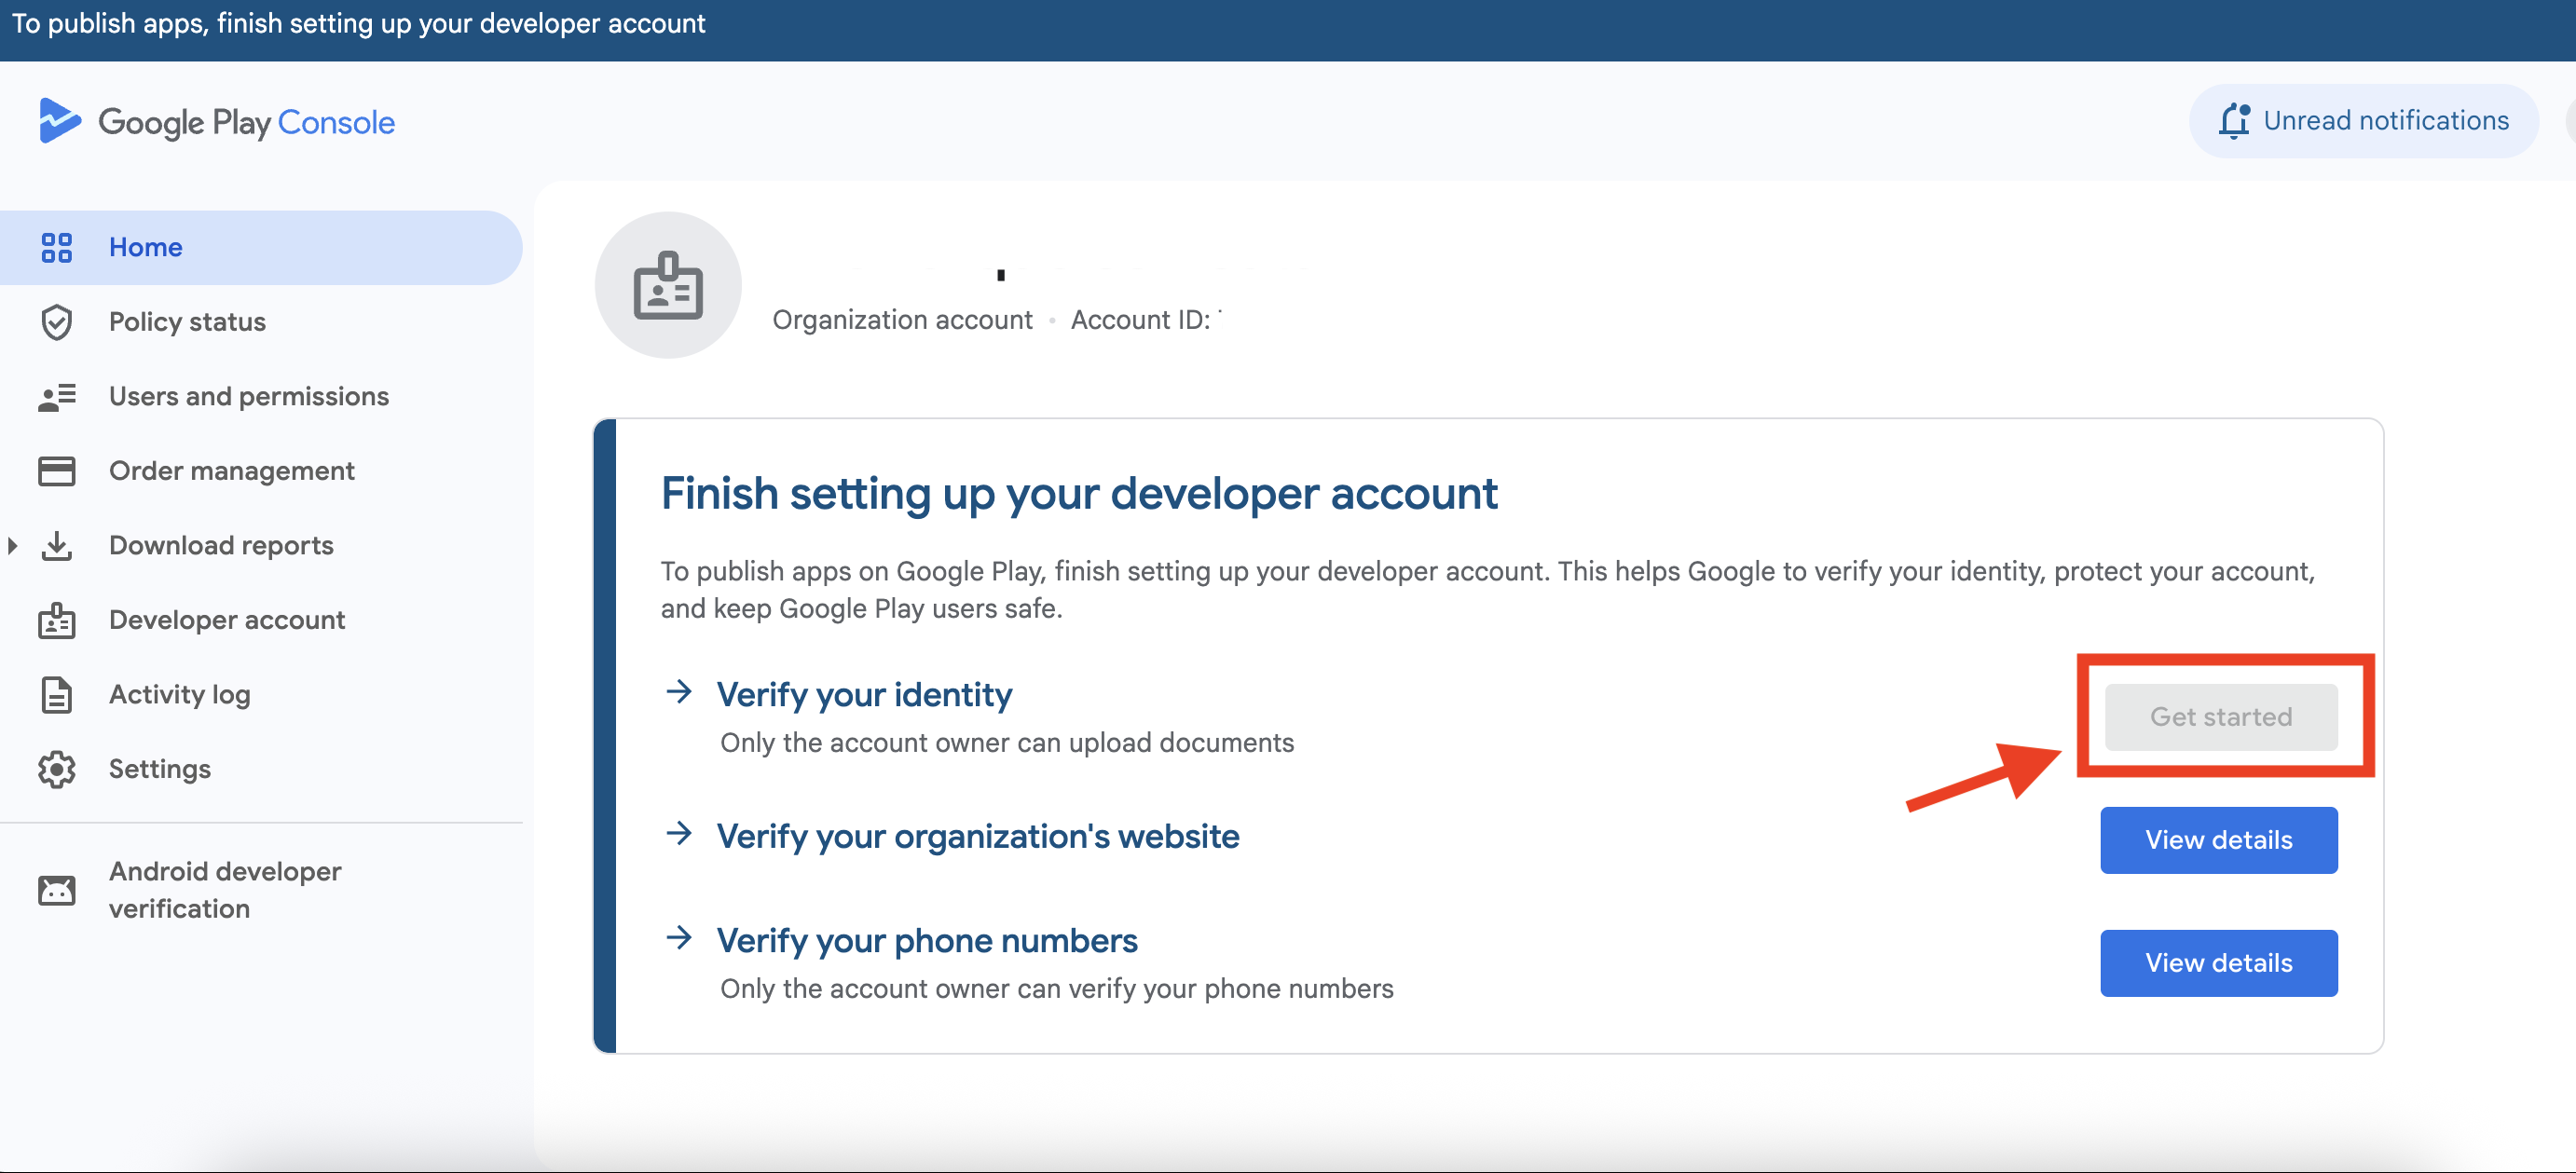
Once the account is created, you’ll have option on the Google Play Console screen to Verify the Account.
Step 1 : Go to google Play console and on the Home Page, click the “Get Started” button right to “Verify your identity”.

Step 2 : You’ll see a list of accepted documents. Required documents vary from Country and Region. Click on Start Verification button.
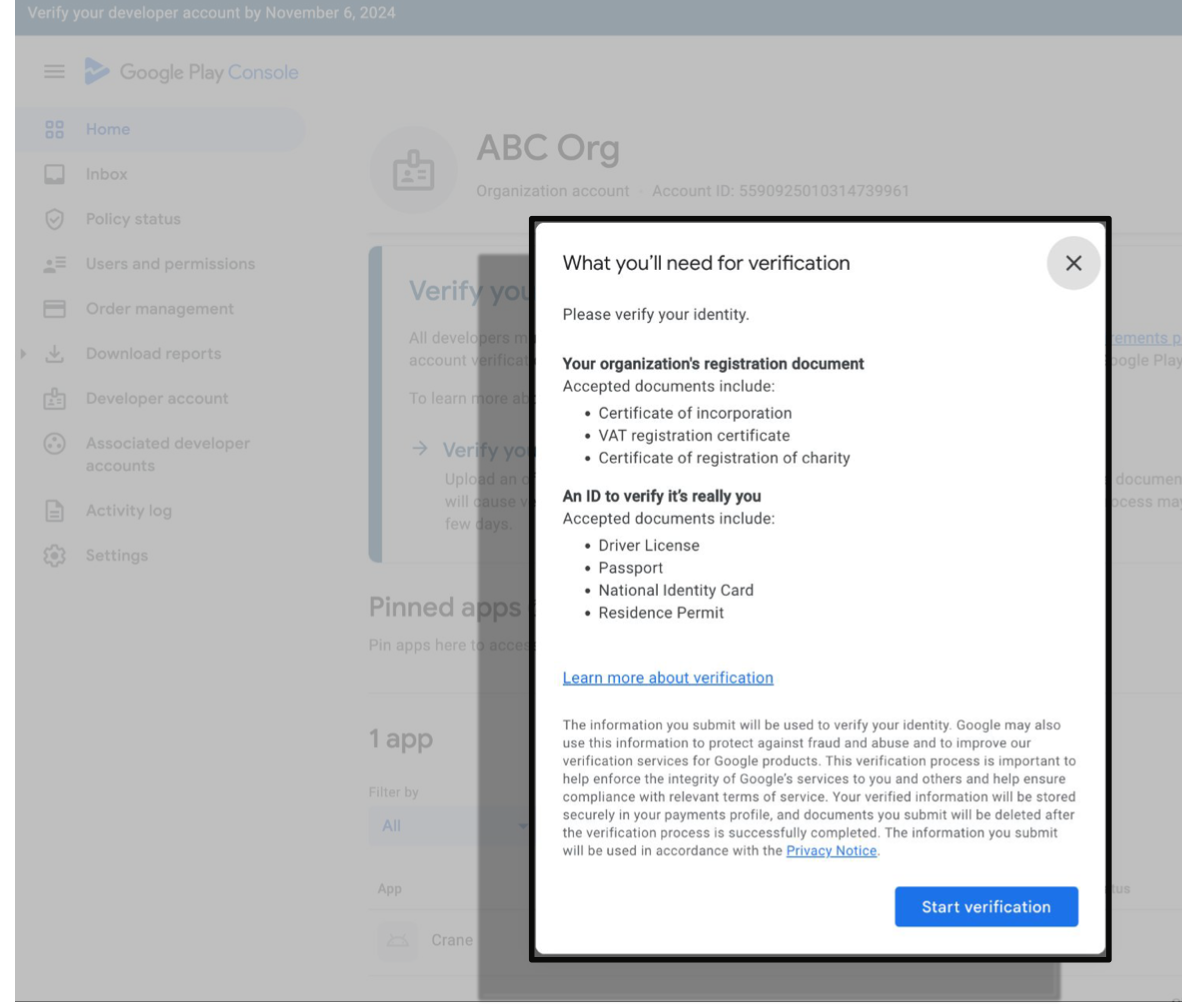
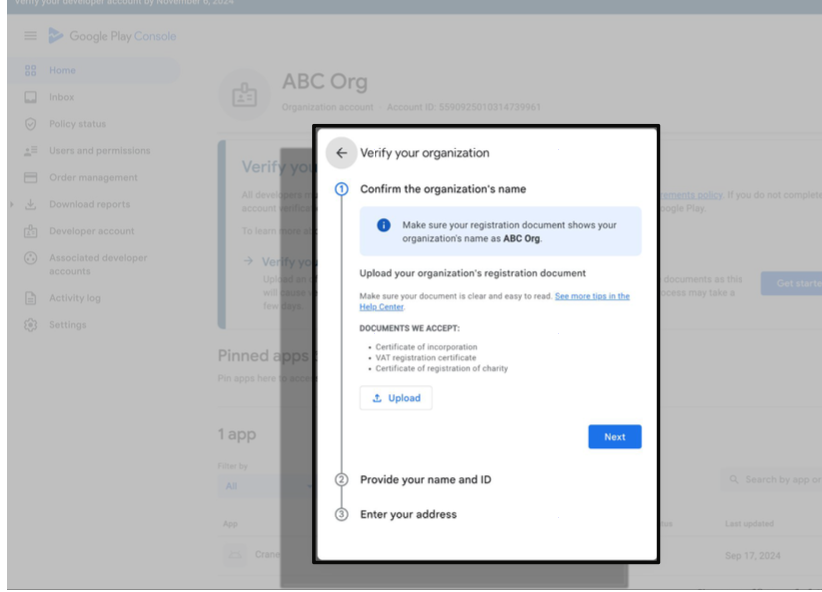
Step 3 : Verify your organization by uploading registration documents, such as your certificate of incorporation, or VAT registration certificate.
All business documents must be issued by a trustworthy authority such as a federal, state, municipal government, business registry, or similar.
In most organizations, the registration documents can be obtained from your finance or legal departments.
If you are a Government organization, you may submit a document with your government’s letterhead as a form of proof if you don't have any of the other recommended business documents.
Step 4 : An individual must verify their identity with a valid document as part of verifying your organization. This can be the owner of your Play Console account, or any authorized representative of your organization.
Supported documents include a driving license, passport, or national identity card (US examples). See country-specific requirements here.
This step is necessary to help us prevent fraud.
Any authorized representative of the organization may provide their personal identity documents to complete the verification process.
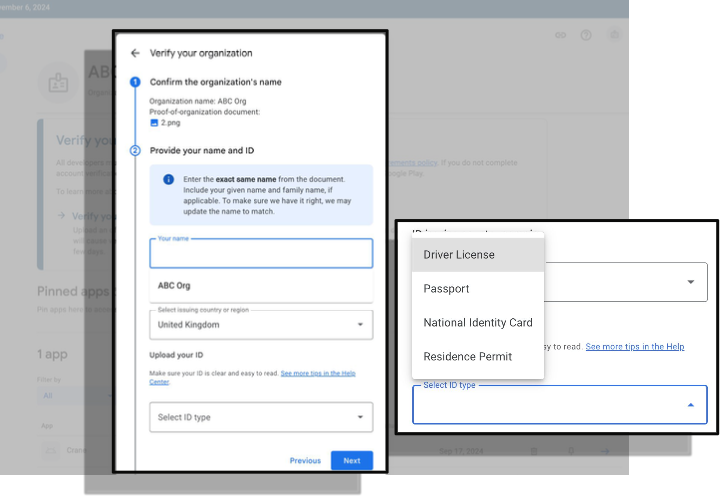
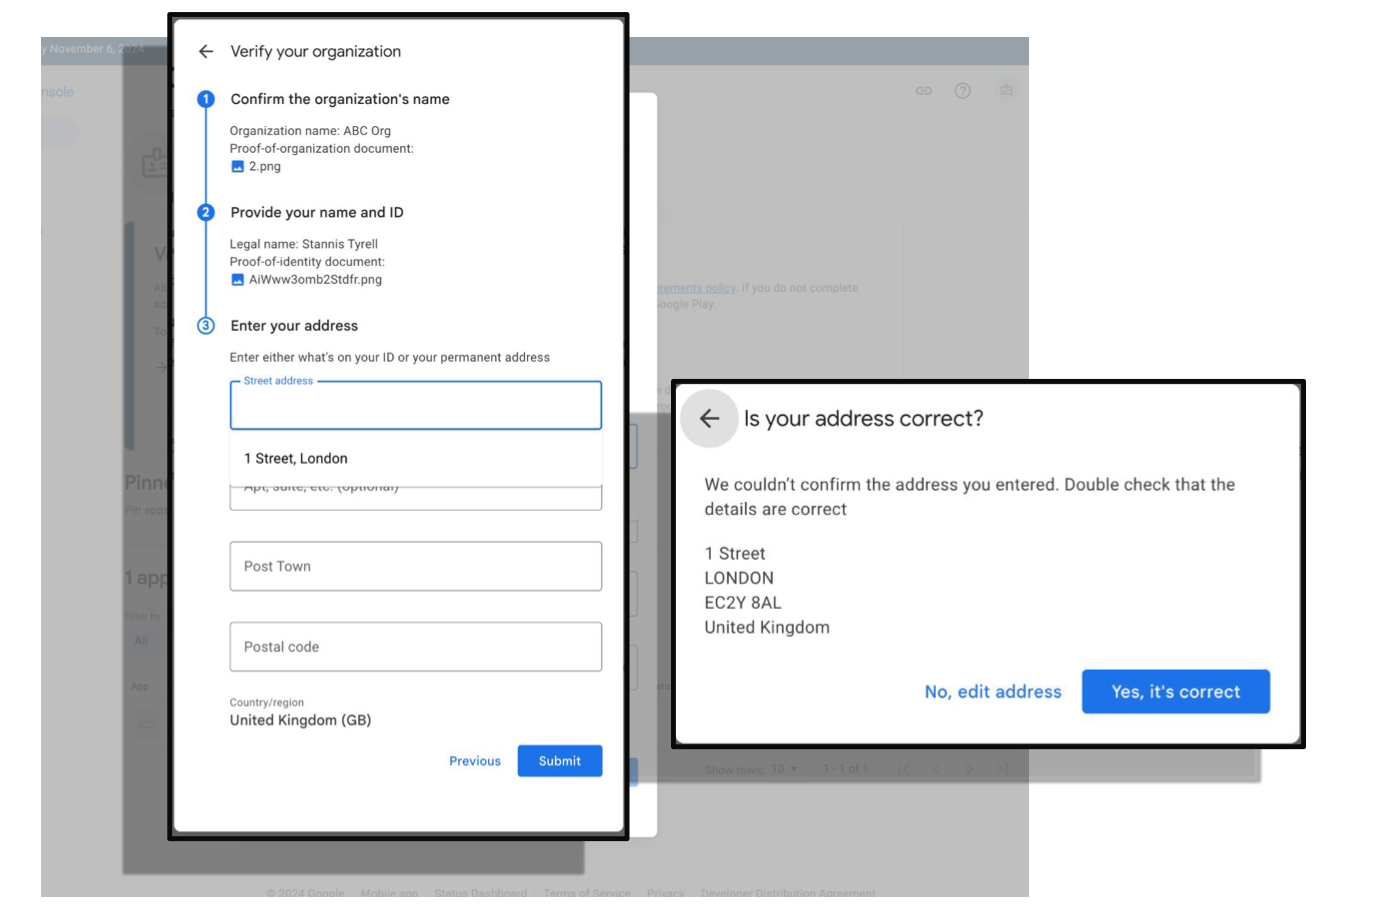
Step 5 : Enter your address. Make sure to enter the name and address shown on the document that you're providing.
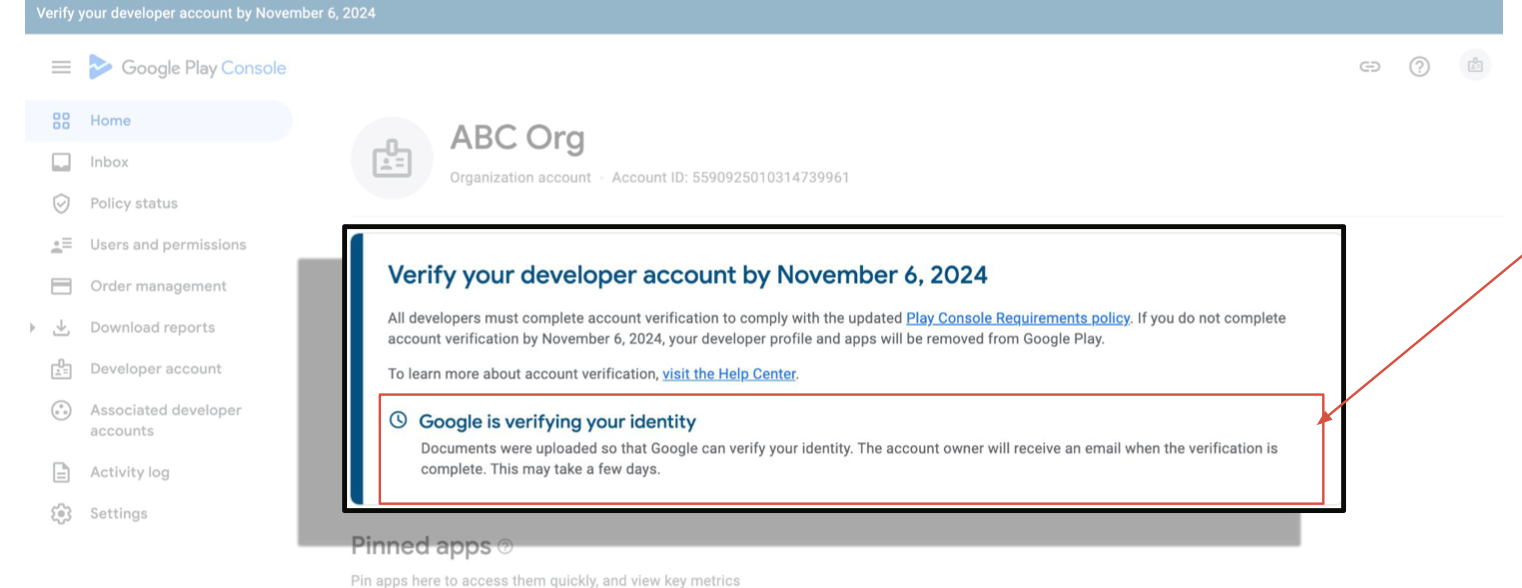
Step 6 : Google will review the information you've provided. The account owner will receive an email when verification is complete.
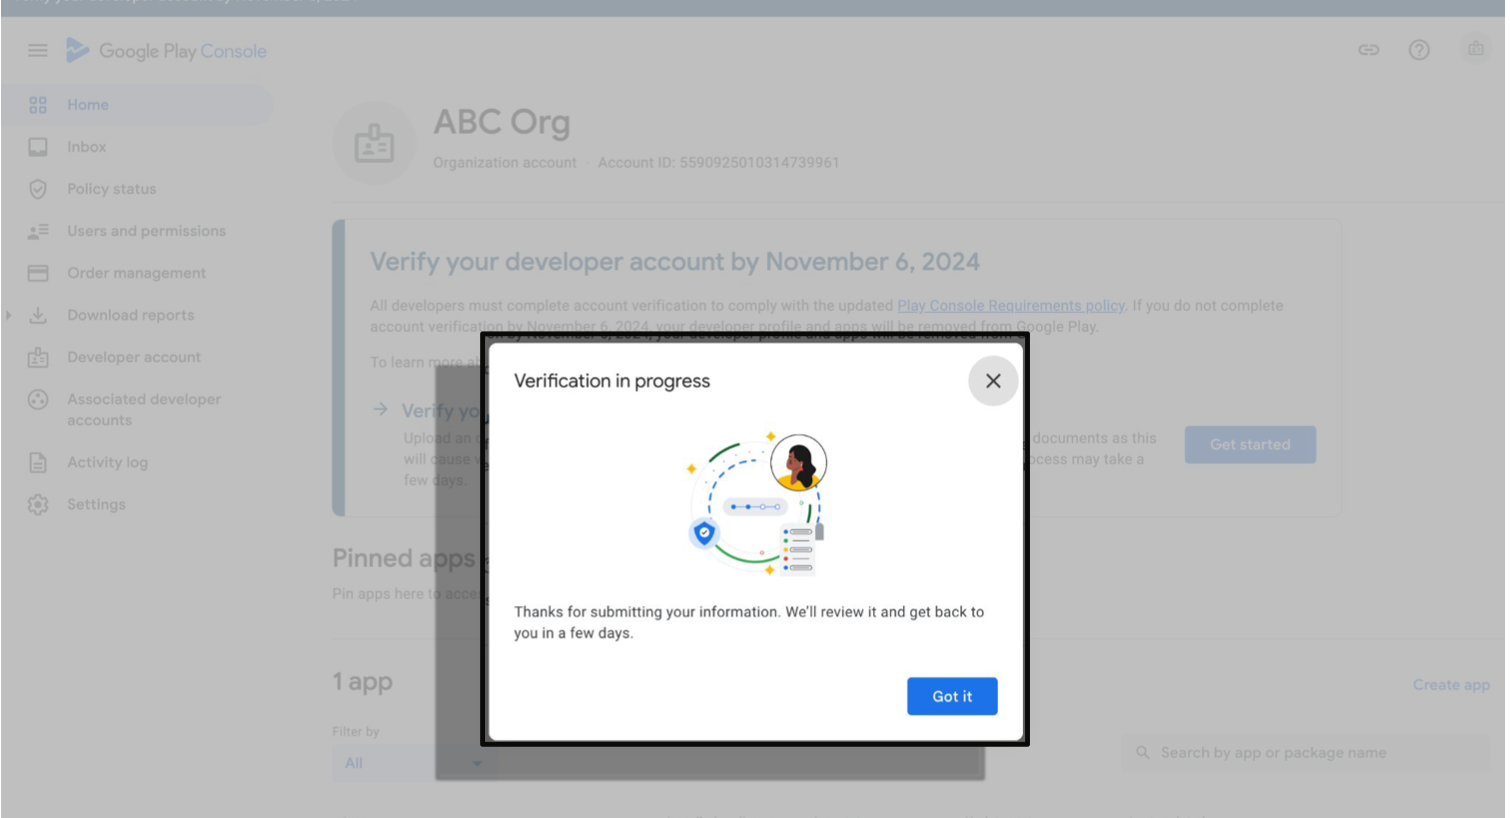
Your Play Console homepage will display a message explaining that Google is verifying your identity. This may take a few days.
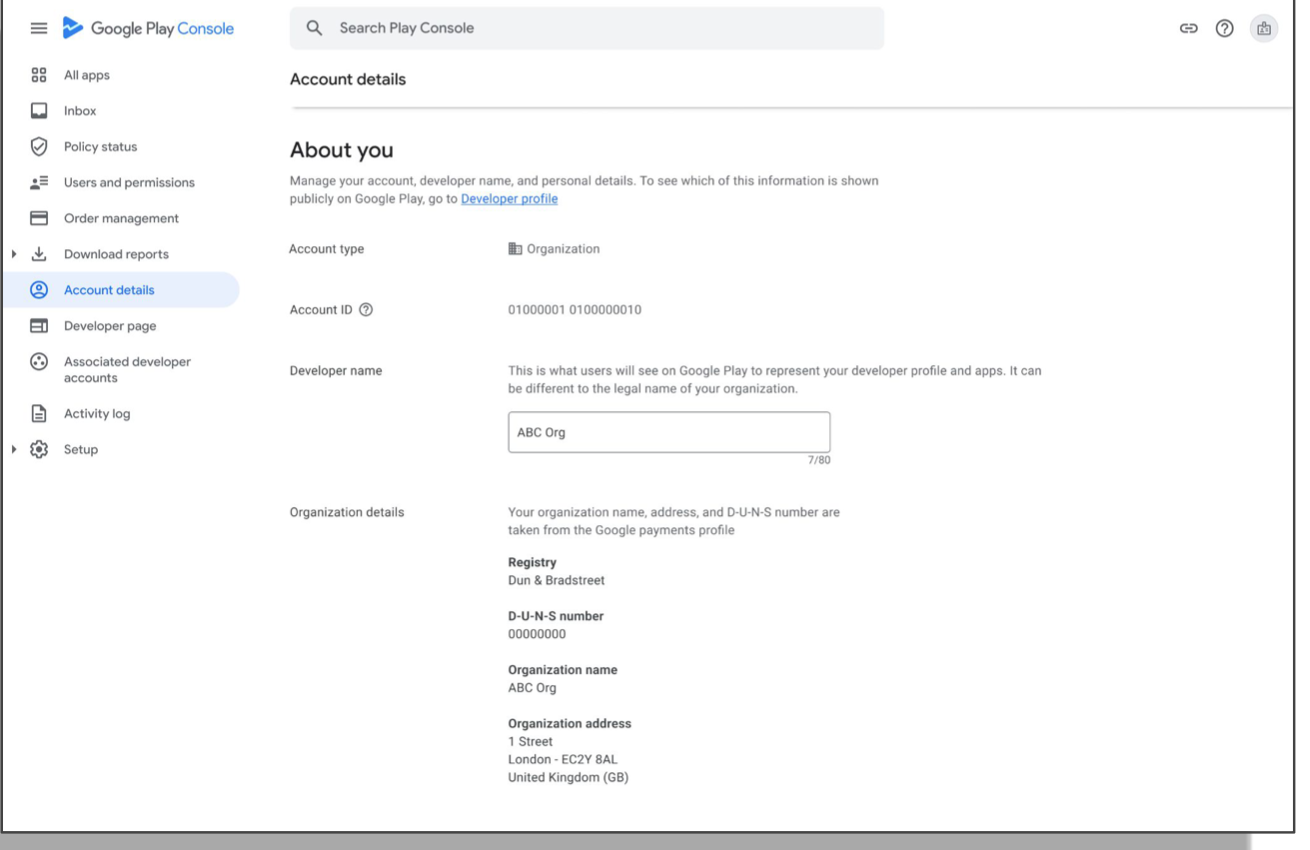
When your organization has been successfully verified, verification banners and messages will disappear from Play Console. You can view your verified information on the Account details page.
Your Play Console homepage will display a message explaining why we couldn’t verify your account. The account owner will also receive emails with more details.
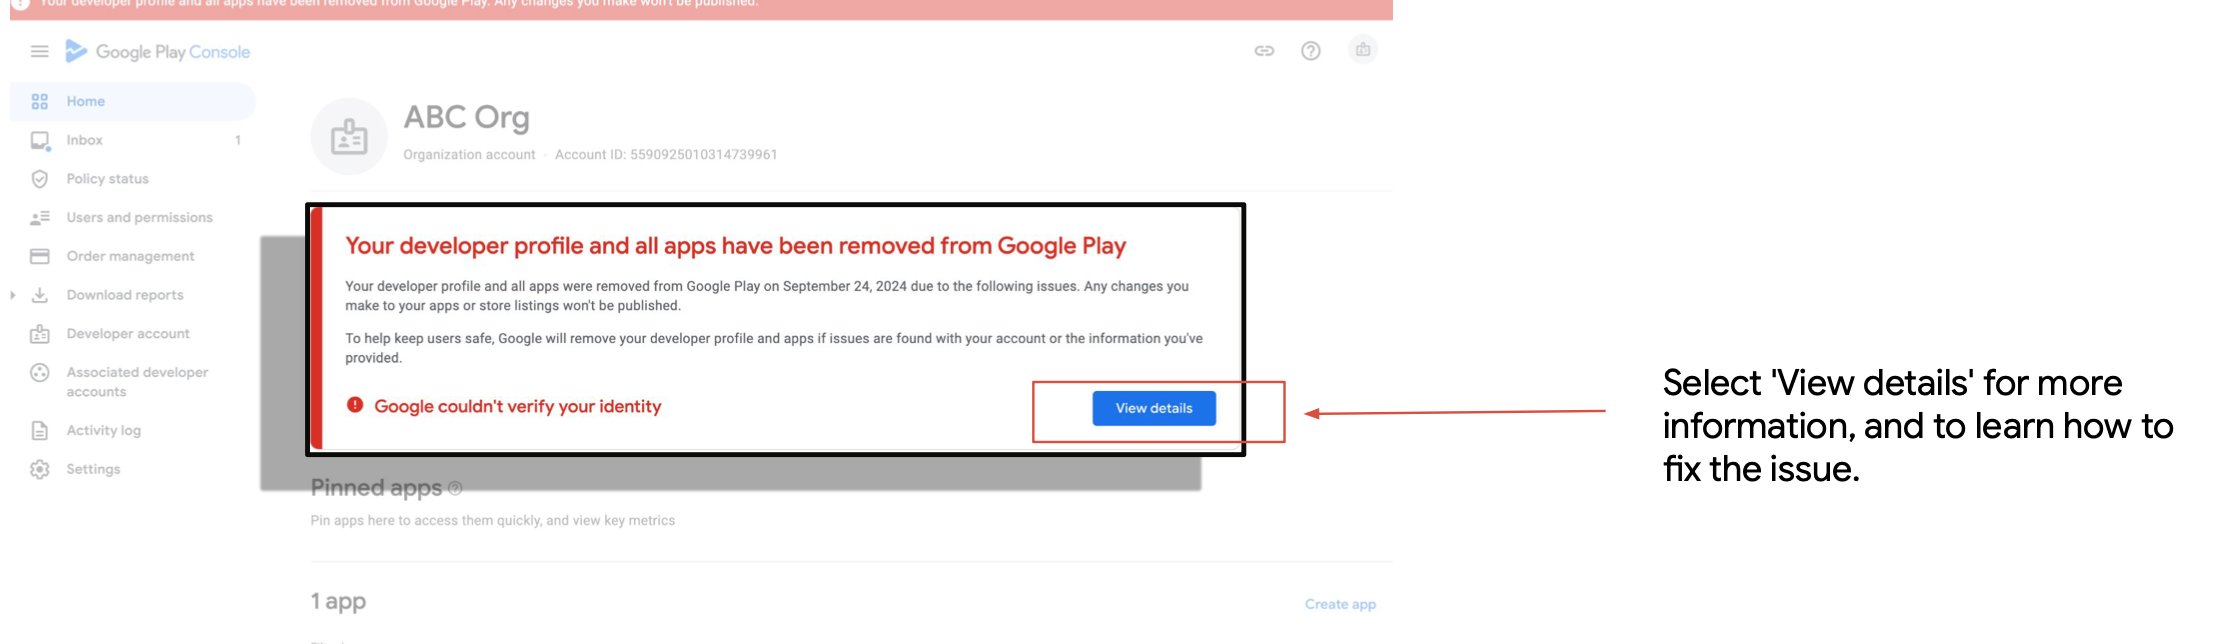
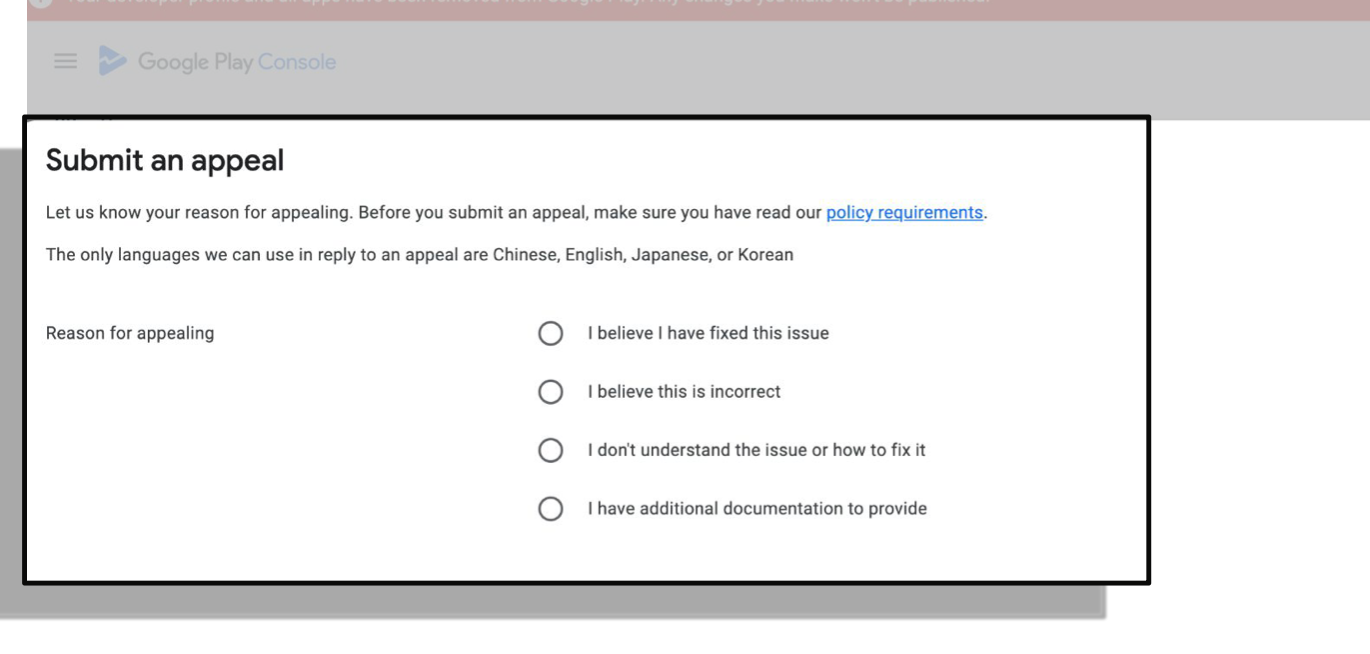
The details page shows why your verifications have failed, how to fix, and how to submit an appeal.

If you choose to appeal, please provide a detailed explanation of the issue. The more information you provide, the better we can assist you in resolving the problem.
Submitting unsupported, expired, or unclear documents
Make sure to upload documents from the list of accepted documents. Required documents vary by country and region, and Play Console will display the accepted documents based on your provided location.
Make sure to upload up-to-date documents. If the organization document or the authorized representative's ID document has expired, the verification will be rejected.
When taking a photo of your documents, make sure the image is clear, well lit, and key data is visible. Verifications may be rejected if the documents are covered, or if the images are blurry or too dark to read.
Submitting altered or fake documents can result in the immediate removal of all your apps.
The organization name on the uploaded identity document does not match the information on your D-U-N-S profile
Make sure to upload an organization document that lists the name of the organization as it is listed on your D-U-N-S profile.
Documents with a different organization name, or only the name of a parent or child company, may result in a rejection.
Incorrectly entering the authorized representative's name on the verification form
All organizations are required to submit an ID document of an individual within the organization. This is known as the authorized representative.
Make sure you enter this person's name into the ID verification form, then upload an ID document belonging to that individual. The name you enter and the name of the ID document must match.